
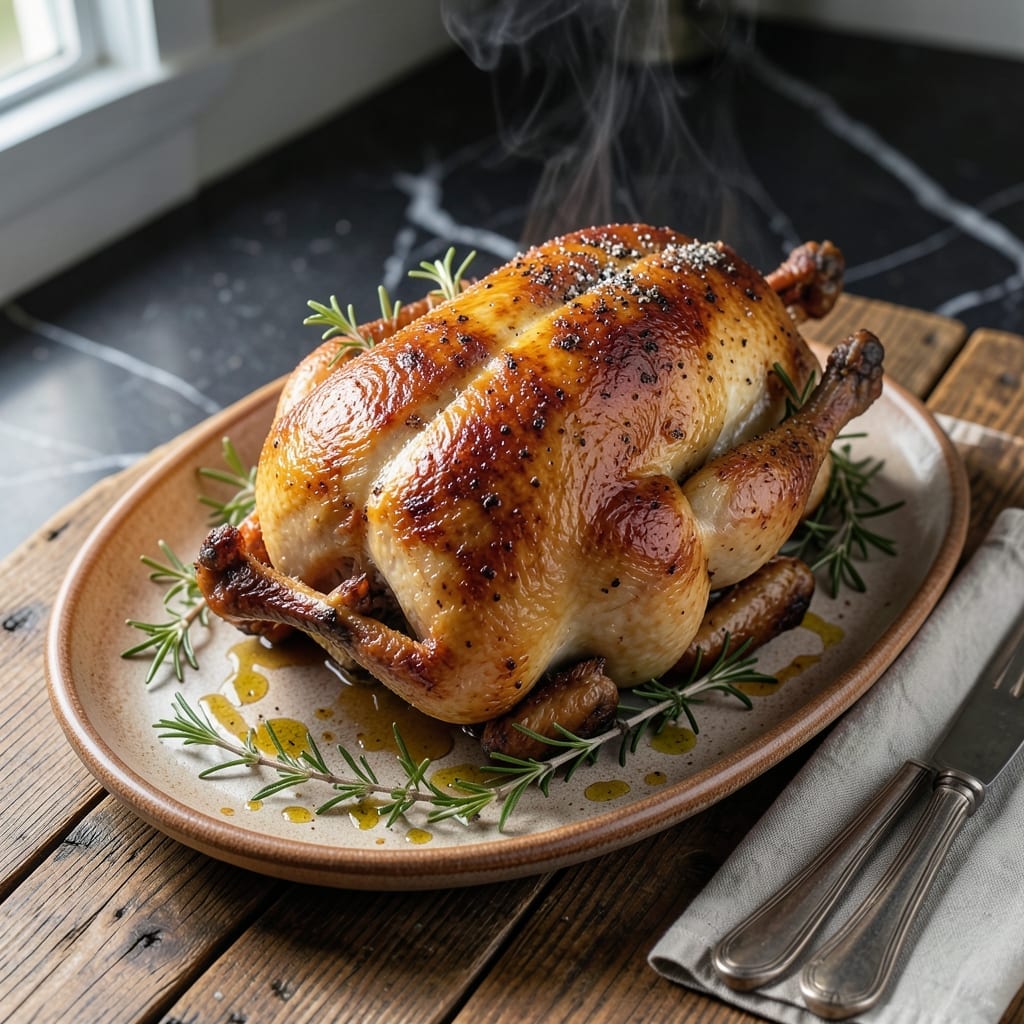
Thomas Keller’s approach to roasted chicken achieves what most home cooks only dream of—crispy, golden skin and succulent meat every time. This method relies on drying the skin thoroughly and roasting at high heat to create that signature texture.
The technique involves trussing the bird for even cooking and basting with butter for extra richness. Starting in a hot pan ensures the skin renders properly, while finishing in the oven guarantees uniform doneness without drying out the meat.
What emerges is chicken with shatteringly crispy skin that gives way to juicy, flavorful flesh. The aroma alone signals you’ve mastered a restaurant-quality dish at home.
Serve with pan juices for the full experience. Here’s how to perfect it.
Ingredients for Keller Roasted Chicken
Thomas Keller’s method requires just a handful of quality ingredients for perfect crispy-skin chicken every time.
| Ingredient | Amount | Notes |
|---|---|---|
| Whole Chicken 🍗 | 4 lb | Pat dry thoroughly inside and out |
| Unsalted Butter 🧈 | 8 tbsp | Room temperature, for basting |
| Kosher Salt 🧂 | 1 ½ tbsp | Diamond Crystal preferred |
| Freshly Ground Black Pepper 🌶️ | 1 tsp | Coarse grind for texture |
| Fresh Thyme Sprigs 🌿 | 4 sprigs | Plus extra for garnish |
| Fresh Rosemary Sprigs 🌿 | 2 sprigs | Optional but recommended |
| Garlic Cloves 🧄 | 4 cloves | Lightly smashed, unpeeled |
| Shallots 🧅 | 2 whole | Halved, for pan aromatics |
| Lemon 🍋 | 1 whole | Halved, for pan and basting |
| Olive Oil 🫒 | 2 tbsp | Neutral flavor, for searing |
| Kitchen Twine 🧵 | 1 piece | For trussing chicken |
| Dry White Wine 🍷 | ½ cup | For deglazing pan |
The chicken itself is paramount. Source a high-quality, air-chilled bird (around 4 lbs) from a reputable butcher or Whole Foods—this ensures even cooking and superior skin texture. Diamond Crystal kosher salt is non-negotiable for proper seasoning penetration. The butter should be European-style for its higher fat content, which lends that luxurious mouthfeel to the basting process.
No kitchen twine? Use unflavored dental floss in a pinch (yes, really). Short on fresh herbs? Dried thyme at one-third the amount works, though fresh delivers superior aroma. The white wine can be any dry variety—Sauvignon Blanc or Pinot Grigio are reliable choices. If abstaining from alcohol, substitute low-sodium chicken broth with a splash of apple cider vinegar for acidity.
The trussed chicken can rest uncovered in the fridge for up to 24 hours before cooking, which intensifies the skin-drying effect. Leftovers (if any exist) keep refrigerated for 3-4 days, though this dish is best enjoyed immediately. The pan juices make an exceptional base for a quick sauce.
Why You’ll Love This Recipe
- One Pan Wonder: I just rub butter, thyme, salt, and pepper on the chicken, pop it in the oven, and let it do its thing—hardly any cleanup.
- Crispy, Juicy Magic: That buttery skin gets so golden and crackly, while the meat stays absurdly tender with just those simple seasonings.
- Sunday or Wednesday: Honestly, it feels fancy enough for company but unfussy enough for a regular dinner with my family.
- Leftovers for Days: One roasted chicken means sandwiches, tacos, or soup for the rest of the week—my wallet loves it.
Step-by-Step Instructions for Keller Roasted Chicken
Master this technique for perfectly crispy skin and juicy meat every time you roast.
Step 1: Prep and Season the Chicken
Pat the 4 lb Whole Chicken thoroughly dry inside and out with paper towels. I emphasize this step because moisture is the enemy of crispy skin. Season the chicken generously with the 1.5 tbsp Kosher Salt and 1 tsp Freshly Ground Black Pepper, including inside the cavity.
Real talk: the skin won’t crisp properly if it’s not bone-dry. Let the seasoned chicken sit uncovered in the refrigerator for 1 hour or up to 24 hours. This drying process is non-negotiable for achieving that signature Keller crispiness.
Step 2: Truss and Aromatize the Pan
Remove the chicken from the fridge and let it come to room temperature for 30 minutes. Truss the legs together with the 1 piece Kitchen Twine, tucking the wings under the body. This creates a compact shape for even cooking and protects the breast meat.
Place the 2 whole Shallots (halved), 4 cloves Garlic Cloves (lightly smashed, unpeeled), 4 sprigs Fresh Thyme Sprigs, 2 sprigs Fresh Rosemary Sprigs, and 1 whole Lemon (halved) in a roasting pan. These aromatics will infuse the chicken with flavor as it roasts.
Step 3: Start Roasting with High Heat
Preheat your oven to 450°F. Place the trussed chicken breast-side up on top of the aromatics in the pan. Brush the skin with 2 tbsp Olive Oil to help it crisp. Roast for 30 minutes until the skin begins to turn golden brown.
This high-heat start is crucial—it jumpstarts the Maillard reaction, creating that deep golden color and complex flavor. Don’t be tempted to baste yet; we want the skin to dry out completely first.
Step 4: Baste and Finish Roasting
After the initial 30 minutes, reduce the oven temperature to 375°F. Now begin basting: every 10-15 minutes, spoon the 8 tbsp Unsalted Butter (melted) over the chicken, particularly focusing on the breast and thighs. The butter helps conduct heat evenly while adding rich flavor.
Continue roasting, basting occasionally, until the thickest part of the thigh reaches an internal temperature of 165°F on an instant-read thermometer. This typically takes another 40-50 minutes, depending on your oven.
The skin should be a deep mahogany color and the juices should run clear when you pierce the thigh. The basting ensures the skin stays crisp while the meat remains succulent.
Step 5: Rest and Deglaze for Serving
Transfer the chicken to a cutting board and let it rest for 15 minutes. This allows the juices to redistribute, ensuring moist meat. Meanwhile, place the roasting pan on the stovetop over medium heat.
Add the 0.5 cup Dry White Wine to the pan and scrape up all the browned bits with a wooden spoon. Simmer for 2-3 minutes until slightly reduced. Strain the pan sauce and serve it alongside the carved chicken for a finishing touch that captures every bit of flavor.
Pro Tips For Making Keller Roasted Chicken
- Dry the Skin: Pat the chicken thoroughly dry with paper towels before seasoning—this guarantees that crispy, golden skin Keller’s recipe is known for. I learned this the hard way after pulling out a pale, soggy bird my first attempt.
- Room Temp Start: Let the chicken sit out for 30-45 minutes before roasting. I was skeptical until I tried it, but it cooks more evenly and the butter under the skin spreads like a dream.
- Butter Under Skin: Work your fingers gently between the skin and meat to spread the butter evenly—don’t just slap it on top. Sounds weird, but it works: the meat stays juicy while the skin crisps up perfectly.
- Rest Before Carving: Give it a solid 15 minutes to rest after pulling it from the oven. My grandmother swore by this, and she was right: the juices redistribute and every bite is moist, not dry.
Health Benefits of This Recipe
Lean Protein Power
This dish packs 40g of protein per serving from the 4 lb Whole Chicken, supporting muscle repair and growth. Protein is essential for maintaining healthy skin, hair, and nails too. I love that it’s naturally lean without sacrificing flavor. 💪
Rich in B Vitamins
The chicken provides a full spectrum of B vitamins, including B6 and B12, which are vital for energy metabolism and brain function. A single serving covers about 30% of your daily B12 needs, keeping your nervous system running smoothly.
Iron Boost
You’ll get a healthy dose of heme iron from this recipe, which is more easily absorbed by your body than plant-based iron. This is especially important for maintaining energy levels and preventing anemia. Pair it with vitamin C from the Lemon to enhance absorption.
Healthy Fats
The 8 tbsp Unsalted Butter adds richness and helps your body absorb fat-soluble vitamins like A, D, E, and K. While moderation is key, these fats contribute to satiety and flavor. Plus, the Olive Oil adds heart-healthy monounsaturated fats.
These fats also support cell growth and hormone production. 💛
Low-Carb Friendly
With no added sugars or starchy ingredients, this dish fits perfectly into low-carb or keto lifestyles. The Kosher Salt and herbs add flavor without the carbs. It’s a satisfying meal that won’t spike your blood sugar.
Nutrition Facts
Frequently Asked Questions
Why is drying the chicken skin so important?
Drying removes moisture, the enemy of crispiness. Keller’s method requires patting it thoroughly dry, then resting uncovered in the fridge for 1-24 hours to ensure maximum skin dryness before roasting.
Can I skip trussing the chicken?
No—trussing keeps the bird compact for even cooking and protects the breast meat. If you don’t have twine, use unflavored dental floss in a pinch. It’s a small step with big results.
What if my chicken isn’t browning properly?
Increase oven temp to 450°F for the first 30 minutes. If needed, broil for 2-3 minutes at the end, watching closely to avoid burning. The high heat kickstarts the Maillard reaction.
How do I know when it’s done?
Use a thermometer: 165°F in the thickest part of the thigh. Juices should run clear, and the skin should be deep mahogany. Rest for 15 minutes before carving.

- Jollof Rice Sauce Recipe: West African Tomato and Spice Infusion - September 25, 2026
- Japanese Rice Soup Recipe: Umami-Rich Comfort in a Bowl - September 25, 2026
- Homemade Cream Of Rice Recipe: Silk-Smooth Breakfast in Minutes - September 25, 2026