
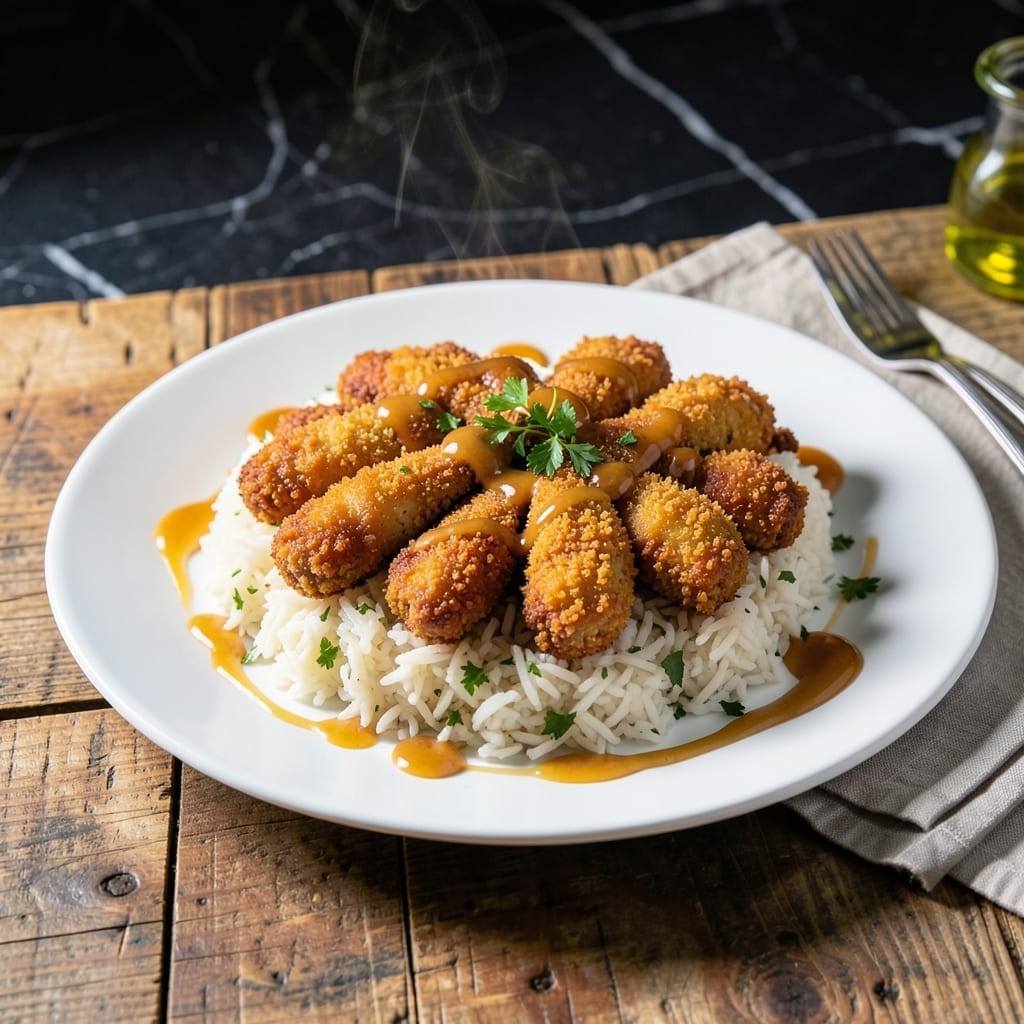
This recipe delivers crispy chicken tenders with golden, shatteringly thin crusts layered over perfectly tender fluffy rice. The contrast between textures makes every bite satisfying.
I developed this method after years of testing to ensure the chicken stays juicy inside while the coating stays crispy outside. The rice absorbs just enough flavor from the chicken to complement without overpowering.
Ingredients for Chicken Tenders and Rice
Crispy chicken and fluffy rice start with these carefully selected ingredients for perfect texture contrast.
| Ingredient | Amount | Notes |
|---|---|---|
| Chicken Tenderloins 🍗 | 1 ½ lb | Boneless, skinless, uniform size |
| All-Purpose Flour 🌾 | 1 cup | For initial dredging |
| Large Eggs 🥚 | 2 whole | Beaten for egg wash |
| Panko Breadcrumbs 🍞 | 2 cups | For extra crispy coating |
| Cornstarch 🌾 | ¼ cup | Mixed with flour for crunch |
| Garlic Powder 🧄 | 1 tsp | For seasoning the coating |
| Onion Powder 🧅 | 1 tsp | Adds depth to breading |
| Paprika 🌶️ | 1 tsp | Sweet or smoked variety |
| Salt 🧂 | 1 tsp | Diamond Crystal kosher preferred |
| Black Pepper 🌶️ | ½ tsp | Freshly ground for best flavor |
| Long-Grain White Rice 🍚 | 1 ½ cups | Uncooked, for fluffy texture |
| Chicken Broth 💧 | 3 cups | Low-sodium for controlled seasoning |
| Unsalted Butter 🧈 | 2 tbsp | For cooking rice |
| Neutral Cooking Oil 🫒 | ½ cup | For frying tenders |
The chicken tenderloins are non-negotiable for tenderness—avoid pre-cut strips as they often contain tougher meat. Whole Foods or Costco sell fresh tenderloins that yield uniform pieces. For the breading, Kikkoman Panko delivers superior crispiness compared to standard breadcrumbs. The rice should be long-grain white; jasmine or basmati work excellently for that fluffy, separate-grain texture.
No panko? Crush cornflakes or saltine crackers for a similar crunch. Out of chicken broth? Water with bouillon cubes works in a pinch. For a gluten-free version, swap all-purpose flour for rice flour and use gluten-free panko. The cornstarch is key for that shatteringly thin crust, so don’t skip it (or substitute arrowroot powder at a 1:1 ratio).
Cooked chicken keeps in the fridge for 3-4 days if stored properly in an airtight container. The rice actually improves overnight as it absorbs residual flavors. For best results, reheat chicken in the oven at 375°F for 10 minutes to maintain crispiness. Freezing breaded raw tenders works well for up to 3 months.
Why You’ll Love This Recipe
- Ready in 20: I can get crispy tenders and fluffy rice on the table faster than takeout arrives.
- That Crispy Crunch: Panko and cornstarch create a coating so satisfying, I catch myself sneaking bites before plating.
- Feeds Everyone: Honestly, it’s my go-to for picky eaters and hearty appetites alike.
- Budget Stretcher: Chicken tenderloins and pantry staples keep this meal light on the wallet but heavy on flavor.
Step-by-Step Instructions for Chicken Tenders and Rice
Master the technique for perfectly crispy tenders served over fluffy, aromatic rice with these proven steps.
Step 1: Prepare the Breading Station
In a shallow dish, combine the 1 cup all-purpose flour, 0.25 cup cornstarch, 1 tsp garlic powder, 1 tsp onion powder, 1 tsp paprika, 1 tsp salt, and 0.5 tsp black pepper. The cornstarch is essential for creating that extra-crispy texture you’re after.
In a second shallow dish, beat the 2 whole large eggs until well combined. In a third dish, place the 2 cups panko breadcrumbs. This three-step breading process ensures maximum crunch and flavor adhesion to the chicken tenderloins.
Step 2: Coat and Rest the Chicken Tenderloins
Pat the 1.5 lb chicken tenderloins completely dry with paper towels—this is critical for the coating to adhere properly. Dredge each piece first in the flour mixture, shaking off any excess, then dip in the beaten eggs, allowing any excess to drip off.
Finally, press each tender firmly into the panko breadcrumbs, turning to coat all sides completely. Place the breaded tenders on a wire rack set over a baking sheet. Let them rest for 10 minutes—this helps the coating set and prevents it from falling off during frying.
Step 3: Fry the Tenders to Golden Perfection
Heat the 0.5 cup neutral cooking oil in a large skillet over medium-high heat until it reaches 350-375°F. To test the temperature, drop in a pinch of panko—if it sizzles immediately and floats to the surface, it’s ready.
Working in batches to avoid crowding, carefully place the breaded chicken tenderloins in the hot oil. Fry for 3-4 minutes per side until golden brown and the internal temperature reaches 165°F. Transfer to a paper towel-lined plate to drain excess oil while you cook the remaining batches.
Step 4: Cook the Rice to Fluffy Perfection
In a medium saucepan with a tight-fitting lid, melt the 2 tbsp unsalted butter over medium heat. Add the 1.5 cups long-grain white rice and stir for 1-2 minutes until the grains are well coated and slightly translucent at the edges.
Pour in the 3 cups chicken broth and bring to a boil. Once boiling, reduce heat to low, cover, and simmer for 15-18 minutes until the liquid is fully absorbed and the rice is tender. Remove from heat and let it sit covered for an additional 5 minutes to steam and fluff up perfectly.
Step 5: Serve and Enjoy the Perfect Pairing
Fluff the cooked rice with a fork to separate the grains. Divide the fluffy rice among serving plates and top with the crispy chicken tenderloins. The contrast of textures—crunchy exterior giving way to tender chicken over soft, buttery rice—is what makes this dish exceptional.
Serve immediately while the tenders are still hot and the rice is at its fluffiest. Any leftovers should be stored separately, with the tenders reheated in the oven to maintain their crispness while the rice can be gently warmed with a splash of water to restore moisture.
Pro Tips For Making Chicken Tenders And Rice
- Dry the Chicken: Pat the tenderloins thoroughly dry with paper towels before dredging—I learned this the hard way after my first few batches turned out soggy instead of crispy.
- Double Dredge: After the egg wash, roll the tenders in panko, then back in the egg, then panko again for a thicker, crunchier crust that actually stays put.
- Skip the Overcrowding: Fry in batches with at least an inch between pieces, or the temperature drops and you’ll end up with greasy, steamed tenders instead of golden ones.
- Add Cornstarch Early: Mix 1 tablespoon of cornstarch into the flour for the initial dredge—it makes the coating stick better and gives it that extra crunch without extra effort.
Best Sauces and Condiments for This Dish
Classic Dipping Sauces
You can’t go wrong with honey mustard—mix ¼ cup yellow mustard with ¼ cup honey and 1 tbsp mayonnaise for that perfect sweet-tangy balance. I also love ranch dressing, especially when I whisk in 1 tsp dried dill for extra brightness. 💛
Spicy Kick Options
For heat lovers, Sriracha mayo is a must—blend ½ cup mayo with 2 tbsp Sriracha and a squeeze of lime. Buffalo sauce works wonders too: melt ¼ cup hot sauce with 2 tbsp butter for tossing or dipping.
Asian-Inspired Flavors
Sweet chili sauce adds a sticky, slightly spicy note that pairs beautifully with the crispy coating. I also keep Mae Ploy brand on hand. For a richer option, whisk 3 tbsp soy sauce with 1 tbsp sesame oil and 1 tsp grated ginger. ✨
Fresh and Light
A simple lemon-dill yogurt sauce keeps things fresh—combine ¾ cup Greek yogurt with 1 tbsp lemon juice, 1 tsp lemon zest, and 1 tbsp chopped dill. The acidity cuts through the richness of the fried chicken wonderfully.
Nutrition Facts
Frequently Asked Questions
Can I bake the tenders instead of frying?
Yes! Arrange breaded tenders on a wire rack over a baking sheet. Bake at 400°F for 18-20 minutes, flipping halfway through. For extra crispiness, spray or brush with oil before baking.
What type of rice works best?
Long-grain white rice like jasmine or basmati gives the fluffiest results. Avoid instant rice as it can turn mushy. For brown rice, increase liquid to 2.25 cups and simmer for 40-45 minutes.
Why did my breading fall off?
This usually happens if the chicken wasn’t dried properly or didn’t rest after breading. Pat tenders completely dry and let them rest for 10 minutes before frying to help the coating adhere.
Can I make this gluten-free?
Use gluten-free panko and swap all-purpose flour for rice flour. Cornstarch is naturally gluten-free. Check that all seasonings are certified gluten-free as well.

- Jollof Rice Sauce Recipe: West African Tomato and Spice Infusion - September 25, 2026
- Japanese Rice Soup Recipe: Umami-Rich Comfort in a Bowl - September 25, 2026
- Homemade Cream Of Rice Recipe: Silk-Smooth Breakfast in Minutes - September 25, 2026