
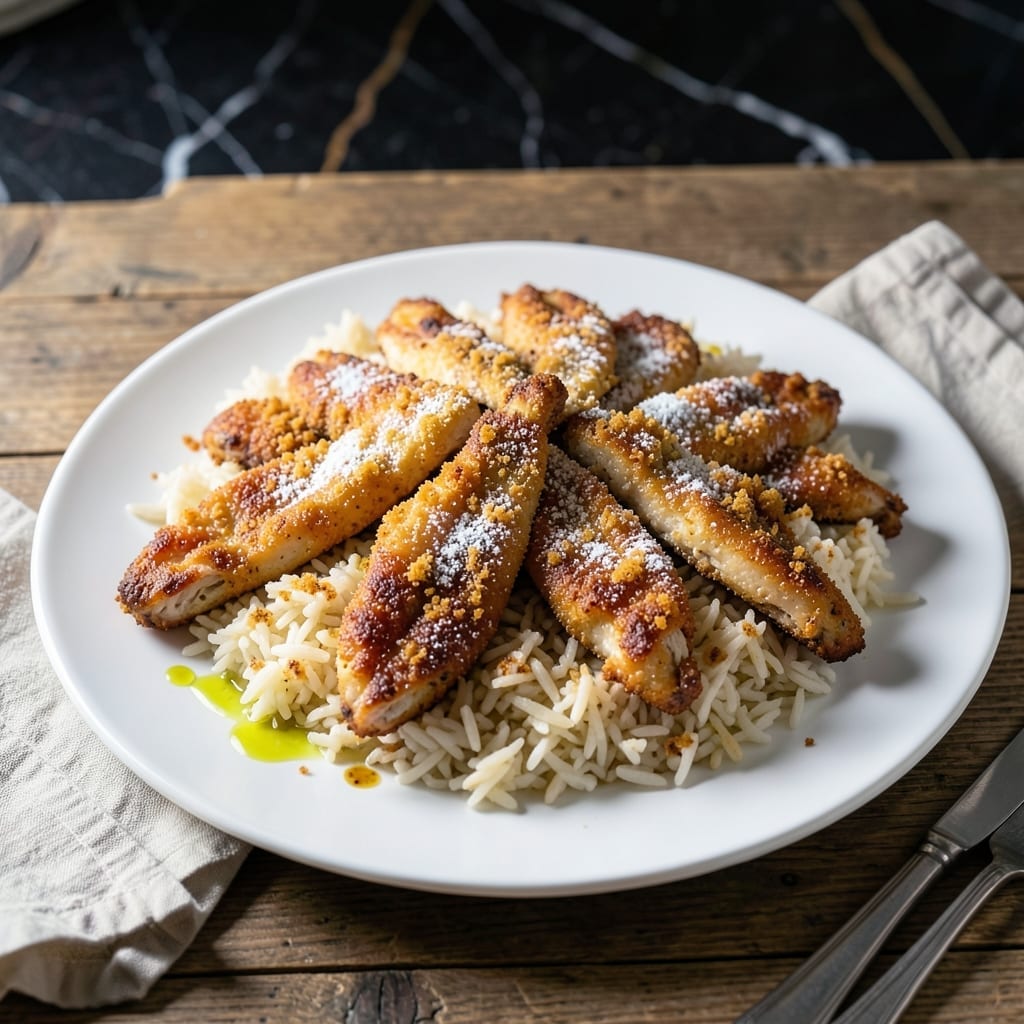
This dish brings together two classics in perfect harmony: crispy chicken and fluffy rice. I developed this method after years of testing to ensure the strips stay golden outside while remaining tender inside.
The secret lies in the double-coating technique for the chicken, which creates an extra-shatter crust. Meanwhile, the rice cooks to perfect fluffiness with a simple ratio that never fails.
What results is a meal that satisfies on every level—juicy chicken with a satisfying crunch, nestled over grains that soak up every bit of flavor. It’s comfort food that feels special enough for company.
Ready in 30 minutes, this recipe delivers restaurant-quality results with minimal effort. Here’s how to make it right every time.
Ingredients for Chicken Strips and Rice
Crispy chicken strips meet perfectly fluffed rice with pantry staples and a few key techniques.
| Ingredient | Amount | Notes |
|---|---|---|
| Boneless, Skinless Chicken Breasts 🍗 | 1 ½ lb | Cut into 1-inch strips |
| All-Purpose Flour 🌾 | 1 cup | For initial coating |
| Large Eggs 🥚 | 2 whole | Beaten for egg wash |
| Panko Breadcrumbs 🍞 | 1 ½ cups | For crispy crust |
| Cornstarch 🌾 | 2 tbsp | For extra crunch |
| Long-Grain White Rice 🍚 | 1 ½ cups | Rinsed before cooking |
| Chicken Broth 🥫 | 2 ½ cups | Low-sodium preferred |
| Vegetable Oil 🫒 | 1 cup | For frying chicken |
| Garlic Powder 🧄 | 1 tsp | For seasoning flour |
| Onion Powder 🧅 | 1 tsp | For seasoning flour |
| Paprika 🌶️ | 1 tsp | Sweet or smoked variety |
| Salt 🧂 | 1 tsp | Divided for chicken and rice |
| Black Pepper 🌶️ | ½ tsp | Freshly ground preferred |
| Butter 🧈 | 1 tbsp | For finishing rice |
The double-coating is non-negotiable here. Panko breadcrumbs create that signature shatter—regular breadcrumbs just won’t deliver. For the chicken, boneless, skinless breasts stay tender when cut into uniform strips. Costco carries high-quality panko in bulk, or Progresso at most supermarkets works perfectly. Cornstarch in the flour mix is the secret to that restaurant-level crunch.
No panko? Crushed cornflakes or Ritz crackers work in a pinch (use one-to-one ratio). Chicken thighs can substitute for breasts—just trim any excess fat. For the rice, jasmine or basmati offer a fragrant alternative to long-grain white. The broth can be vegetable or beef if you prefer, though chicken broth enhances the dish’s natural flavors best.
Cooked chicken keeps well in the fridge for 3-4 days, though it’s best served fresh for that optimal crunch. The rice actually improves overnight—reheat with a splash of water to restore fluffiness. Leftovers store together or separately for up to 4 days.
Why You’ll Love This Recipe
- Foolproof Breading: I use the flour-egg-panko combo with cornstarch for that perfect crunch every single time. No soggy strips here.
- Weeknight Hero: Honestly, between the 20-minute active prep and one-pan cooking, I can get this on the table faster than takeout arrives.
- Kid-Approved Comfort: My picky nephew devours these strips with rice, and I love that they work just as well for lunchboxes the next day.
- Budget Stretcher: A pound of chicken breasts plus pantry staples feeds my family of four with leftovers—no fancy ingredients required.
Step-by-Step Instructions for Chicken Strips and Rice
Master the technique for achieving perfectly crispy chicken tenders paired with fluffy, aromatic rice every time.
Step 1: Prepare and Season the Chicken Strips
Begin by cutting the 1.5 lb boneless, skinless chicken breasts into 1-inch strips. Pat them completely dry with paper towels—this ensures the coating adheres properly and creates maximum crispiness.
In a shallow dish, combine the 1 cup all-purpose flour, 1 tsp garlic powder, 1 tsp onion powder, 1 tsp paprika, 1 tsp salt, and 0.5 tsp black pepper. Whisk until evenly distributed, then dredge each chicken strip in the mixture, pressing gently to coat all sides.
Step 2: Create the Crispy Breading Station
In a second shallow dish, beat the 2 whole large eggs until uniform and slightly frothy. In a third dish, mix the 1.5 cups panko breadcrumbs with the 2 tbsp cornstarch—this combination guarantees an ultra-crispy exterior.
Dip each floured chicken strip into the egg wash, allowing excess to drip off, then press into the panko mixture. Coat thoroughly, applying pressure to ensure the crumbs adhere. Place breaded strips on a wire rack to rest for 5 minutes while you heat the oil.
Step 3: Fry the Chicken to Golden Perfection
Heat the 1 cup vegetable oil in a deep skillet over medium-high heat until it reaches 350°F. To test readiness, drop in a pinch of panko—it should sizzle immediately and float to the surface within 3-5 seconds.
Carefully place the breaded chicken strips in the hot oil, working in batches to avoid overcrowding. Fry for 3-4 minutes per side until deep golden brown and the internal temperature reaches 165°F. Transfer to a paper towel-lined plate to drain excess oil.
Step 4: Cook the Rice to Fluffy Perfection
Meanwhile, rinse the 1.5 cups long-grain white rice under cold water until the water runs clear. In a medium saucepan, combine the rinsed rice, 2.5 cups chicken broth, and remaining salt to taste. Bring to a boil, then reduce heat to low, cover, and simmer for 15-18 minutes.
Remove from heat and let it steam, covered, for 5 minutes. Fluff with a fork, then stir in the 1 tbsp butter until melted and fully incorporated. The rice should be tender with individual grains that separate easily.
Step 5: Serve Immediately for Optimal Texture
Arrange the crispy chicken strips over a bed of fluffy rice. The contrast of textures—crunchy exterior giving way to tender chicken, paired with light, separate rice grains—creates the ideal bite. Serve immediately while the chicken is still hot and the rice is steamy.
For best results, avoid covering the dish, as trapped steam will soften the chicken’s crispy coating. The tenders should maintain their crunch for 5-10 minutes after frying if kept uncovered.
Pro Tips For Making Chicken Strips And Rice
- Pound the Chicken: I learned this the hard way—pounding the chicken breasts to an even ½-inch thickness guarantees they cook through without drying out.
- Double Dredge: Dip the chicken in flour, then egg, then panko, but repeat the egg and panko step for a crust that actually stays put and gets extra crispy.
- Skip the Cold Oil: After burning three batches, I finally figured out that the oil needs to be hot but not smoking—350°F is the sweet spot—before adding the strips.
- Rest Before Serving: Give the strips 5 minutes on a wire rack after frying—this keeps them crispy instead of soggy when they hit the rice.
Common Mistakes When Making This Recipe
Skipping the Drying Step
Never skip patting the chicken strips completely dry with paper towels after cutting. Even a little moisture prevents the flour and panko from adhering properly, resulting in a sad, patchy crust. I learned this the hard way in my early cooking days. 💪
Overcrowding the Pan
Frying too many strips at once lowers the oil temperature, causing the chicken to absorb oil instead of crisping. Work in batches with at least 1 inch between pieces. Use a deep skillet and maintain 350°F oil temperature.
Rushing the Breading
Let the breaded strips rest for 5 minutes before frying. This allows the coating to set, preventing it from sliding off during cooking. Press the panko firmly onto each strip to ensure full coverage.
Underseasoning the Flour
Peeking at the Rice
Every time you lift the lid while cooking rice, steam escapes and the temperature drops. Keep it covered for the full 15-18 minutes of simmering and 5 minutes of resting. Trust the process. ✨
Serving Too Late
The chicken strips lose their crispiness quickly. Serve immediately after frying for the best texture. If you must wait, keep them uncovered on a wire rack in a 200°F oven for up to 10 minutes.
Nutrition Facts
Frequently Asked Questions
Can I bake the chicken instead of frying?
Yes! Bake at 400°F for 15-20 minutes, flipping halfway. Use a wire rack on a baking sheet for crispiness. Spray strips lightly with oil before baking for best results.
What’s the best way to keep the strips crispy?
Serve immediately after cooking. If needed, keep warm on a wire rack in a 200°F oven for up to 10 minutes. Never cover, as steam will soften the coating.
Can I use a different type of rice?
Try jasmine or basmati for a fragrant twist. Adjust liquid to 1:1.5 rice-to-broth ratio and cook time to 12-15 minutes for these varieties.
How do I know when the chicken is done?
Use a meat thermometer to check for 165°F internally. The strips should be golden brown with no pink inside. Overcooking dries them out, so test early.

- Jollof Rice Sauce Recipe: West African Tomato and Spice Infusion - September 25, 2026
- Japanese Rice Soup Recipe: Umami-Rich Comfort in a Bowl - September 25, 2026
- Homemade Cream Of Rice Recipe: Silk-Smooth Breakfast in Minutes - September 25, 2026