
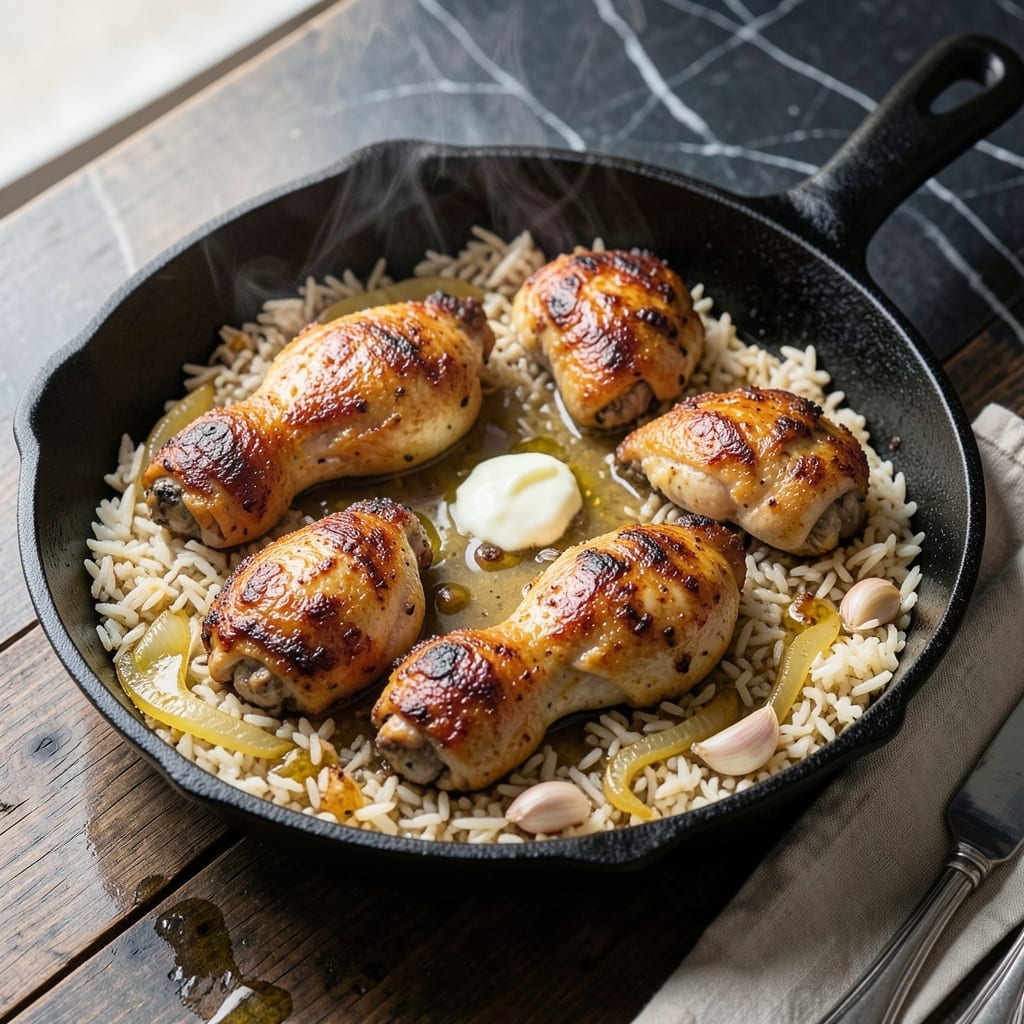
This one-pan method delivers tender chicken and perfectly cooked rice with minimal effort. The technique ensures every grain absorbs rich flavor while the chicken develops a golden crust.
By searing the thighs first, then simmering with rice in the same pan, you create a cohesive dish with maximum taste and minimal cleanup. The result is consistently tender meat and fluffy grains.
Ingredients for Chicken Thigh Rice One Pan
Bone-in thighs, long-grain rice, and a handful of aromatics create this effortless one-pan wonder.
| Ingredient | Amount | Notes |
|---|---|---|
| Bone-In Chicken Thighs 🍗 | 6 whole | Skin-on for golden crust |
| Long-Grain White Rice 🍚 | 1 ½ cups | Rinsed until water runs clear |
| Chicken Broth 🥣 | 2 ½ cups | Low-sodium preferred for control |
| Yellow Onion 🧅 | 1 whole | Medium, finely diced |
| Garlic Cloves 🧄 | 4 cloves | Minced for even distribution |
| Unsalted Butter 🧈 | 2 tbsp | Divided for searing and finishing |
| Extra-Virgin Olive Oil 🫒 | 1 tbsp | For initial searing boost |
| Dried Thyme 🌿 | 1 tsp | Rubbed between fingers to release oils |
| Smoked Paprika 🌶️ | 1 tsp | For depth and color |
| Bay Leaf 🍃 | 1 whole | Removed before serving |
| Kosher Salt 🧂 | 1 ½ tsp | Diamond Crystal preferred for even seasoning |
| Freshly Ground Black Pepper 🌶️ | ½ tsp | Coarse grind for texture |
| Fresh Parsley 🌿 | ¼ cup | Chopped, for garnish |
The chicken thighs are non-negotiable for this method—bone-in, skin-on ensures that golden crust and tender meat. Source them from Whole Foods or a trusted butcher for consistent sizing (about 6-8 oz each). The rice must be long-grain white; jasmine or basmati work beautifully. Rinsing is critical to remove excess starch and prevent gummy grains.
Substitute boneless thighs if you must, but reduce cooking time by 5 minutes. Brown rice can be used, though it requires 45 minutes and more liquid. No fresh aromatics? 1 tsp onion powder and 1/2 tsp garlic powder work in a pinch. For extra richness, swap the butter for duck fat—it delivers an incredible depth of flavor.
Leftovers reheat well and actually improve overnight. Store in an airtight container for up to 4 days in the fridge or freeze for 3 months. The rice will firm up when cold—add a splash of broth when reheating to restore moisture.
Why You’ll Love This Recipe
- One Pan Wonder: I toss everything in, cover it, and let the oven do the work—no extra pots, no fuss.
- Rich Garlic Depth: The onion and garlic caramelize right under the chicken, soaking into the rice with every bite.
- Meal Prep Hero: I make a big batch Sunday and we’re set for lunches all week. (Yes, even on a Tuesday night)
- Budget Stretcher: Bone-in thighs stay juicy and cost half what breasts do, and a little goes a long way here.
Step-by-Step Instructions for Chicken Thigh and Rice One Pan
Master the technique for crispy-skinned thighs over perfectly tender rice with this streamlined approach.
Step 1: Sear the Chicken Thighs to Golden Perfection
Heat a large oven-safe skillet or Dutch oven over medium-high heat. Add the 1 tbsp Extra-Virgin Olive Oil and 1 tbsp Unsalted Butter, swirling to coat the pan. Season the 6 whole Bone-In Chicken Thighs generously with 1.5 tsp Kosher Salt, 0.5 tsp Freshly Ground Black Pepper, 1 tsp Smoked Paprika, and 1 tsp Dried Thyme.
Place the chicken skin-side down in the hot pan. Sear undisturbed for 6-8 minutes until the skin is deep golden brown and crisp. Flip and sear the other side for 3-4 minutes until lightly browned. Remove the chicken to a plate, leaving the rendered fat in the pan.
Step 2: Sauté Aromatics and Toast the Rice
Reduce heat to medium and add the finely diced 1 whole Yellow Onion to the pan. Cook for 3-4 minutes, stirring occasionally, until softened and translucent. Add the minced 4 cloves Garlic Cloves and cook for 30 seconds until fragrant.
Stir in the 1.5 cups Long-Grain White Rice, coating it in the fat and aromatics. Toast the rice for 1-2 minutes until the edges appear slightly translucent. This enhances the nutty flavor and prevents a gummy texture.
Step 3: Deglaze and Add Broth
Pour in the 2.5 cups Chicken Broth, scraping up any browned bits from the bottom of the pan. Add the 1 whole Bay Leaf and stir to combine. The liquid should bubble gently at the edges—this is the perfect simmer for even cooking.
Return the chicken to the pan, nestling the thighs skin-side up into the rice and broth. The liquid should just cover the rice. If it seems low, add a splash of water, but avoid overfilling the pan.
Step 4: Simmer and Finish
Cover the pan and reduce heat to low. Simmer for 25-30 minutes until the rice is tender and the liquid is mostly absorbed. Resist the urge to stir—this disrupts the crispy skin and can make the rice sticky.
Remove from heat and let it sit covered for 5 minutes. This final rest allows the rice to steam and the chicken to reabsorb some of the flavors. Discard the bay leaf before serving.
Step 5: Garnish and Serve
Fluff the rice gently with a fork, taking care not to disturb the crispy chicken skin. Dot the remaining 1 tbsp Unsalted Butter over the top for a glossy finish. Sprinkle with the 0.25 cup Fresh Parsley for a pop of color and freshness.
Serve the chicken thighs atop the rice, ensuring each portion has a crispy piece of skin. The rice should be tender with a slight bite, and the chicken should pull away from the bone easily.
Pro Tips For Making Chicken Thigh Rice One Pan
- Brown the Skin First: Render the chicken thighs skin-side down for 5-6 minutes in a hot pan until golden and crisp—this builds flavor for the rice and keeps the meat juicy. I learned this the hard way after pulling them too early and ending up with pale, soggy skin.
- Toast the Rice: After removing the chicken, sauté the rice in the same pan for 2-3 minutes until it turns slightly translucent. Sounds weird, but it works: this step guarantees every grain absorbs maximum flavor from the fond.
- Skip the Rinse: Resist the urge to rinse the rice—you’ll wash away starch that actually changes the outcome by helping the grains bind and soak up the broth better. My grandmother swore by this, and she was right.
- Use Room-Temp Broth: Pour in warm or room-temperature chicken broth, not cold—it prevents the cooking process from stalling and ensures even absorption. After burning three batches, I finally figured out that cold liquid was the culprit.
Essential Equipment for chicken thigh rice one pan
Oven-Safe Skillet
An oven-safe skillet is non-negotiable for this recipe—I use my 12-inch Lodge cast iron for even heat distribution and that perfect sear. A heavy-bottomed stainless steel skillet works too, but avoid nonstick unless it’s rated for oven use up to 400°F. 🔥
Dutch Oven Alternative
If you prefer, a 5-6 quart Dutch oven like Le Creuset or Staub is ideal. The deep sides prevent splatter during searing, and the tight lid traps steam for fluffy rice. Just ensure it has a flat base for even browning.
Tongs for Flipping
Invest in a good pair of 12-inch locking tongs—I swear by OXO Good Grips. They give you precise control when flipping the thighs without piercing the skin. Avoid forks, which can release those precious juices we worked so hard to seal in.
Wooden Spoon
A wooden spoon is perfect for stirring the rice and scraping up browned bits. It won’t scratch your pan like metal utensils can. I keep one dedicated to my cast iron—it’s developed a beautiful patina over years of use.
Instant-Read Thermometer
While not strictly necessary, I always use my ThermoWorks Thermapen to check the chicken reaches 165°F internally. This takes the guesswork out of doneness, especially with bone-in pieces. The rice will be perfectly cooked by the time the chicken is done.
Fine-Mesh Strainer
For rinsing the rice, a fine-mesh strainer is essential to catch every grain. I rinse until the water runs completely clear—this removes excess starch and prevents gummy rice. It’s a small step that makes a big difference in texture.
Nutrition Facts
Frequently Asked Questions
Do I need to use bone-in thighs?
Bone-in is ideal for flavor and moisture, but boneless works too. Reduce cooking time by 5 minutes to prevent drying out. Skin-on is still recommended for that crispy texture.
Can I use brown rice instead?
Yes, but it requires 45 minutes of simmering and 1/2 cup extra broth. The texture will be chewier. Keep an eye on the liquid level to prevent burning.
How do I prevent burnt rice?
Ensure the heat is at low during simmering. Use a heavy pan (like cast iron) for even heat distribution. Avoid stirring once the chicken is added.
Can I add vegetables to the pan?
Add diced carrots or bell peppers when sautéing the onions. For heartier veggies like potatoes, par-cook them first to ensure they finish at the same time.

- Jollof Rice Sauce Recipe: West African Tomato and Spice Infusion - September 25, 2026
- Japanese Rice Soup Recipe: Umami-Rich Comfort in a Bowl - September 25, 2026
- Homemade Cream Of Rice Recipe: Silk-Smooth Breakfast in Minutes - September 25, 2026