
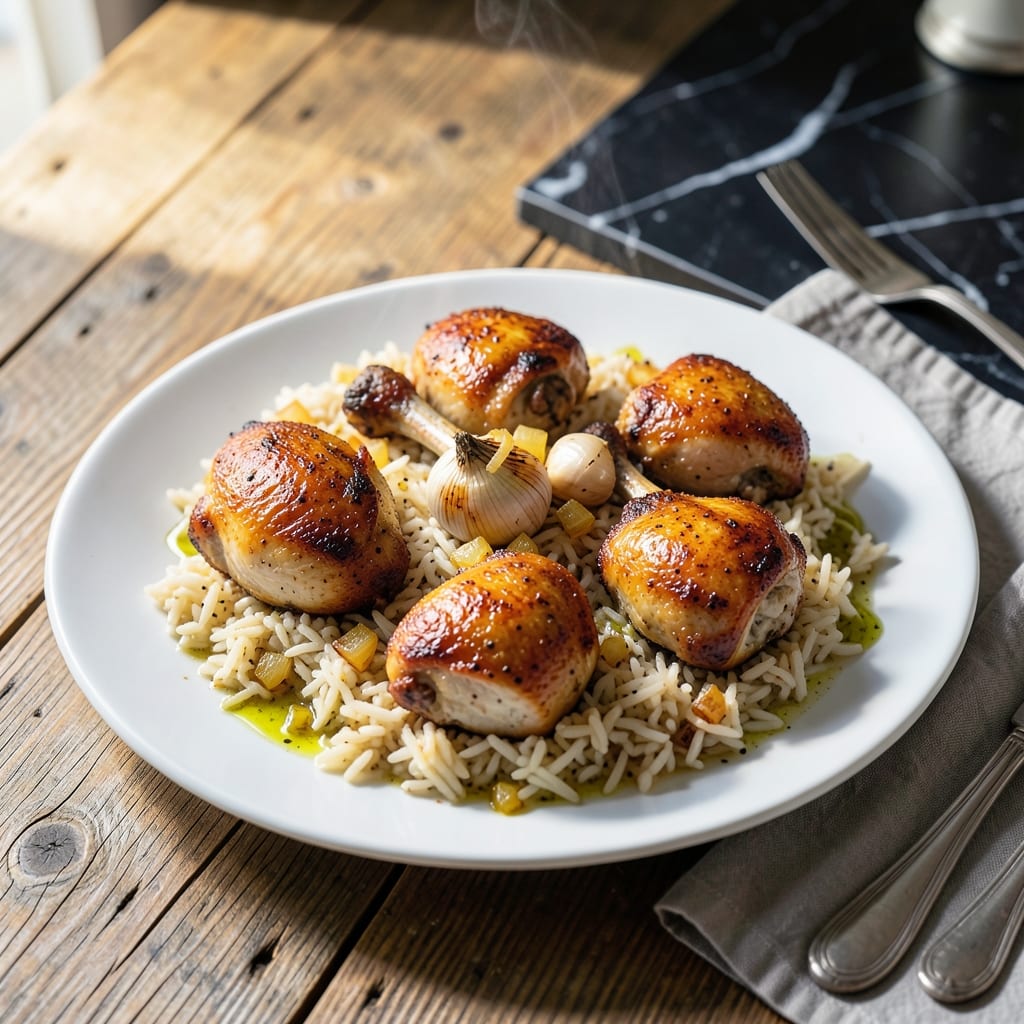
This one-pan method delivers crispy chicken skin and perfectly fluffy rice with minimal effort. I developed this technique during my time at The Smoky Pig, where efficiency matters as much as flavor.
The key is high heat to render the fat and create that signature crispy texture, while the rice absorbs all the flavorful juices below. It’s a restaurant-quality dish that comes together in one pan.
You’ll get golden, shatteringly crispy chicken thighs nestled into beds of tender, aromatic rice. The skin stays intact, and every grain soaks up the savory pan drippings.
Serve straight from the pan for a meal that looks and tastes impressive with almost no cleanup. This is comfort food at its best.
Ingredients for Chicken Thighs and Rice Oven
Short list. Big flavor. Everything you need for golden, crispy perfection in one pan.
| Ingredient | Amount | Notes |
|---|---|---|
| Bone-In Chicken Thighs 🍗 | 6 whole | Skin-on for crispiness |
| Long-Grain White Rice 🍚 | 1 ½ cups | Uncooked, rinsed well |
| Chicken Broth 🥣 | 2 ½ cups | Low-sodium preferred |
| Yellow Onion 🧅 | 1 whole | Medium, finely diced |
| Garlic Cloves 🧄 | 4 cloves | Minced for maximum flavor |
| Olive Oil 🫒 | 2 tbsp | Extra-virgin for richness |
| Dried Thyme 🍃 | 1 tsp | Or substitute dried rosemary |
| Dried Oregano 🌿 | 1 tsp | Mediterranean variety preferred |
| Paprika 🌶️ | 1 tsp | Smoked or sweet variety |
| Salt 🧂 | 1 ½ tsp | Kosher or sea salt |
| Black Pepper 🌶️ | ½ tsp | Freshly ground preferred |
| Bay Leaf 🍃 | 1 whole | Optional for depth |
| Butter 🧈 | 1 tbsp | For finishing the rice |
| Fresh Parsley 🌿 | ¼ cup | Chopped, for garnish |
The chicken thighs are the star—bone-in, skin-on is non-negotiable for that shatteringly crispy skin. I grab mine from Costco for bulk savings, but any grocery store will do. Look for thighs with smooth, unbroken skin (it crisps better). The rice should be long-grain white—jasmine or basmati work great. Rinse it well to remove excess starch (trust me on this).
No bone-in thighs? Boneless thighs work but won’t crisp the same. Swap white rice for brown (add 10 minutes cook time, use 3 cups broth). Fresh herbs? Use 1 tbsp fresh thyme instead of dried. Out of paprika? Cumin adds a nice earthy note. The broth can be vegetable if that’s what you’ve got. No butter? Olive oil finishes the rice just fine.
Leftovers keep 4-5 days in the fridge (the skin softens but still tastes great). Reheats best in a skillet to recrisp the chicken. Freezes beautifully for 3 months—portion before freezing for easy meals. I always double the recipe for lunches all week (worth the extra pan).
Why You’ll Love This Recipe
- One Pan Magic: I toss everything on a sheet pan—chicken thighs, rice, broth, onions—and let the oven do the work. No stirring, no fuss.
- Garlic-Kissed Comfort: The garlic and onions caramelize right under the chicken, soaking into the rice with this rich, savory depth. Honestly, it’s the kind of flavor that lingers.
- Feeds the Week: I make a big batch on Sunday and we’re set for lunches—reheats beautifully, and the rice soaks up even more flavor overnight.
- Budget Hero: Bone-in thighs are cheap, rice is a pantry staple, and it stretches to feed four without breaking the bank. Here’s what sold me—it’s filling and flavorful.
Step-by-Step Instructions for Chicken Thighs and Rice
Here’s the method. Straightforward, tested, works every time.
Step 1: Season and Sear the Chicken Thighs
Pat the 6 whole Bone-In Chicken Thighs dry with paper towels—this ensures crispy skin. Season both sides generously with 1 tsp Paprika, 1.5 tsp Salt, and 0.5 tsp Black Pepper. I always rub the seasoning in so it adheres well.
Heat 2 tbsp Olive Oil in a large oven-safe skillet over medium-high heat. When the oil shimmers, add the chicken skin-side down. Sear undisturbed for 6-7 minutes until the skin is deep golden brown and crispy. Flip and sear the other side for 3-4 minutes. Remove chicken and set aside.
Step 2: Sauté Aromatics and Toast the Rice
In the same skillet, add the finely diced 1 whole Yellow Onion and cook for 3-4 minutes until softened. Stir in the minced 4 cloves Garlic Cloves, 1 tsp Dried Thyme, and 1 tsp Dried Oregano, cooking for 30 seconds until fragrant.
Add the 1.5 cups Long-Grain White Rice to the skillet and stir to coat in the oil and aromatics. Toast for 2 minutes—you’ll notice the rice becomes slightly translucent at the edges. This step builds flavor and prevents mushy rice.
Step 3: Combine with Broth and Bake
Pour in the 2.5 cups Chicken Broth and add the 1 whole Bay Leaf. Stir to combine, scraping up any browned bits from the bottom of the skillet. These bits add depth to the dish. Return the chicken to the skillet, skin-side up, nestling the thighs into the rice.
Bring the mixture to a gentle boil, then transfer the skillet to a preheated 375°F oven. Bake uncovered for 25-30 minutes until the chicken reaches an internal temperature of 165°F and the rice absorbs most of the liquid.
Step 4: Rest and Finish with Butter and Parsley
Remove the skillet from the oven and let it rest for 5-10 minutes. This allows the juices in the chicken to redistribute and the rice to finish absorbing the remaining broth. Discard the bay leaf, then stir in the 1 tbsp Butter to add richness to the rice.
Garnish with 0.25 cup Fresh Parsley chopped finely. The parsley adds a bright, fresh contrast to the rich, savory dish. Serve the chicken thighs over the fluffy rice, ensuring each portion gets a crispy piece of skin and a generous helping of the flavorful grains.
Pro Tips For Making Chicken Thighs And Rice Oven
- Preheat the Pan: Sear the chicken thighs skin-side down in a hot oven-safe pan for 4-5 minutes until golden before transferring to the oven. I learned this the hard way—skip it and you’ll miss that crispy skin.
- Use Room-Temp Broth: Pour hot broth straight from the stove over the rice and it’ll cook unevenly. Let it cool slightly first, or use room-temperature broth to guarantee even absorption.
- Skip the Rinse: Resist the urge to rinse the rice—you’ll wash away the starch that helps it bind and thicken the dish. Just give it a quick swirl in the pot if you’re worried about excess starch.
- Bake Uncovered First: Start the chicken and rice uncovered for 20 minutes at 375°F to let the skin crisp, then cover with foil to finish. Sounds weird, but it works: the rice cooks through without turning mushy.
Serving Suggestions for This Dish
Family-Style Presentation
Serve this straight from the skillet at the center of the table—it makes for a stunning presentation and lets everyone help themselves. I love using my vintage Lodge cast iron for this. The sizzling sound as it hits the table always gets a reaction. 🔥
Garnish Like a Pro
Beyond the ¼ cup fresh parsley, try adding lemon wedges for a bright acid pop. A sprinkle of flaky sea salt on the chicken skin right before serving enhances the crispiness. I sometimes add toasted almond slivers for crunch.
Side Dish Pairings
A simple green salad with a light vinaigrette balances the richness perfectly. I toss 4 cups mixed greens with 2 tbsp olive oil and 1 tbsp balsamic. Or try steamed green beans with garlic for a Southern touch.
Bread for Soaking
Warm crusty bread is essential for soaking up those flavorful pan juices. I recommend a baguette or ciabatta from your local bakery. Toast it lightly if you want extra texture. This is how we do it at The Smoky Pig.
Plating for Guests
For individual servings, place 1-2 thighs over a bed of rice on warm plates. Drizzle any remaining pan juices over the top. The contrast of the golden skin against the white rice is dinner party-worthy.
Add a sprig of fresh thyme for that final chef’s touch. ✨
Nutrition Facts
Frequently Asked Questions
Why do I need to pat the chicken dry first?
Dry skin crisps better in the oven. Moisture prevents proper browning and can steam the chicken instead of searing it.
Can I use boneless thighs instead?
Yes, but they won’t crisp as well. Reduce baking time to 20-25 minutes since they cook faster without the bone.
What if my rice is undercooked?
Cover the skillet with foil and return to the oven for 5-10 minutes. If dry, add ¼ cup broth before reheating.
Can I make this ahead of time?
Yes! Cook fully, cool, then refrigerate up to 2 days. Reheat covered at 350°F for 15 minutes.

- Jollof Rice Sauce Recipe: West African Tomato and Spice Infusion - September 25, 2026
- Japanese Rice Soup Recipe: Umami-Rich Comfort in a Bowl - September 25, 2026
- Homemade Cream Of Rice Recipe: Silk-Smooth Breakfast in Minutes - September 25, 2026