
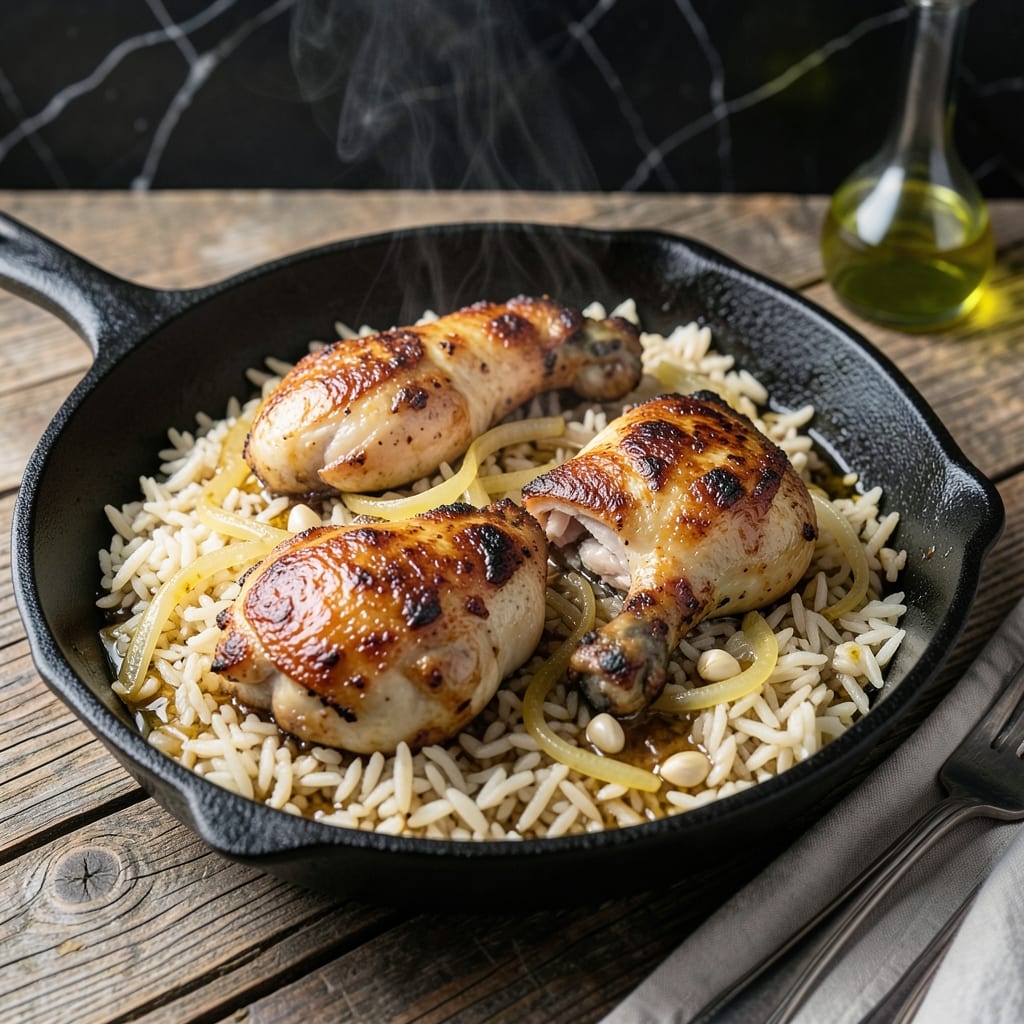
This one-pan recipe delivers restaurant-quality results with minimal cleanup. I developed this method during my early days at The Smoky Pig, perfecting the balance of tender chicken and fluffy rice.
The key is searing the chicken first to build flavor, then using those browned bits to infuse the rice as it cooks. My vintage cast iron skillet makes this especially satisfying—though any heavy pan works just as well.
You’ll end up with juicy, golden chicken atop perfectly seasoned rice, all in 30 minutes. The technique is simple but the results are anything but ordinary.
Ideal for busy weeknights when you want a complete meal without the fuss. Here’s how to make it happen.
Ingredients for Chicken Thighs and Rice Skillet
Bone-in thighs, fluffy rice, and pantry spices make this skillet sing.
| Ingredient | Amount | Notes |
|---|---|---|
| Bone-In Chicken Thighs 🍗 | 1 ½ lb | Skin-on for crispiness |
| Long-Grain White Rice 🍚 | 1 ½ cups | Uncooked, rinsed before use |
| Chicken Broth 🥣 | 2 ½ cups | Low-sodium preferred |
| Olive Oil 🫒 | 2 tbsp | Divided for searing and cooking |
| Yellow Onion 🧅 | 1 whole | Medium-sized, finely diced |
| Garlic Cloves 🧄 | 3 cloves | Minced for maximum flavor |
| Bell Pepper 🌶️ | 1 whole | Any color, diced |
| Dried Thyme 🌿 | 1 tsp | Or 1 tbsp fresh |
| Dried Oregano 🍃 | 1 tsp | Mediterranean style |
| Paprika 🌶️ | 1 tsp | Sweet or smoked variety |
| Bay Leaf 🌿 | 1 whole | Removed before serving |
| Salt 🧂 | 1 tsp | Kosher or sea salt |
| Black Pepper 🌶️ | ½ tsp | Freshly ground preferred |
| Fresh Parsley 🌿 | ¼ cup | Chopped, for garnish |
The chicken is the star here. Bone-in, skin-on thighs stay juicy and render fat that flavors the rice. I grab mine from Whole Foods when they’re on sale, but any supermarket works—just look for plump pieces with smooth skin. The rice should be long-grain white (jasmine or basmati add nice aroma). Rinse it well to remove excess starch, otherwise the dish turns gluey.
No fresh parsley? Dried works at half the amount, though the color isn’t as pretty. Short on chicken broth? Water plus a bouillon cube does the trick. Bell pepper not your thing? Swap in diced zucchini or mushrooms. The paprika is flexible too—Cajun seasoning adds a nice kick. For extra richness, stir in a pat of butter at the end (worth the extra minute).
Leftovers keep 4-5 days in the fridge, though the skin loses crispness. Reheat in a skillet with a splash of broth to revive. Freezes for 3 months if you want to make a double batch. I portion mine into containers for easy grab-and-go lunches.
Why You’ll Love This Recipe
- One Pan Wonder: Honestly, I just chop the onion, brown the thighs, add the rice and broth—then walk away. The skillet does the rest.
- Rich and Juicy: That bone-in skin renders down into the rice, turning plain grains into something crave-worthy with every bite.
- Feeds the Week: I make a double batch on Sunday and we’re set for lunches. The leftovers reheat like a dream.
- Budget King: Chicken thighs are cheap, rice is cheaper, and together they stretch into a solid, filling meal that doesn’t break the bank.
Step-by-Step Instructions for Chicken Thighs and Rice Skillet
Everything cooks in one pan for this flavorful dish that’s ready in under an hour.
Step 1: Sear the Bone-In Chicken Thighs to Golden Perfection
Heat 1 tbsp olive oil in a large, deep skillet over medium-high heat. Pat the 1.5 lb bone-in chicken thighs dry with paper towels and season both sides with ½ tsp salt and all the 0.5 tsp black pepper. The skin needs to be completely dry for that crispy texture we’re after.
Place the chicken thighs skin-side down in the hot oil. Don’t move them for 6-7 minutes—this is how you get that beautiful deep golden-brown crust. You’ll see the skin pulling away from the edges when it’s ready to flip. Turn and cook for another 5 minutes, then transfer to a plate. They won’t be fully done yet, but they’ll finish cooking with the rice.
Step 2: Sauté the Aromatic Base for Maximum Flavor
In the same skillet, add the remaining 1 tbsp olive oil. Toss in the finely diced yellow onion and diced bell pepper, cooking for 4-5 minutes until they soften and start to turn translucent. Stir occasionally and scrape up any browned bits from the chicken—those are pure flavor.
Add the 3 minced garlic cloves and cook for 30 seconds until fragrant. Be careful not to let the garlic burn. Then stir in the 1.5 cups long-grain white rice, 1 tsp paprika, 1 tsp dried thyme, 1 tsp dried oregano, and remaining ½ tsp salt. Toast the rice for 1-2 minutes to enhance its nutty flavor.
Step 3: Simmer Everything Together Until Tender
Pour in the 2.5 cups chicken broth and add the bay leaf. Stir well to distribute the rice evenly. Return the chicken thighs to the skillet, nestling them skin-side up into the rice mixture. Bring to a boil, then reduce the heat to low.
Cover the skillet and let it simmer for 25-30 minutes. Resist the urge to peek—the steam is what cooks the rice perfectly. You’ll know it’s done when the rice is tender, the liquid is absorbed, and the chicken reaches 165°F internally. If the top looks dry before the rice is done, add a splash of water and re-cover.
Step 4: Rest and Garnish for a Finished Touch
Once everything is cooked, remove the skillet from the heat. Discard the bay leaf and let the dish sit covered for 5 minutes. This resting period allows the flavors to meld and the rice to steam a bit more.
Sprinkle with the 0.25 cup chopped fresh parsley just before serving. The parsley adds a pop of color and freshness that balances the rich, savory flavors. Serve directly from the skillet for a rustic, one-pan presentation that’s as impressive as it is delicious.
Pro Tips For Making Chicken Thighs And Rice Skillet
- Sear Skin First: I learned this the hard way—start skin-side down in a screaming hot skillet with 2 tablespoons of olive oil for at least 5 minutes before flipping, or you’ll lose that crispy golden crust that makes this dish worth eating.
- Use Room-Temp Broth: Adding cold chicken broth straight from the fridge slows everything down and can make the rice gummy; I now pull it out 15 minutes early so it blends right into the rice without shocking the pan.
- Skip the Rinsing: After making mushy rice one too many times, I finally stopped rinsing the long-grain white rice—it needs that starch to thicken the liquid into a creamy, cohesive texture.
- Rest Before Serving: Sounds weird, but it works: let the whole skillet sit covered off the heat for 10 minutes after cooking, so the rice absorbs the last of the broth and the chicken reabsorbs its juices.
Storing and Reheating This Recipe
Refrigerator Storage
Let your skillet cool for no more than 2 hours before transferring to airtight containers. I use glass Pyrex with snap-on lids to store at 40°F or below for up to 4 days. The flavors actually deepen overnight as the spices continue to meld. ❄️
Freezer Storage
This dish freezes beautifully for up to 3 months without losing quality. I recommend using flat freezer bags (quart or gallon size) because they stack efficiently. Leave 1 inch of headspace for expansion and squeeze out excess air to prevent freezer burn.
Stovetop Reheating
My preferred method for maintaining texture. Pour contents into a heavy-bottomed skillet, add ¼ cup chicken broth to prevent sticking, and heat over medium-low heat for 10-15 minutes. Stir occasionally and taste for seasoning adjustments. 🔥
Microwave Reheating
For quick meals, microwave individual portions covered with a damp paper towel. Heat on 70% power for 2-3 minutes, stir, then continue in 1-minute intervals until reaching 165°F. Add a splash of water if it looks dry.
Reviving the Crispy Skin
To restore that coveted crispiness, transfer reheated chicken to a baking sheet and broil on high for 2-3 minutes. Watch closely to avoid burning. This works especially well with the stovetop method.
Nutrition Facts
Frequently Asked Questions
What’s the best rice type for this dish?
Long-grain white rice works best for its fluffy texture and ability to absorb flavors. Jasmine or basmati add nice aroma. Avoid instant rice as it can turn mushy during the 25-30 minutes simmering time.
Can I use boneless chicken thighs?
Yes, but bone-in stays juicier and adds more flavor to the rice. If using boneless, reduce cooking time by 5 minutes since they cook faster. The skin still gets crispy either way.
How do I prevent the rice from burning?
Use a heavy-bottomed skillet and maintain low heat during simmering. If the top looks dry, add a splash of water or broth before the rice finishes cooking. Never stir the rice while it’s cooking.
Can I make this ahead of time?
The flavors actually improve overnight. Store in the fridge for up to 4 days or freeze for 3 months. Reheat with a splash of broth to restore moisture.

- Jollof Rice Sauce Recipe: West African Tomato and Spice Infusion - September 25, 2026
- Japanese Rice Soup Recipe: Umami-Rich Comfort in a Bowl - September 25, 2026
- Homemade Cream Of Rice Recipe: Silk-Smooth Breakfast in Minutes - September 25, 2026