
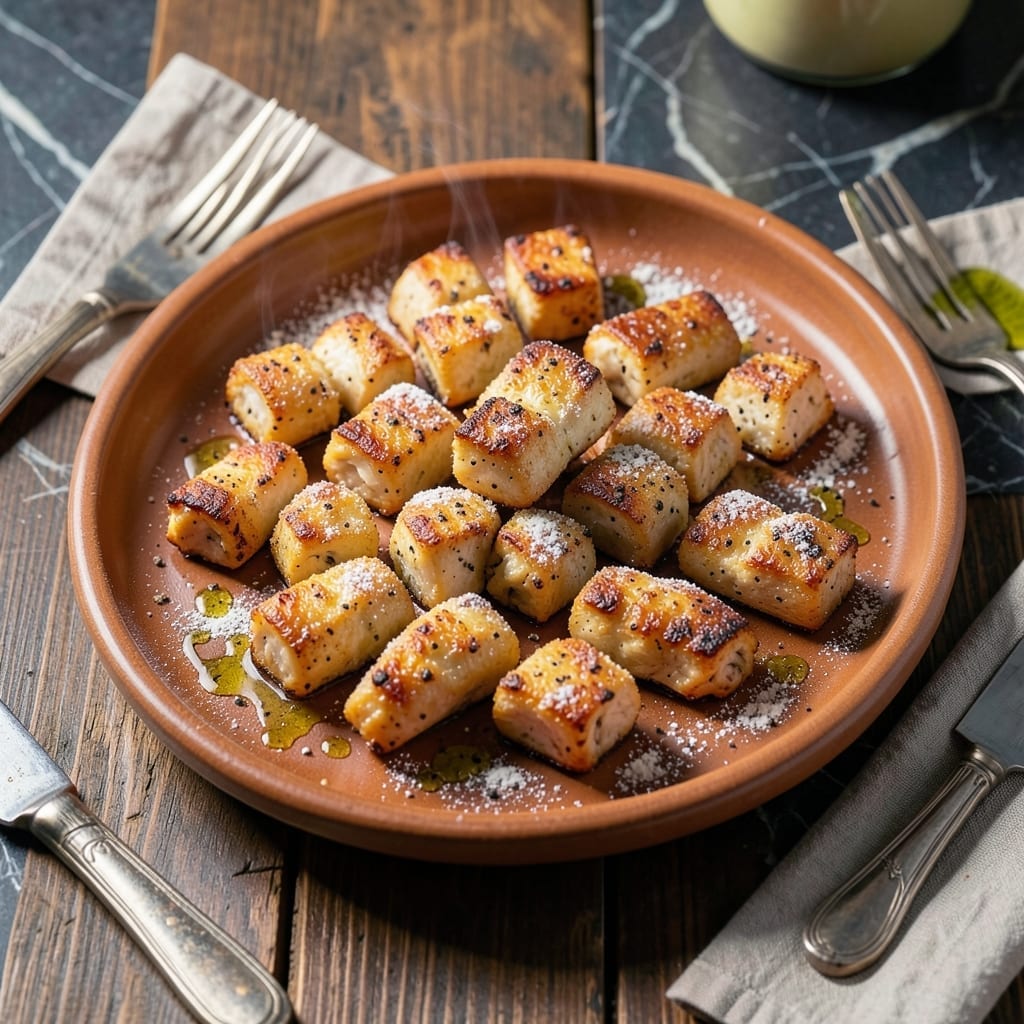
This chicken tips recipe delivers tender bites in a creamy garlic sauce that’s both rich and balanced. I developed this method to ensure the chicken stays juicy while the sauce achieves perfect consistency.
The key is searing the chicken quickly over high heat to lock in moisture, then finishing it in the sauce. A splash of cream at the end adds that signature creamy texture without overpowering the garlic.
You’ll end up with succulent chicken pieces coated in a velvety sauce that clings to every bite. The flavors are bold yet harmonious, making this dish a reliable crowd-pleaser.
Serve it over pasta, rice, or with crusty bread to soak up every last drop. Here’s how to make it.
Ingredients for Chicken Tips
Simple ingredients create tender chicken in a velvety garlic sauce everyone will love.
| Ingredient | Amount | Notes |
|---|---|---|
| Boneless Skinless Chicken Breasts 🍗 | 1 ½ lb | Cut into 1-inch pieces |
| All-Purpose Flour 🌾 | ½ cup | For dredging chicken |
| Salt 🧂 | 1 tsp | Divided for seasoning |
| Black Pepper 🌶️ | ½ tsp | Freshly ground preferred |
| Olive Oil 🫒 | 3 tbsp | Divided for cooking |
| Butter 🧈 | 2 tbsp | Unsalted for sauce |
| Garlic Cloves 🧄 | 4 cloves | Minced for sauce |
| Heavy Cream 🥛 | 1 cup | Full-fat for creaminess |
| Chicken Broth 🍲 | ½ cup | Low-sodium preferred |
| Dijon Mustard 🟡 | 1 tbsp | For depth of flavor |
| Worcestershire Sauce 🍶 | 1 tsp | Adds umami complexity |
| Fresh Parsley 🌿 | 2 tbsp | Chopped, for garnish |
The chicken quality matters here. Boneless, skinless breasts from a trusted butcher or Whole Foods ensure tenderness. For the cream, organic heavy cream has a richer mouthfeel, but any full-fat version works. The butter should be unsalted so you control the seasoning. If you’re searing in batches, use a heavy-bottomed skillet—All-Clad or cast iron distributes heat evenly.
Short on cream? Half-and-half at half the amount works, but the sauce will be thinner. No Dijon? Regular yellow mustard in a pinch, though it’s sharper. Skip the Worcestershire? A dash of soy sauce adds similar depth. The parsley is optional (dried works at one-third the amount), but fresh brightens up the dish beautifully.
Store raw chicken in the coldest part of your fridge—use within 2 days. The sauce keeps 3-4 days refrigerated, but the chicken is best fresh. Reheat gently to avoid curdling the cream. Never freeze creamy sauces—they separate.
Why You’ll Love This Recipe
- 20-Minute Meal: I can go from raw chicken to golden tips on the plate faster than the kids can argue over who gets the last roll.
- Crispy Outside, Tender Inside: The flour coating fries up in olive oil to that perfect crunch, while the chicken stays juicy—no dry bites here.
- Weeknight MVP: Honestly, it’s my Tuesday lifesaver: pairs with pasta, rice, or a salad, and everyone cleans their plate.
- Budget Stretcher: One pound of chicken breasts turns into a meal that feeds four, and the pantry staples do the rest.
Step-by-Step Instructions for Chicken Tips in Creamy Garlic Sauce
This method guarantees juicy chicken and a rich, velvety sauce every time.
Step 1: Prep and Season the Chicken
Cut the 1.5 lb boneless skinless chicken breasts into 1-inch pieces for even cooking. Pat them completely dry with paper towels—this prevents steaming and ensures a proper sear.
Season the chicken with ½ tsp salt and the 0.5 tsp black pepper. Dredge each piece in the 0.5 cup all-purpose flour, shaking off any excess. The flour creates a light coating that will thicken the sauce later and give the chicken a golden crust.
Step 2: Sear the Chicken to Golden Perfection
Heat 2 tbsp olive oil in a large skillet over medium-high heat until shimmering. Add the floured chicken pieces in a single layer, working in batches if needed to avoid crowding the pan. Cook for 3-4 minutes per side until golden brown and cooked through.
Resist the urge to move the chicken around too much—let it develop a deep golden crust before flipping. Transfer the cooked chicken to a plate and tent with foil to keep warm. The chicken should reach an internal temperature of 165°F during this step.
Step 3: Build the Creamy Garlic Sauce
In the same skillet, reduce the heat to medium and add the remaining 1 tbsp olive oil along with the 2 tbsp butter. Once the butter melts, add the 4 cloves minced garlic cloves and cook for 30 seconds until fragrant but not browned.
Pour in the 0.5 cup chicken broth, 1 tbsp Dijon mustard, and 1 tsp Worcestershire sauce. Stir with a wooden spoon to deglaze the pan, scraping up all the browned bits from the bottom. These bits pack intense flavor into the sauce.
Simmer for 2-3 minutes until the liquid reduces slightly, then stir in the 1 cup heavy cream. Let the sauce simmer for another 3-4 minutes until it thickens enough to coat the back of a spoon. Taste and adjust seasoning with the remaining ½ tsp salt if needed.
Step 4: Combine and Finish
Return the cooked chicken to the skillet along with any accumulated juices. Stir gently to coat the chicken in the creamy sauce. Let it simmer together for 2-3 minutes to allow the flavors to meld and the sauce to cling to every piece.
The sauce should be rich and velvety, with a beautiful sheen. If it thickens too much, add a splash of chicken broth to loosen it. Finish by stirring in the 2 tbsp chopped fresh parsley just before serving for a pop of color and freshness.
Pro Tips For Making Chicken Tips
- Pound the Breasts: Even thickness means even cooking—pound them to about ½ inch so the tips cook through without drying out.
- Season the Flour: Mix salt and pepper into the flour before dredging; it sticks better than sprinkling it on after.
- Skip the Overcrowding: I learned this the hard way—cook the chicken in batches so the pan stays hot and the tips actually brown instead of steam.
- Rest Before Serving: Give the chicken a solid 5 minutes on a plate after cooking; it keeps the juices from running all over when you cut into it.
Essential Equipment for chicken tips
Best Skillet Choice
I always reach for my 12-inch All-Clad stainless steel skillet for this recipe. The heavy base distributes heat evenly, preventing hot spots that could burn your sauce. Stainless steel also develops the best fond for deglazing. 🔥
Wooden Spoon Essential
A good wooden spoon won’t scratch your skillet and is perfect for scraping up those flavorful browned bits. I prefer a flat-edged spoon for maximum contact with the pan. It’s my go-to tool for stirring the sauce without damaging the surface.
Digital Thermometer
Don’t guess at doneness—use a digital instant-read thermometer to ensure your chicken reaches 165°F. I love my ThermoWorks ThermoPop for its accuracy and speed. It takes the uncertainty out of cooking chicken perfectly every time.
Whisk for Sauce
A balloon whisk helps emulsify the butter and cream into a smooth, velvety sauce. I keep a 10-inch whisk handy for this recipe. The wires separate the cream while keeping the sauce from sticking to the pan.
Tongs for Chicken
Use locking tongs to flip the chicken pieces without piercing them. I prefer 12-inch tongs for better reach in the skillet. They give you precise control when searing and prevent the chicken from breaking apart.
Cutting Board
A good plastic cutting board is essential for prepping the chicken. I use a large OXO Good Grips board that won’t slip while cutting. Always wash it thoroughly with hot, soapy water after handling raw chicken. 💡
Nutrition Facts
Frequently Asked Questions
Can I use chicken thighs instead of breasts?
Thighs stay even juicier and handle high heat well. Use 1.5 lb boneless skinless thighs and follow the same steps. The cooking time may be slightly shorter since thighs cook faster.
What if my sauce is too thin?
Simmer it for 2-3 more minutes to reduce. If it’s still thin, mix 1 tsp cornstarch with 1 tbsp cold water and stir into the sauce. It will thicken as it heats.
Can I make this ahead of time?
The dish reheats well! Store in an airtight container for up to 3 days. Warm gently on the stove over low heat to prevent curdling. Avoid microwaving.
How do I prevent the sauce from curdling?
Keep the heat at medium or lower when adding cream. Stir constantly and avoid boiling. If it starts to separate, remove from heat and whisk vigorously to bring it back together.

- Jollof Rice Sauce Recipe: West African Tomato and Spice Infusion - September 25, 2026
- Japanese Rice Soup Recipe: Umami-Rich Comfort in a Bowl - September 25, 2026
- Homemade Cream Of Rice Recipe: Silk-Smooth Breakfast in Minutes - September 25, 2026