
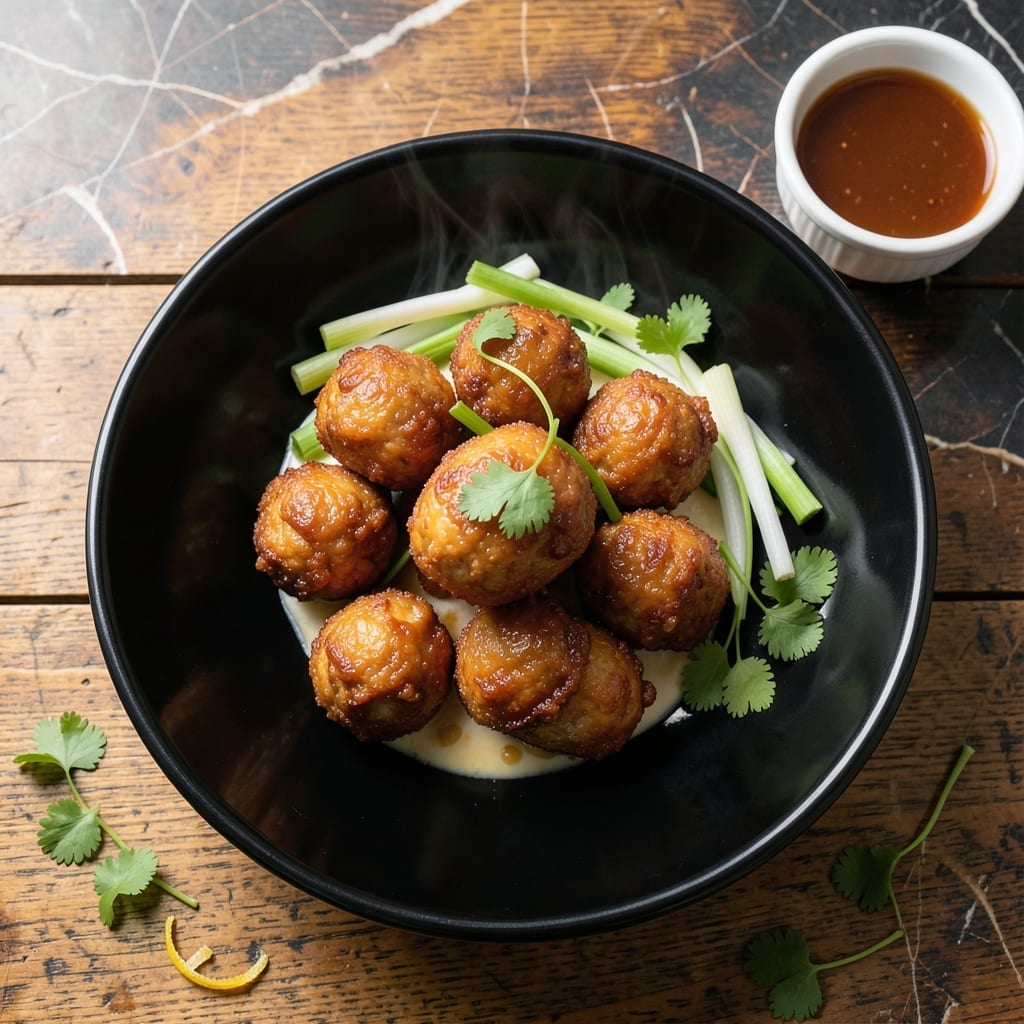
Few dishes deliver the satisfying crunch of perfectly made Chinese chicken balls. This recipe uses a double-frying technique to achieve an incredibly crispy exterior while keeping the chicken juicy and tender inside.
I developed this method after testing various approaches, and the key is in the timing between fries. The first fry cooks the chicken through, while the second at higher heat creates that signature golden, shatteringly crispy coating.
What you’ll get are bite-sized morsels with a texture that’s addictive—the outside stays crispy long after frying, while the inside remains moist and flavorful. The double-fry ensures consistent results every time.
Serve immediately for the best texture, with sweet and sour sauce or your favorite dipping sauce on the side. Here’s how to make them.
Ingredients for Chinese Chicken Balls
Pantry staples and a quick grocery run. Nothing exotic, just crispy perfection in the making.
| Ingredient | Amount | Notes |
|---|---|---|
| Boneless Chicken Breast 🍗 | 1 ½ lb | Cut into 1-inch cubes |
| All-Purpose Flour 🌾 | 1 cup | For initial coating |
| Cornstarch 🌽 | ½ cup | For extra crispiness |
| Large Eggs 🥚 | 2 whole | Beaten for batter |
| Soy Sauce 🫙 | 2 tbsp | Low-sodium preferred |
| Shaoxing Wine 🍶 | 1 tbsp | Or dry sherry substitute |
| Garlic Cloves 🧄 | 3 cloves | Minced finely |
| Fresh Ginger 🌿 | 1 tbsp | Grated or minced |
| Green Onions 🧅 | 3 whole | Thinly sliced, for garnish |
| Salt 🧂 | 1 tsp | Divided for seasoning |
| White Pepper 🌶️ | ½ tsp | Ground, for authenticity |
| Vegetable Oil 🫒 | 4 cups | For deep-frying (peanut or canola oil works too) |
The chicken is the star here. Boneless, skinless breasts stay juicier than thighs for this double-fry method. Look for air-chilled at Whole Foods or Costco—less moisture means crispier coating. The cornstarch is non-negotiable (trust me, I’ve tested). Bob’s Red Mill or any Asian market brand works great. Cut the chicken into even 1-inch cubes so they cook uniformly.
No Shaoxing wine? Dry sherry at one-to-one ratio gets you 90% there. Out of fresh ginger? Ground ginger at one-quarter the amount works in a pinch (but fresh is better). For gluten-free, swap the all-purpose flour for rice flour. The vegetable oil can be peanut or canola—just pick something with a high smoke point. Baby cornstarch? Any brand will do.
Fry in batches—don’t crowd the pot or the temperature drops and you’ll get soggy results. Leftovers? Reheat in a 375°F oven for 10-12 minutes to revive the crunch. Best eaten fresh, but they’ll keep in the fridge for 2 days (though that coating softens).
Why You’ll Love This Recipe
- One Bowl Wonder: I mix everything right in the bowl—no fancy prep, just chicken, cornstarch, egg, and a splash of soy for flavor.
- Crispy Outside, Tender Inside: The cornstarch and flour combo gives that perfect crunch, while the chicken stays juicy every single time.
- Party or Lunchbox: Honestly, these work for game day snacks or my kid’s school lunch—equally loved both ways.
- Budget Stretcher: A pound of chicken breast makes a mountain of these, and leftovers? Still delicious the next day.
Step-by-Step Instructions for Double-Fried Crispy Chicken Balls
Here’s how I get that shatteringly crisp exterior with juicy, flavorful meat every single time.
Step 1: Marinate and Season the Chicken
Cut the 1.5 lb boneless chicken breast into 1-inch cubes and place them in a large bowl. Add the 2 tbsp soy sauce, 1 tbsp Shaoxing wine, 1 tsp salt, and 0.5 tsp white pepper. Mix well to coat every piece evenly.
Now add the 3 minced garlic cloves and 1 tbsp fresh ginger. I like to let this sit for 15-20 minutes while I prep the rest—this gives the flavors time to penetrate the chicken deeply, which is crucial for that authentic taste.
Real talk: don’t skip this marinating step. It’s what separates good chicken from the kind that makes you close your eyes with every bite.
Step 2: Create the Ultra-Crispy Battering Station
In one bowl, beat the 2 large eggs until frothy. In another shallow dish, combine the 1 cup all-purpose flour and 0.5 cup cornstarch. The cornstarch is the secret weapon here—it creates that extra-crispy texture that stays crunchy even after frying.
I always set up my station in this order: raw chicken, egg wash, then flour-cornstarch mixture. This assembly line approach prevents cross-contamination and keeps the process moving smoothly. Dip each piece of chicken in the beaten egg, letting any excess drip off, then immediately roll it in the flour mixture.
Press gently to ensure full coverage—you want an even, thick coating that will puff up beautifully during frying.
Step 3: First Fry for Perfect Cooking
Heat the 4 cups vegetable oil in a deep, heavy pot over medium-high heat until it reaches 325°F. Use a deep-fry thermometer for accuracy; if you don’t have one, test with a wooden chopstick—when bubbles form rapidly around it, you’re ready.
Fry the chicken in batches to avoid crowding the pot, which would lower the oil temperature. Each piece should have plenty of room to move around. Cook for 4-5 minutes until the coating sets and turns a pale golden color. The chicken won’t be fully crispy yet—that comes in the second fry.
Remove with a slotted spoon and drain on a wire rack set over a baking sheet. This allows air circulation underneath, preventing soggy bottoms. Let them rest for 5 minutes while you bring the oil temperature up.
Step 4: Second Fry for Maximum Crispiness
Increase the oil temperature to 375°F. This higher heat is what creates that deep golden-brown color and shatteringly crisp texture. Fry the chicken again for 2-3 minutes until they’re deep golden brown and ultra-crispy.
Watch them closely—they’ll darken quickly at this temperature. The double-frying technique ensures the chicken is fully cooked through while achieving that restaurant-style crispiness that lasts even after cooling slightly.
Drain again on the wire rack. Here’s the thing—if you stack them while hot, they’ll steam and lose that crispness you worked so hard for. Always keep them in a single layer.
Garnish with the 3 thinly sliced green onions and serve immediately while hot and at peak crispiness.
Pro Tips For Making Chinese Chicken Balls
- Chill the Chicken: After mixing the chicken with soy sauce and egg, refrigerate for 20-30 minutes—I learned this the hard way when my first batch fell apart in the oil because the coating wouldn’t stick to room-temp meat.
- Double Coat: Roll the chicken pieces in flour first, then dip in egg, and finally coat with cornstarch for that extra-crispy texture. Sounds tedious, but it’s the only way to get that restaurant-style crunch.
- Skip Cold Oil: Heat the oil to 350°F before adding the chicken—after burning three batches, I finally figured out that cold oil just makes the balls greasy instead of golden.
- Use Thigh Meat: Swap half the chicken breast for thigh meat for juicier results. My grandmother swore by this, and she was right: breast alone can dry out too easily.
Creative Variations of chinese chicken balls
Sweet & Sour Twist
Toss the crispy chicken balls in ½ cup sweet and sour sauce right after frying. I use Kikkoman’s brand for consistency. The heat from the chicken helps the sauce cling perfectly, creating a sticky, finger-licking coating that kids and adults love equally. 🌟
Spicy Sichuan Version
Add 1 tbsp Sichuan peppercorns and 2 dried red chilies to your hot oil during the second fry. The numbing heat from the peppercorns combined with the chili’s spice creates an addictive flavor profile. Finish with a sprinkle of chili oil and chopped cilantro.
Honey Garlic Glaze
Mix 3 tbsp honey, 2 tbsp soy sauce, and 3 minced garlic cloves. Simmer until thickened, then toss with the hot chicken. This variation has become my go-to for parties—everyone asks for the recipe. The glaze caramelizes slightly on the crispy exterior.
Lemon Pepper Style
After the second fry, immediately toss the chicken with 1 tbsp lemon zest, 1 tbsp cracked black pepper, and ½ tsp salt. The citrus brightens the rich flavor while the pepper adds a subtle kick. I love this version for summer picnics.
Sesame Crunch
Roll the battered chicken in ¼ cup toasted sesame seeds before the first fry. The seeds add a nutty flavor and extra texture. Serve with a dipping sauce of 3 tbsp mayonnaise mixed with 1 tbsp sriracha and 1 tsp honey. 💫
Air Fryer Adaptation
For a lighter version, cook at 375°F for 12 minutes, shake, then 375°F for 8 more minutes. Spritz with oil between cook cycles. While not as crispy as deep-frying, it’s a great weeknight alternative that still delivers satisfying crunch.
Nutrition Facts
Frequently Asked Questions
Can I use chicken thighs instead of breasts?
Yes, but thighs have more fat. Use boneless, skinless thighs and trim excess fat for best results. They’ll stay juicier but may need 1-2 extra minutes frying.
What if I don’t have a deep fryer?
A heavy pot with 2-3 inches of oil works fine. Use a thermometer to maintain 325°F and 375°F. Never fill past halfway to prevent spills.
How do I keep them crispy for a party?
Fry in advance, then reheat on a rack in a 375°F oven for 8-10 minutes. Avoid microwaving—it’ll make them soggy. Serve on a wire rack to maintain air circulation.
Can I make these gluten-free?
Swap all-purpose flour for rice flour or a gluten-free blend. Ensure your soy sauce is gluten-free (tamari works). The texture will still be crispy!

- Jollof Rice Sauce Recipe: West African Tomato and Spice Infusion - September 25, 2026
- Japanese Rice Soup Recipe: Umami-Rich Comfort in a Bowl - September 25, 2026
- Homemade Cream Of Rice Recipe: Silk-Smooth Breakfast in Minutes - September 25, 2026