
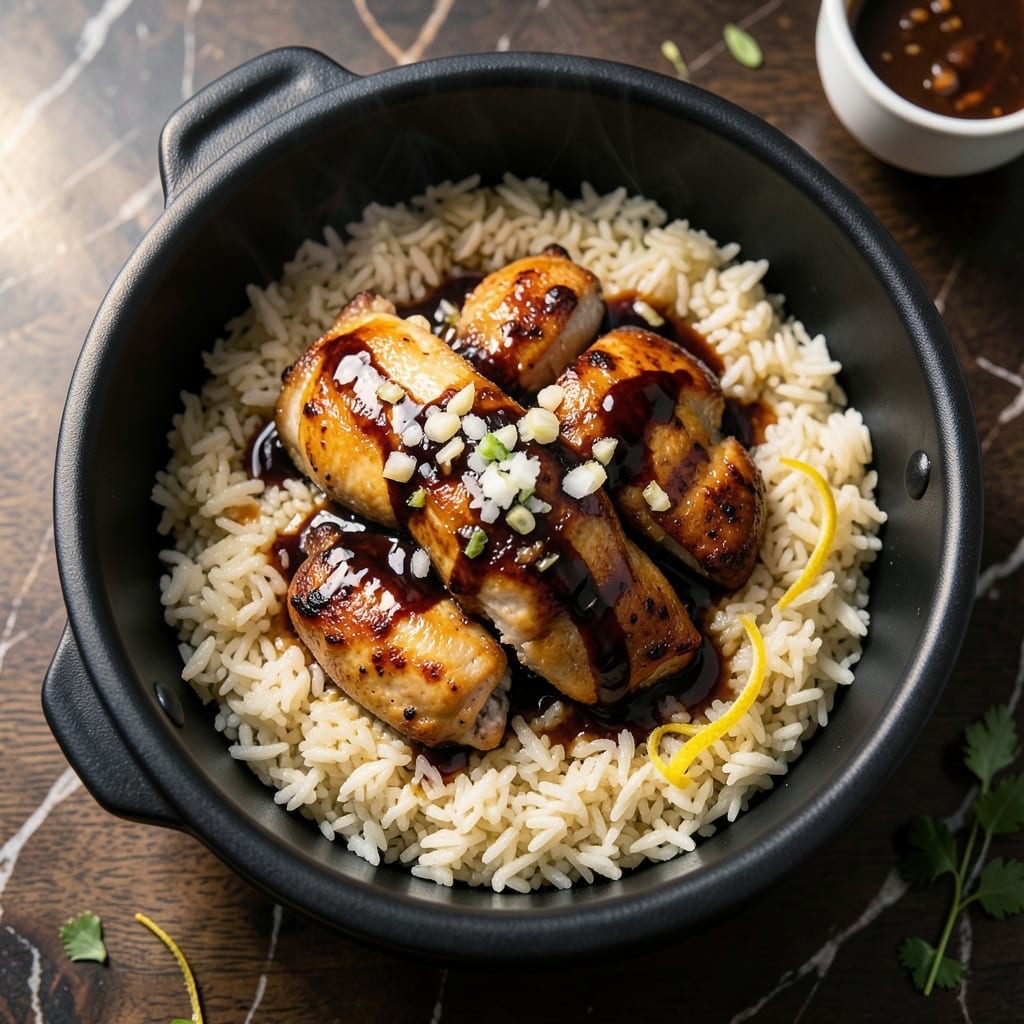
This rice cooker method delivers the crispy bottom and fragrant aroma of traditional claypot chicken rice without the fuss. I developed this approach after years of struggling with stovetop versions that either burned or stayed soggy.
The secret is layering marinated chicken over uncooked rice and letting the cooker work its magic. The chicken juices infuse the grains while the bottom forms that coveted golden crust. It’s hands-off perfection in 30 minutes.
You’ll get tender chicken pieces, fluffy rice, and that signature caramelized layer at the bottom. The rice cooker’s even heat distribution ensures every bite is packed with flavor, just like the restaurant version.
This method consistently produces the texture and depth that makes claypot chicken rice so special. Here’s how to achieve it at home.
Ingredients for Claypot Chicken Rice in Rice Cooker
Transform simple ingredients into restaurant-quality claypot chicken rice with ease.
| Ingredient | Amount | Notes |
|---|---|---|
| Jasmine Rice 🍚 | 2 cups | Rinsed until water runs clear |
| Boneless Chicken Thighs 🍗 | 1 ½ lb | Skin-on, cut into bite-sized pieces |
| Light Soy Sauce 🫒 | 3 tbsp | For marinating chicken |
| Dark Soy Sauce 🫒 | 1 tbsp | Adds depth and color |
| Oyster Sauce 🫒 | 2 tbsp | Essential for authentic flavor |
| Shaoxing Wine 🍶 | 2 tbsp | Dry sherry as substitute |
| Garlic Cloves 🧄 | 4 cloves | Minced finely |
| Fresh Ginger 🌿 | 1 tbsp | Grated or minced |
| Granulated Sugar 🍚 | 1 tsp | Balances savory flavors |
| Sesame Oil 🫒 | 1 tsp | Toasted for aroma |
| Green Onions 🧅 | 3 whole | Thinly sliced for garnish |
| Neutral Cooking Oil 🫒 | 2 tbsp | For searing chicken |
| Chicken Stock 🍲 | 1 ½ cups | Low-sodium preferred |
| White Pepper 🌶️ | ½ tsp | Freshly ground |
The chicken thighs are non-negotiable here. Bone-in, skin-on delivers the richest flavor and juiciest texture—boneless will dry out. Source from Asian markets if possible, as they often carry higher-quality poultry. Jasmine rice is traditional, but long-grain white rice works in a pinch. Look for grains that are uniform in size and not broken for the best texture.
No Shaoxing wine? Dry sherry is the closest substitute, but mirin plus a splash of rice vinegar can work. Oyster sauce is key for umami depth—vegetarian oyster sauce if needed. The dark soy sauce adds color, so don’t skip it. For the stock, homemade or high-quality store-bought (like Kikkoman) makes a noticeable difference in the final dish.
This dish is best served fresh, but leftovers keep for 2-3 days in the fridge. Reheat in the microwave with a damp paper towel to restore moisture. The crispy bottom won’t survive storage, but the flavors deepen. Freezing isn’t recommended as it alters the rice texture.
Why You’ll Love This Recipe
- Set It and Forget: I just dump everything into the rice cooker and walk away—jasmine rice, chicken thighs, and the soy sauces do all the work.
- Umami Bomb: The combo of dark soy, light soy, and oyster sauce gives that deep, caramelized flavor without me babysitting a wok.
- Weeknight Hero: Between us, this is my Tuesday night lifesaver when I need something hearty and ready by the time the kids finish homework.
- Budget Stretcher: Boneless thighs stay juicy and cheap, and one batch makes enough for leftovers that taste even better the next day.
Step-by-Step Instructions for Claypot Chicken Rice in Rice Cooker
Master the technique and achieve perfectly crispy edges with minimal effort using this method.
Step 1: Marinate the Chicken for Maximum Flavor
In a bowl, combine the 1.5 lb boneless chicken thighs with 3 tbsp light soy sauce, 1 tbsp dark soy sauce, 2 tbsp oyster sauce, 2 tbsp Shaoxing wine, 4 cloves minced garlic, 1 tbsp fresh ginger, 1 tsp granulated sugar, and 0.5 tsp white pepper.
Mix thoroughly to ensure every piece is evenly coated. I like to let this marinate for 20-30 minutes at room temperature while I prep the other ingredients—this allows the flavors to penetrate deeply without drying out the meat.
Step 2: Prepare the Rice and Sear the Chicken
Rinse the 2 cups jasmine rice until the water runs clear, then drain well. Heat 2 tbsp neutral cooking oil in a large skillet over medium-high heat. Remove the chicken from the marinade (reserve the marinade) and sear until golden brown on both sides, about 3-4 minutes per side.
The chicken doesn’t need to cook through at this stage—just develop a deep golden crust. Transfer the seared chicken to a plate and set aside. The fond left in the pan adds incredible depth to the final dish.
Step 3: Layer Ingredients in the Rice Cooker
Add the drained jasmine rice to the rice cooker pot. Pour in the reserved marinade and 1.5 cups chicken stock, stirring to distribute the liquid evenly. Arrange the seared chicken pieces on top of the rice, pressing them slightly into the mixture.
Drizzle 1 tsp sesame oil over the chicken and rice. This step ensures the rice absorbs all the rich, savory flavors as it cooks, creating that signature claypot texture without constant monitoring.
Step 4: Cook and Crisp the Top Layer
Select the “Cook” function on your rice cooker and let it run through its cycle undisturbed. Once the rice cooker switches to “Keep Warm,” let it sit for an additional 10 minutes to steam the chicken through.
Then, open the lid and use a spatula to gently press down on the top layer of rice and chicken. This creates the coveted crispy crust. Close the lid and let it sit for another 5-10 minutes on the “Keep Warm” setting to develop the texture further.
Step 5: Garnish and Serve
Thinly slice the 3 whole green onions and sprinkle them over the top just before serving. The contrast of the fresh, bright green against the rich, caramelized chicken and rice is visually stunning.
Serve hot, ensuring each portion includes some of the crispy rice from the bottom and edges. The chicken should be tender and juicy, with the rice perfectly infused with all the savory, umami-rich flavors from the marinade and cooking liquid.
Pro Tips For Making Claypot Chicken Rice In Rice Cooker
- Pre-Cook the Chicken: I learned this the hard way—par-cook the chicken thighs for 3-4 minutes in a pan before adding to the rice cooker. This guarantees they’ll finish cooking perfectly with the rice and won’t end up rubbery or underdone.
- Rinse Then Soak: Rinse the jasmine rice until the water runs clear, then soak it for at least 20 minutes. After burning a few batches, I finally figured out this prevents the bottom from sticking and gives you that fluffy, separate grain texture.
- Layer the Sauces: Mix the light and dark soy sauces with the oyster sauce, but pour half at the start and reserve half for the end. Sounds weird, but it works—this keeps the rice from turning into a mushy, oversauced clump.
- Crisp the Top: Once the rice cooker switches to “keep warm,” let it sit for 10 minutes, then open the lid and let it steam off for another 5. My grandmother swore by this, and she was right: it gives you that coveted slightly crispy top layer.
Storing and Reheating This Dish
Refrigerator Storage
Let your dish cool for no more than 2 hours before transferring to airtight containers. I use glass containers with locking lids to preserve freshness. Store in the fridge at 40°F or below for up to 3 days. ❄️
Freezer Storage
This dish freezes well for up to 1 month without significant texture loss. Portion into freezer-safe bags or containers, leaving 1 inch of headspace for expansion. Squeeze out excess air to prevent freezer burn.
Stovetop Reheating
My preferred method for best texture. Add 2-3 tbsp chicken stock or water to a skillet over medium-low heat. Cover and heat for 8-10 minutes, stirring occasionally. The crispy bottom won’t return, but flavors will be vibrant. 🔥
Microwave Reheating
For quick meals, microwave individual portions covered with a damp paper towel. Use 70% power for 2-3 minutes, stir, then continue in 30-second intervals until reaching 165°F. Add a splash of water if it looks dry.
Reviving the Crisp
While you can’t fully restore the crispy layer, spreading leftovers on a baking sheet under a broiler for 3-4 minutes helps create some texture. Watch closely to avoid burning the chicken pieces.
Nutrition Facts
Frequently Asked Questions
Can I use chicken breast instead of thighs?
I don’t recommend it. Chicken breast dries out easily and lacks the fat needed for flavor. Thighs stay juicy and absorb marinades better, giving you that authentic taste.
Why do I need to sear the chicken first?
Searing creates a flavorful crust and renders fat that infuses the rice. It also helps the chicken hold its shape during cooking, preventing it from falling apart.
How do I get the rice crispier?
After cooking, let it sit on Keep Warm for 10 minutes. Then press the top layer with a spatula and close the lid for another 5-10 minutes. This maximizes crust formation.
Can I make this without a rice cooker?
Yes, use a heavy pot with a tight lid on the stovetop. Cook on medium-low heat for 20 minutes, then let it steam off-heat for 10 minutes.

- Jollof Rice Sauce Recipe: West African Tomato and Spice Infusion - September 25, 2026
- Japanese Rice Soup Recipe: Umami-Rich Comfort in a Bowl - September 25, 2026
- Homemade Cream Of Rice Recipe: Silk-Smooth Breakfast in Minutes - September 25, 2026