
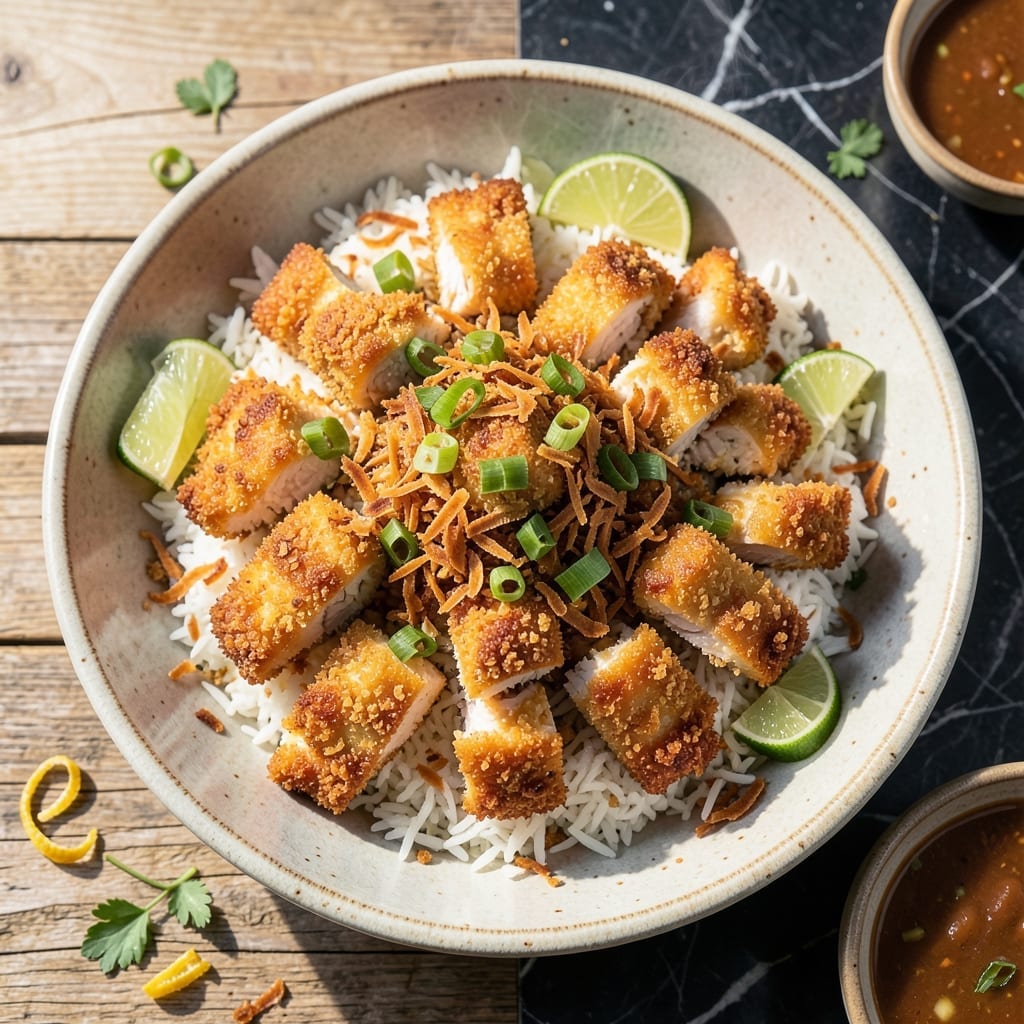
This tropical-inspired dish delivers a perfect balance of textures and flavors that will transport your taste buds. The coconut coating creates a crispy golden exterior that gives way to tender, juicy chicken inside.
I developed this recipe after testing multiple methods to achieve the ideal crunch without drying out the meat. The secret lies in a double-dredging technique that ensures every bite is packed with coconut flavor and satisfying texture.
What sets this apart is how the coconut toasts to a perfect golden brown while sealing in the chicken’s natural moisture. The result is a dish that’s impressive enough for guests but simple enough for weeknight dinners.
Serve these bites with a tangy dipping sauce to complement the sweet coconut. The contrast between the outer crunch and the succulent interior makes every mouthful memorable.
Ingredients for Coconut Chicken
A few pantry staples and fresh ingredients create these crispy, juicy tropical bites.
| Ingredient | Amount | Notes |
|---|---|---|
| Boneless Chicken Breasts 🍗 | 1 ½ lb | Cut into 1-inch pieces |
| All-Purpose Flour 🌾 | ¾ cup | For first dredging layer |
| Large Eggs 🥚 | 2 whole | Beaten for egg wash |
| Shredded Coconut 🥥 | 2 cups | Sweetened or unsweetened |
| Panko Breadcrumbs 🍞 | 1 cup | For extra crispiness |
| Salt 🧂 | 1 tsp | Kosher or sea salt |
| Black Pepper 🌶️ | ½ tsp | Freshly ground preferred |
| Garlic Powder 🧄 | 1 tsp | For savory depth |
| Paprika 🌶️ | 1 tsp | For color and mild heat |
| Vegetable Oil 🫒 | ½ cup | For frying chicken |
| Sweet Chili Sauce 🍯 | ½ cup | For dipping sauce |
| Lime Juice 🍈 | 2 tbsp | Freshly squeezed preferred |
The chicken quality matters here. Boneless, skinless breasts stay juicy if not overcooked. I source mine from Whole Foods or Costco—look for even thickness so pieces cook uniformly. The shredded coconut should be fine-cut (not flaked) for better adhesion. Bob’s Red Mill or Let’s Do Organic brands work well. For the panko, Kikkoman is my go-to for consistent texture.
No panko? Regular breadcrumbs work in a pinch (texture won’t be as crisp). Sweetened vs. unsweetened coconut is a preference call—unsweetened at half the amount if you’re sugar-conscious. Swap garlic powder for fresh minced garlic at one-third the quantity. The vegetable oil can be peanut or canola—anything with a high smoke point. For the dipping sauce, sriracha mixed with lime makes a quick alternative.
Fry in batches to avoid crowding the pan—keeps the oil hot and the coating crisp. Leftovers hold up 3-4 days in the fridge (reheat in the oven at 375°F to revive crunch). The dipping sauce keeps for 1 week refrigerated. Freeze uncooked breaded pieces for up to 2 months.
Why You’ll Love This Recipe
- Under 30 Minutes: I can get this from prep to plate faster than my kids can agree on a movie.
- Crispy Meets Sweet: That first bite where the panko-coconut crust gives way to tender chicken? Ridiculously good.
- Crowd Pleaser: Even my picky nephew cleans his plate, and he usually turns his nose up at anything “exotic.”
- Leftovers? Yes Please: Honestly, it’s even better the next day tucked into a wrap or over a salad.
Step-by-Step Instructions for Coconut Chicken
Master the technique for perfectly crispy, juicy coconut chicken with this proven method.
Step 1: Season and Prepare the Chicken
Cut the 1.5 lb boneless chicken breasts into 1-inch pieces. This uniform size ensures even cooking. Pat each piece dry with paper towels—this removes excess moisture so the coating adheres properly.
Season the chicken with 1 tsp salt, 0.5 tsp black pepper, 1 tsp garlic powder, and 1 tsp paprika. I rub the seasoning in thoroughly to ensure every bite is flavorful. This blend adds savory depth and a touch of warmth to balance the sweetness of the coconut.
Step 2: Create the Crispy Coating Layers
Set up a breading station with three shallow bowls. Place the 0.75 cup all-purpose flour in the first bowl. In the second, beat the 2 whole large eggs until smooth. For the third, mix the 2 cups shredded coconut and 1 cup panko breadcrumbs together.
Dredge each seasoned chicken piece in the flour, shaking off any excess. Then dip it into the beaten eggs, allowing any excess to drip off. Finally, press the chicken into the coconut-panko mixture, ensuring it’s fully coated on all sides. The panko adds extra crunch while the coconut delivers that signature tropical flavor.
Step 3: Fry to Golden Perfection
Heat 0.5 cup vegetable oil in a large, deep skillet over medium-high heat until it shimmers. To test the temperature, drop in a pinch of the coconut mixture—it should sizzle immediately. Carefully add the coated chicken pieces in a single layer, without overcrowding the pan.
Fry for 3-4 minutes per side until the coating is deep golden brown and the chicken reaches an internal temperature of 165°F. The coconut should look toasted and crispy. Use a slotted spoon to transfer the chicken to a paper towel-lined plate to drain excess oil.
Step 4: Prepare the Dipping Sauce
While the chicken fries, whisk together 0.5 cup sweet chili sauce and 2 tbsp lime juice in a small bowl. The lime juice brightens the sweetness of the chili sauce, creating a perfectly balanced dip.
Taste and adjust the flavors if needed—add a pinch more salt or a splash of lime for extra tang. This sauce pairs beautifully with the crispy, savory coconut chicken, tying together the tropical and savory elements of the dish.
Pro Tips For Making Coconut Chicken
- Pound the Chicken: I learned this the hard way—uneven breasts cook unevenly. Pound them to ½-inch thickness so every piece crisps up at the same rate.
- Toast the Coconut: Spread the shredded coconut on a baking sheet and toast at 350°F for 5 minutes before breading. The extra depth of flavor is worth the small effort.
- Double Dredge: After the flour, dip in egg, then back in flour before the final coconut-panko mix. This creates a thicker, crunchier crust that actually stays put.
- Rest Before Frying: Let the breaded chicken sit for 10 minutes before hitting the oil. Sounds weird, but it keeps the coating from sliding off in the pan.
Pro Cooking Tips for Perfect Results
Double Dredging Secret
For maximum crunch and coconut flavor, I use a double dredge technique. After the initial flour-egg-coconut coating, let the pieces rest for 5 minutes, then repeat the egg and coconut dredge. This builds up a thicker, crispier layer that holds up better during frying. 💡
Oil Temperature Control
Maintain oil between 350-375°F for perfect results. If it’s too cool, the coating absorbs oil and gets greasy. Too hot, and the coconut burns before the chicken cooks through. I use a candy thermometer clipped to the pan for precision.
Even Cooking Trick
Cut chicken pieces to uniform 1-inch cubes and pat them completely dry. This ensures even cooking and prevents the coating from sliding off. I also pound thicker pieces to ½-inch thickness for consistent results.
Rest Before Serving
Let fried pieces rest on a wire rack for 2-3 minutes after cooking. This allows excess oil to drip away while keeping the coating crisp. Serving immediately from the paper towels can make the bottoms soggy.
Coconut Toasting Tip
For extra golden color and nuttiness, toast the shredded coconut in a dry pan over medium heat for 2-3 minutes before mixing with panko. Watch closely—it burns quickly! This step intensifies the coconut flavor significantly.
Pan Selection
Use a heavy-bottomed pan like cast iron or enamel-coated Dutch oven for even heat distribution. These maintain consistent temperatures better than thin aluminum pans, preventing hot spots that could burn the coconut coating. 🔥
Nutrition Facts
Frequently Asked Questions
Can I bake instead of frying?
Yes! Bake at 400°F for 15-20 minutes, flipping halfway. Use a wire rack on a baking sheet for even crisping. The texture won’t be as crispy as frying, but it’s a healthier option.
Why did my coating fall off?
This usually happens if the chicken isn’t dry before dredging. Pat pieces thoroughly with paper towels first. Also, let the breaded chicken rest for 5 minutes before cooking to help the coating adhere.
What sauce pairs best?
Sweet chili sauce with lime juice is classic, but try mango chutney or honey mustard for variation. The sweetness complements the coconut beautifully while adding a tangy contrast.
Can I make this ahead?
Bread the chicken up to 4 hours ahead and refrigerate. Fry just before serving for best texture. Leftovers keep 3-4 days refrigerated but lose some crispness.

- Jollof Rice Sauce Recipe: West African Tomato and Spice Infusion - September 25, 2026
- Japanese Rice Soup Recipe: Umami-Rich Comfort in a Bowl - September 25, 2026
- Homemade Cream Of Rice Recipe: Silk-Smooth Breakfast in Minutes - September 25, 2026