
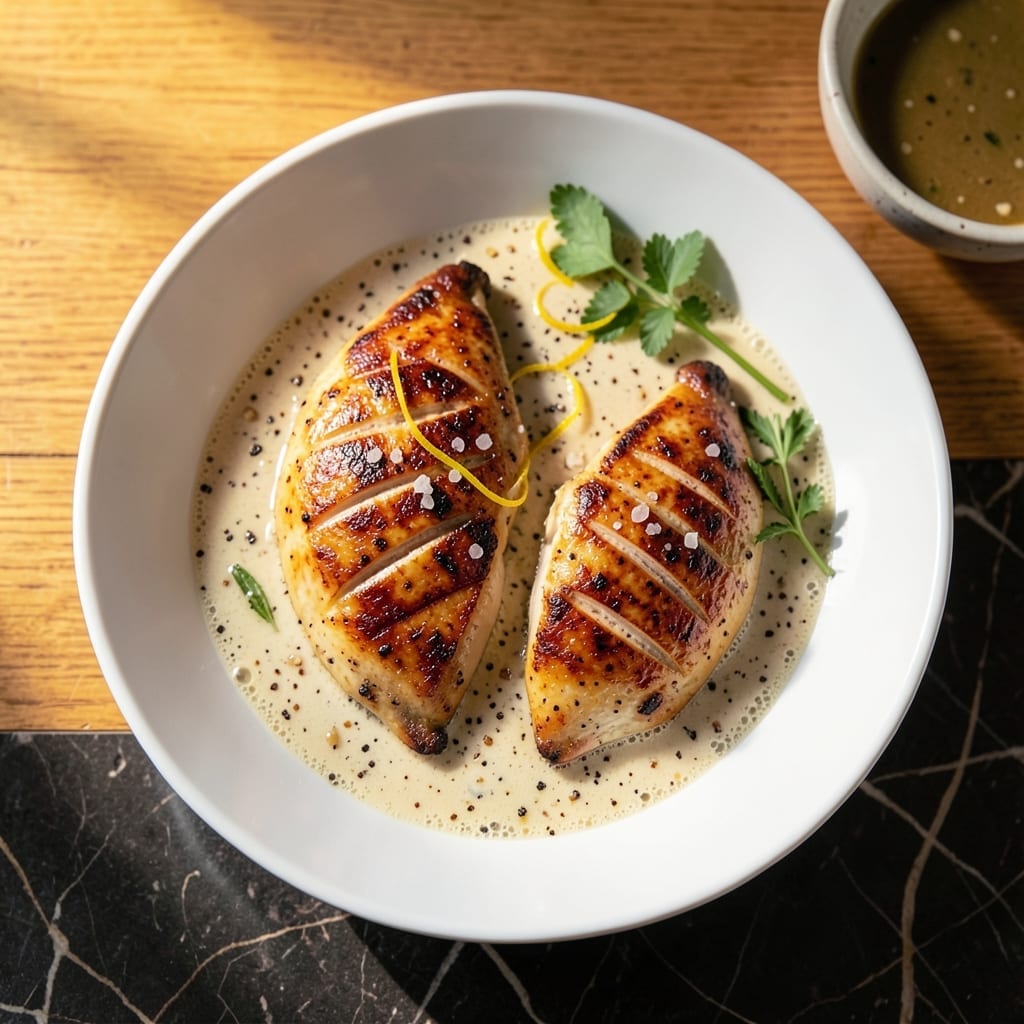
Buttermilk brining transforms ordinary chicken breast into juicy, flavorful perfection every time. This proven technique guarantees tender results without complicated steps or special equipment.
Soaking the chicken in a simple buttermilk mixture for 4 hours works magic on the texture. The acid in buttermilk breaks down proteins gently, ensuring the meat stays moist through cooking.
After brining, the seasoned chicken bakes at 400°F until golden and cooked through. The result is chicken breast with a golden crust and interior that stays succulent, never dry.
Serve this versatile protein with roasted vegetables or over fresh greens. The brining method works for grilling, baking, or pan-searing with equally impressive results.
Ingredients for Cook Chicken Breast
Simple ingredients elevate this chicken breast to juicy, tender perfection with minimal effort required.
| Ingredient | Amount | Notes |
|---|---|---|
| Boneless Skinless Chicken Breasts 🍗 | 1 ½ lb | Pounded to even thickness |
| Buttermilk 🥛 | 2 cups | Full-fat for best results |
| Kosher Salt 🧂 | 2 tbsp | Diamond Crystal preferred |
| Granulated Sugar 🍚 | 1 tbsp | Balances acidity in brine |
| Black Peppercorns 🌶️ | 1 tbsp | Freshly cracked for brine |
| Garlic Powder 🧄 | 1 tsp | For seasoning coating |
| Onion Powder 🧅 | 1 tsp | For seasoning coating |
| Smoked Paprika 🌶️ | 1 tsp | Adds depth to crust |
| Olive Oil 🫒 | 2 tbsp | For coating before baking |
| Dried Thyme 🌿 | 1 tsp | Optional for herb note |
| Dried Rosemary 🌿 | 1 tsp | Optional for herb note |
The chicken quality is paramount. Air-chilled, free-range breasts from Whole Foods or Costco yield superior texture and flavor compared to conventional options. Buttermilk should be full-fat—low-fat versions lack the richness needed for proper brining. For the salt, Diamond Crystal kosher salt dissolves more cleanly than table salt, preventing graininess in your brine.
No buttermilk? Mix 2 cups whole milk with 2 tbsp white vinegar and let sit for 10 minutes. Garlic and onion powder can be substituted with 1 tbsp each of fresh minced garlic and onion, though the flavor profile will differ slightly. For a spicier crust, replace smoked paprika with hot paprika or cayenne. The olive oil can be swapped for avocado oil if preferred.
Brine chicken for exactly 4 hours—longer can make the meat mushy. Store raw brined chicken in the fridge for up to 24 hours before cooking. Cooked chicken keeps for 3-4 days refrigerated or can be frozen for 2 months in airtight containers.
Why You’ll Love This Recipe
- Set It and Forget: I toss the chicken in buttermilk with salt, sugar, and crushed peppercorns the night before—next day, just cook.
- Tender Every Time: That buttermilk soak keeps the breast so juicy it’s ridiculous, with a subtle peppery kick.
- Meal Prep Hero: I make a double batch Sunday and we’re set for salads, wraps, and stir-fries all week.
- Budget Stretch: A few chicken breasts, a splash of buttermilk, and I’ve fed four for under ten bucks.
Step-by-Step Instructions for Buttermilk Brined Chicken Breast
This method guarantees juicy, flavorful chicken with a perfectly seasoned crust every time.
Step 1: Prepare the Buttermilk Brine
In a large bowl, whisk together the 2 cups buttermilk, 2 tbsp kosher salt, 1 tbsp granulated sugar, and 1 tbsp black peppercorns until the salt and sugar dissolve completely. The sugar balances the brine’s saltiness and helps the chicken retain moisture during cooking.
Place the 1.5 lb boneless skinless chicken breasts in the brine, ensuring they’re fully submerged. Cover and refrigerate for 4-12 hours—I find 8 hours optimal for flavor penetration without over-softening the texture. The buttermilk’s acidity tenderizes while the salt seasons deeply.
Step 2: Create the Seasoning Coating
In a shallow dish, combine the 1 tsp garlic powder, 1 tsp onion powder, 1 tsp smoked paprika, 1 tsp dried thyme, and 1 tsp dried rosemary. This aromatic blend will form the crust that locks in juices during cooking.
Remove the chicken from the brine and pat thoroughly dry with paper towels. This step is critical—excess moisture prevents the seasoning from adhering and inhibits browning. Coat each breast evenly with the spice mixture, pressing gently to ensure full coverage.
Step 3: Sear for Crust Development
Heat the 2 tbsp olive oil in a large oven-safe skillet over medium-high heat until shimmering but not smoking. Add the seasoned chicken breasts and sear for 3-4 minutes per side until golden brown and a crust forms.
Resist the urge to move the chicken prematurely. The crust develops when the meat releases naturally from the pan. You’ll see the edges turn opaque and the surface develop a deep, rich color as the spices toast.
Step 4: Finish in the Oven
Transfer the skillet to a preheated 375°F oven and bake for 12-15 minutes, or until the internal temperature reaches 165°F at the thickest part. The carryover heat will bring it to the perfect 170°F as it rests.
For even cooking, ensure the chicken breasts are pounded to uniform thickness before brining. This prevents the thinner ends from drying out while waiting for the thicker portions to cook through.
Step 5: Rest and Serve
Remove the chicken from the oven and transfer to a cutting board. Tent loosely with foil and let rest for 5-10 minutes. This allows the muscle fibers to relax and the juices to redistribute throughout the meat.
Slice against the grain for maximum tenderness. The result should be a moist interior with a well-seasoned, golden crust. Serve immediately while hot—the buttermilk brine ensures the chicken stays succulent even as it cools slightly during serving.
Pro Tips For Making Cook Chicken Breast
- Pound the Thickness: Use a rolling pin or heavy pan to pound the chicken breasts to an even ½-inch thickness—this guarantees they cook through at the same rate and stay juicy.
- Brine in Buttermilk: Soak the chicken in buttermilk for at least 4 hours (overnight is even better), as the acidity tenderizes the meat and the sugars help with browning.
- Skip the Boiling: I learned this the hard way—never boil the buttermilk marinade, or it’ll curdle and ruin the texture; keep it cold and use it straight from the fridge.
- Rest Before Slicing: Give the cooked chicken a solid 5-10 minutes under foil to redistribute the juices—cutting too soon sends all that moisture straight to the cutting board.
Wine and Beer Pairings for This Dish
Crisp White Wines
A Sauvignon Blanc from New Zealand cuts through the richness beautifully with its bright citrus notes. I love how the acidity balances the buttermilk’s tang. Cloudy Bay is my go-to for $20-25. 🍷
Light Red Options
Pinot Noir from Oregon offers gentle tannins that won’t overpower the chicken. Try Eyrie Vineyards for a $30 bottle with earthy notes that complement the smoked paprika. Serve slightly chilled for best results.
Wheat Beers
A German Hefeweizen with its banana and clove esters pairs surprisingly well. Weihenstephaner is widely available for $3-4 per bottle. The effervescence cleanses your palate between bites. 🍺
American Ales
For craft beer lovers, a blonde ale like Fireman’s 4 from Real Ale Brewing offers malt sweetness that matches the caramelized crust. Its 5.5% ABV won’t overwhelm the dish.
Rosé All Day
A dry Provence-style rosé brings red fruit notes without heavy tannins. Whispering Angel at $20 is my reliable choice. The crisp finish highlights the chicken’s juiciness. 🌟
Non-Alcoholic Pairing
For alcohol-free options, a sparkling apple cider like Martinelli’s Gold offers the same palate-cleansing bubbles. The natural sweetness balances the savory spices perfectly.
Nutrition Facts
Frequently Asked Questions
Can I use regular milk instead of buttermilk?
Yes! Mix 2 cups whole milk with 2 tbsp vinegar or lemon juice. Let it sit for 10 minutes to thicken before using. The acidity mimics buttermilk’s tenderizing effect.
How long should I brine the chicken?
For best results, brine for 4-12 hours. 8 hours is ideal for flavor without over-softening. Longer than 12 hours can make the texture mushy.
Why must the chicken rest after cooking?
Resting for 5-10 minutes lets juices redistribute. Slicing too soon causes them to spill out, leaving the meat dry. Patience ensures maximum tenderness.
Can I skip the searing step?
Searing creates a flavorful crust and golden color. Without it, the chicken may lack depth and visual appeal. For best texture, don’t skip this 3-4 minute step.

- Jollof Rice Sauce Recipe: West African Tomato and Spice Infusion - September 25, 2026
- Japanese Rice Soup Recipe: Umami-Rich Comfort in a Bowl - September 25, 2026
- Homemade Cream Of Rice Recipe: Silk-Smooth Breakfast in Minutes - September 25, 2026