
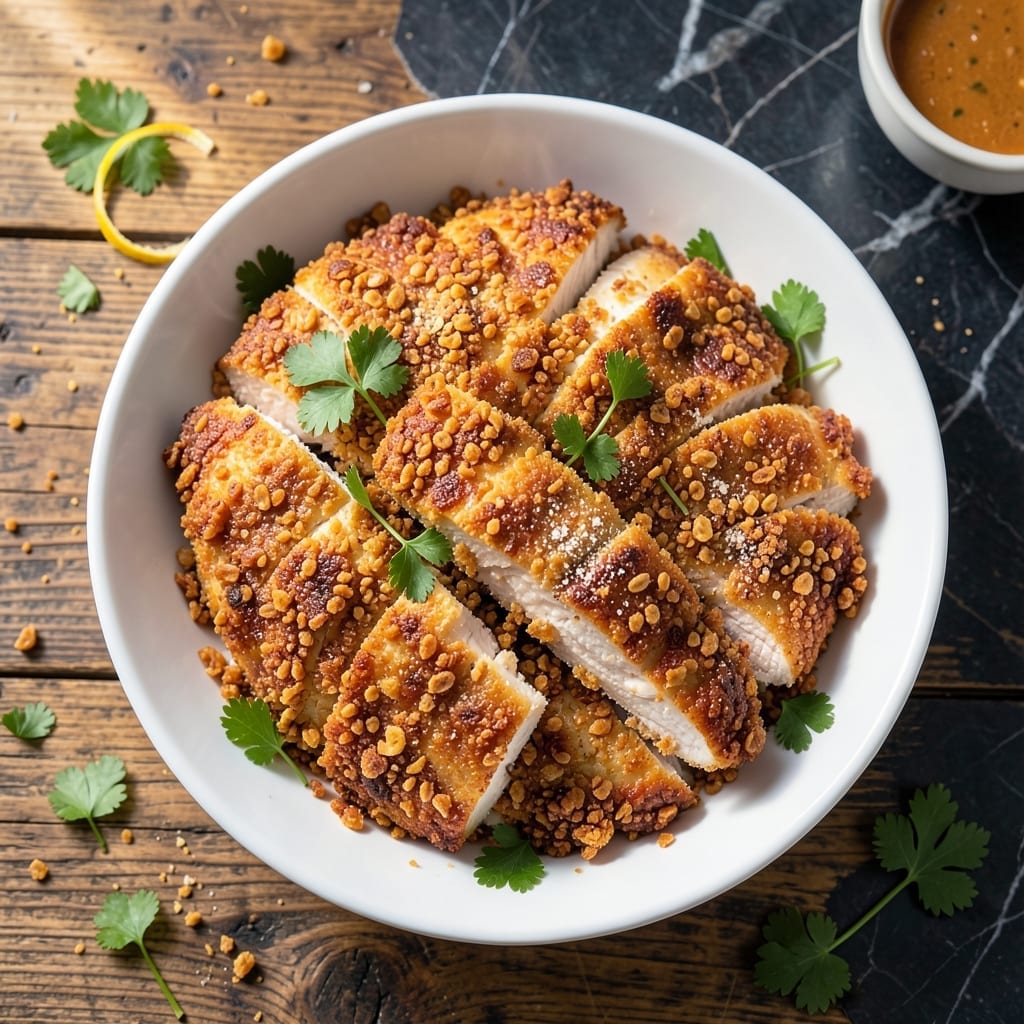
This cornflake-coated chicken delivers a crispy exterior that gives way to surprisingly juicy meat inside. The secret lies in the crushed cornflakes, which create a golden crust that stays crunchy long after baking.
I developed this method after years of experimenting with breading alternatives. The cornflakes provide texture without the density of traditional breadcrumbs, while a brief rest before cooking ensures the coating adheres perfectly.
Each bite offers shatteringly crispy edges and tender meat beneath. The contrast between the crunchy coating and moist chicken makes this dish irresistible, whether served hot from the oven or packed for lunch.
Simple ingredients and straightforward technique yield restaurant-quality results every time. The process takes less than an hour from start to finish.
Ingredients for Cornflake Chicken
Simple ingredients create that irresistible crispy exterior and juicy interior everyone loves.
| Ingredient | Amount | Notes |
|---|---|---|
| Boneless Skinless Chicken Breasts 🍗 | 1 ½ lb | Pounded to even thickness |
| Cornflakes 🥣 | 4 cups | Crushed to fine crumbs |
| All-Purpose Flour 🌾 | ½ cup | For initial dredging |
| Large Eggs 🥚 | 2 whole | Beaten for binding |
| Buttermilk 🥛 | ½ cup | For tenderizing chicken |
| Garlic Powder 🧄 | 1 tsp | For seasoning coating |
| Onion Powder 🧅 | 1 tsp | For depth of flavor |
| Paprika 🌶️ | 1 tsp | Sweet or smoked variety |
| Salt 🧂 | 1 tsp | Kosher or sea salt |
| Black Pepper 🌶️ | ½ tsp | Freshly ground preferred |
| Vegetable Oil 🫒 | 2 tbsp | For baking sheet prep |
| Unsalted Butter 🧈 | 2 tbsp | Melted, for coating |
The cornflakes are non-negotiable for texture. Kellogg’s original works best—avoid sugary varieties that burn. For the chicken, thighs can replace breasts if you prefer darker meat, but adjust cooking time. Whole Foods or Trader Joe’s carry quality buttermilk, but any grocery store brand suffices. The key is pounding the chicken to uniform thickness so it cooks evenly.
No buttermilk? Mix 1 tbsp vinegar or lemon juice into 1 cup milk and let sit 5 minutes. Skip the flour dredge if gluten is a concern—just use egg wash. For extra crunch, add 1/4 cup crushed cornflakes to the coating mix. The paprika can be swapped for cayenne if you want heat.
The coating stays crisp for 24 hours in the fridge. Freeze uncooked breaded chicken for up to 3 months (thaw before baking). Leftovers reheat best in a toaster oven to revive the crunch.
Why You’ll Love This Recipe
- One Bowl Wonder: I crush the cornflakes right in the bowl I’ll use for dredging—no extra dishes, no fuss.
- Crunch in Every Bite: That buttermilk-soaked chicken coated in crispy cornflakes gives you juicy meat with a satisfying snap.
- Feeds the Gang: I make a double batch for Sunday dinner and pack the leftovers for lunches all week.
- Pantry Staples: Between us, I always have cornflakes and flour on hand, so this is my go-to when the fridge looks sad.
Step-by-Step Instructions for Cornflake Chicken
This method ensures a perfectly crisp coating with juicy, tender chicken inside every time.
Step 1: Prepare and Season the Chicken
Begin by pounding the 1.5 lb boneless skinless chicken breasts to an even ½-inch thickness between two sheets of plastic wrap. This guarantees uniform cooking and prevents dry spots. Pat the pieces dry with paper towels to ensure the coating adheres properly.
Season both sides generously with 1 tsp salt, 0.5 tsp black pepper, 1 tsp garlic powder, 1 tsp onion powder, and 1 tsp paprika. The spices should form a visible layer—this is your flavor foundation for the crunchy exterior.
Step 2: Create the Breading Station
Set up three shallow bowls for dredging. In the first, combine the 0.5 cup all-purpose flour. In the second, whisk together the 2 whole large eggs and 0.5 cup buttermilk until smooth—this mixture acts as a tenderizing binder.
For the third bowl, pulse the 4 cups cornflakes in a food processor until they resemble fine breadcrumbs with some slightly larger pieces for texture. The varying sizes will create an extra-crispy, uneven coating that stays put during cooking.
Step 3: Coat the Chicken Thoroughly
Dredge each seasoned chicken breast in the flour, shaking off any excess. Then dip it into the egg-buttermilk mixture, allowing any excess to drip off for 5 seconds. Finally, press the piece firmly into the crushed cornflakes, turning to coat all sides completely. The coating should look thick and uneven—this is what creates that signature crunch.
Place the breaded chicken on a wire rack set over a baking sheet. This elevation allows air to circulate underneath, preventing the coating from becoming soggy. Let the pieces rest for 10 minutes to help the coating set before cooking.
Step 4: Bake to Golden Perfection
Preheat your oven to 400°F. Line a baking sheet with parchment paper and drizzle with 2 tbsp vegetable oil, spreading it evenly to prevent sticking. Arrange the chicken pieces on the sheet, leaving space between them for even air circulation.
Drizzle the 2 tbsp unsalted butter evenly over the chicken—this adds richness and promotes browning. Bake for 20-25 minutes, flipping halfway through, until the coating is deep golden brown and the internal temperature reaches 165°F.
The coating should be crisp to the touch and the chicken should feel firm when pressed. If any spots need more color, broil for 1-2 minutes while watching closely to avoid burning.
Pro Tips For Making Cornflake Chicken
- Crush Cornflakes Fine: Pulse them in a food processor or seal in a bag and roll with a pin—smaller crumbs stick better and give that even, crispy coating. I learned this the hard way after picking chunks of cereal off half my chicken.
- Buttermilk Soak First: Let the chicken soak in buttermilk for at least 30 minutes before dredging. It tenderizes the meat and helps the flour and cornflakes cling like glue.
- Double Dip the Chicken: After the flour, dip in egg, then back in flour, then egg again, and finally the cornflakes. It sounds like overkill, but this is what gives it that thick, crunchy crust that doesn’t fall off.
- Use a Wire Rack: Place the chicken on a wire rack over a baking sheet, not directly on the pan. This lets air circulate underneath so the coating crisps all the way around instead of steaming into a soggy mess.
Serving Suggestions for This Recipe
Family-Style Platter
Arrange the crispy chicken on a large wooden board with lemon wedges and fresh parsley for a rustic presentation. The bright citrus and herbs cut through the richness and add a pop of color. I love how this makes the dish feel special yet approachable. 💛
Dipping Sauces
Offer 3-4 sauce options in small bowls: honey mustard, ranch, and spicy mayo are my go-tos. The sweetness of honey mustard complements the savory coating beautifully, while ranch adds a cool contrast. For heat lovers, mix 1 tbsp sriracha into ¼ cup mayo.
Classic Sides
Serve with creamy mashed potatoes and steamed green beans for a comforting meal. The soft potatoes let the crispy chicken shine, while the beans add freshness. I use Yukon Gold potatoes for their buttery texture.
Lighter Options
A crisp green salad with balsamic vinaigrette balances the dish’s richness. Toss mixed greens with cherry tomatoes and cucumber slices for crunch. The acidity in the dressing brightens each bite of chicken.
Kid-Friendly Twist
Cut the chicken into 1-inch strips for easy dipping. Pair with carrot sticks and celery for a fun, interactive meal. My kids love building their own bites with different sauces.
Picnic Perfect
Pack the chicken in a bamboo bento box with corn on the cob and watermelon slices for a summer outing. The coating stays crisp for hours, making it ideal for al fresco dining. 🌟
Nutrition Facts
Frequently Asked Questions
Can I use crushed cornflakes directly from the box?
For best results, pulse them in a food processor first. This creates a mix of fine crumbs and slightly larger pieces for extra crunch. Hand-crushing works but may leave uneven chunks.
Why does the chicken need to rest after coating?
The 10 minutes rest helps the coating adhere better and prevents it from sliding off during cooking. This step ensures crispier results.
How do I keep the coating crispy when reheating?
Use a toaster oven or air fryer at 375°F for 5-8 minutes. Avoid microwaving, as it makes the coating soggy.
Can I substitute buttermilk?
Mix 1 tbsp vinegar or lemon juice into 1 cup milk and let sit for 5 minutes. This works as a perfect substitute.

- Jollof Rice Sauce Recipe: West African Tomato and Spice Infusion - September 25, 2026
- Japanese Rice Soup Recipe: Umami-Rich Comfort in a Bowl - September 25, 2026
- Homemade Cream Of Rice Recipe: Silk-Smooth Breakfast in Minutes - September 25, 2026