
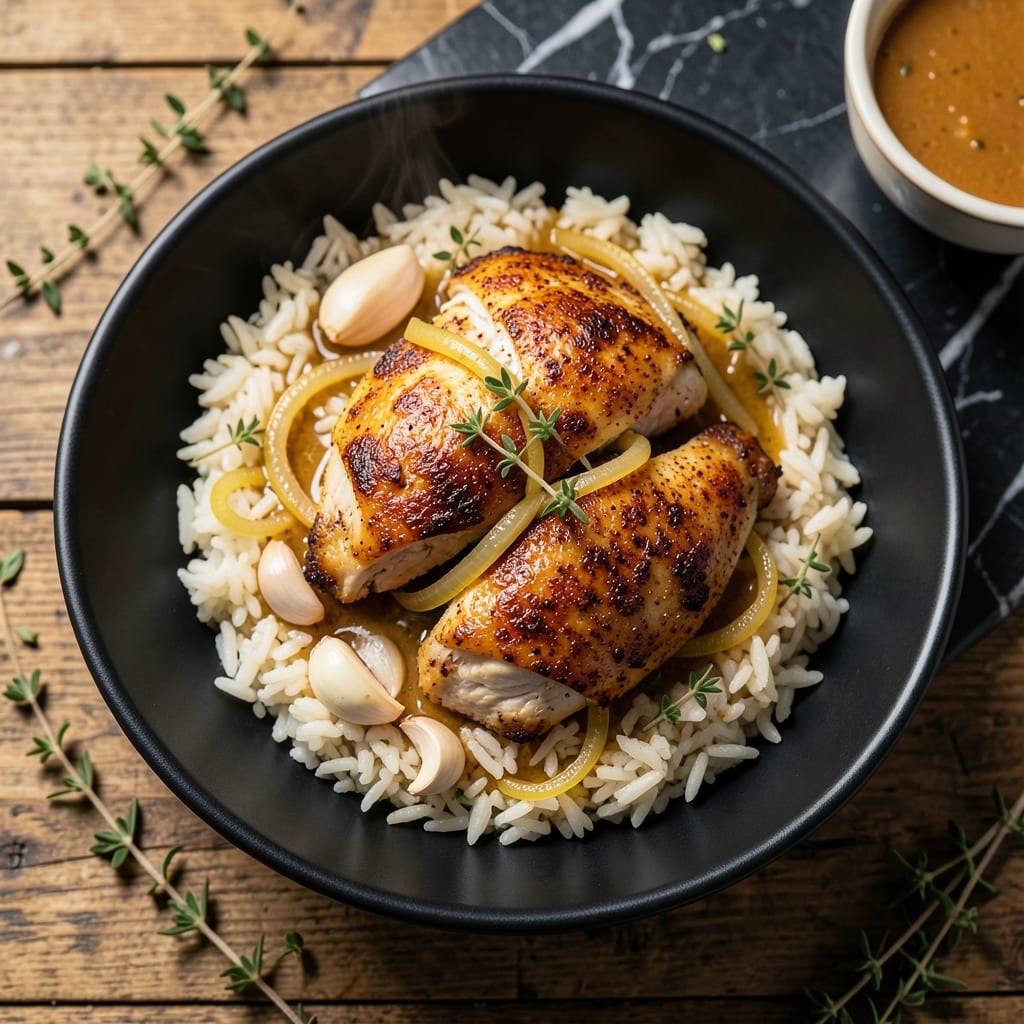
This recipe recreates that signature rotisserie chicken taste with perfectly seasoned rice. I’ve tested multiple methods to match Costco’s flavor profile without shortcuts.
The chicken stays juicy while the rice absorbs all the savory, herby notes. It’s a foolproof way to bring that deli favorite to your kitchen.
Ingredients for Costco Chicken and Rice
Recreate that deli favorite with juicy chicken and perfectly seasoned rice at home.
| Ingredient | Amount | Notes |
|---|---|---|
| Whole Chicken 🍗 | 3 lb | Cut into 8 pieces, skin-on |
| Long-Grain White Rice 🍚 | 2 cups | Uncooked, rinsed thoroughly |
| Chicken Broth 🥣 | 3 cups | Low-sodium preferred for control |
| Garlic Cloves 🧄 | 6 cloves | Minced for maximum flavor infusion |
| Yellow Onion 🧅 | 1 whole | Finely diced for even distribution |
| Dried Thyme 🌿 | 1 tsp | Rubbed between fingers to release oils |
| Dried Rosemary 🍃 | 1 tsp | Crushed lightly before adding |
| Paprika 🌶️ | 1 tbsp | Sweet or smoked variety |
| Onion Powder 🧅 | 1 tsp | Enhances savory depth |
| Garlic Powder 🧄 | 1 tsp | Doubles down on garlic flavor |
| Kosher Salt 🧂 | 1 ½ tsp | Diamond Crystal preferred for texture |
| Freshly Ground Black Pepper 🌶️ | 1 tsp | Coarsely ground for texture |
| Olive Oil 🫒 | 2 tbsp | Extra-virgin for richness |
| Bay Leaves 🌿 | 2 whole | Removed before serving |
The chicken is the foundation here. Costco’s rotisserie uses a specific spice blend, but we’re replicating it with paprika, thyme, and rosemary—easy to find at any grocery store. For the best texture, use bone-in, skin-on pieces (thighs and drumsticks work great). If you’re short on time, pre-cut chicken from the butcher section saves a step, but whole chickens are usually cheaper per pound.
No fresh herbs? Dried work perfectly fine—just use the amounts listed. Swapping the rice? Basmati or jasmine can work, but long-grain white absorbs the broth best for that signature Costco texture. Out of chicken broth? Water plus bouillon cubes (or Better Than Bouillon paste) gets you close. The onion and garlic are non-negotiable for the base flavor, but you can use shallots instead of yellow onions if that’s what you’ve got.
Leftovers keep beautifully—chicken stays tender, rice soaks up more flavor. Store in an airtight container for 4-5 days in the fridge, or freeze for up to 3 months. Reheat gently to avoid drying out the chicken (the microwave works, but a skillet with a splash of water is even better).
Why You’ll Love This Recipe
- One Pot Wonder: I toss everything in a single pot—chicken, rice, broth, garlic—then let it simmer. No fancy techniques, just set it and forget it.
- Garlic-Infused Comfort: The garlic and onion cook right with the chicken, so every bite of rice soaks up that rich, savory goodness. It’s the kind of flavor that lingers.
- Meal Prep Hero: This makes enough for three nights of dinners. I portion it out and reheat with a splash of broth to keep it moist.
- Budget Stretcher: A whole chicken and pantry staples feed my family for days. Honestly, it’s cheaper than takeout and twice as satisfying.
Step-by-Step Instructions for Chicken and Rice
Here’s the method. Straightforward, tested, works every time.
Step 1: Season and Brown the Chicken Pieces
Pat the 3 lb Whole Chicken pieces completely dry with paper towels. In a small bowl, combine the 1 tbsp Paprika, 1 tsp Onion Powder, 1 tsp Garlic Powder, 1.5 tsp Kosher Salt, and 1 tsp Freshly Ground Black Pepper. Rub this mixture evenly over all the chicken pieces, pressing it into the skin for maximum adhesion.
Heat the 2 tbsp Olive Oil in a large Dutch oven over medium-high heat until shimmering. Working in batches if necessary to avoid crowding, add the chicken pieces skin-side down. Cook undisturbed for 5-7 minutes until the skin is deep golden brown and crispy. Flip and cook for another 3-4 minutes until the other side is lightly browned. Transfer to a plate and set aside.
Step 2: Sauté the Aromatics
In the same Dutch oven, reduce heat to medium. Add the 1 whole Yellow Onion and cook for 3-4 minutes until softened and translucent. Stir in the minced 6 cloves Garlic Cloves and cook for 30 seconds until fragrant—don’t let it brown, or it will turn bitter.
Add the 1 tsp Dried Thyme (rubbed between your fingers) and 1 tsp Dried Rosemary (lightly crushed) to the pot, stirring to coat the onions and garlic. Cook for another 1 minute to bloom the spices and deepen their flavors. This builds the aromatic foundation that gives the dish its signature depth.
Step 3: Toast the Rice and Deglaze
Add the 2 cups Long-Grain White Rice to the pot and stir to coat it in the oil and aromatics. Toast for 2-3 minutes, stirring frequently, until the rice becomes slightly translucent at the edges and smells nutty. This step enhances the rice’s natural flavor and prevents it from becoming mushy.
Pour in ½ cup of the 3 cups Chicken Broth to deglaze the pot, scraping up any browned bits from the bottom with a wooden spoon. These bits, known as fond, are packed with flavor and will enrich your dish. Add the remaining broth, the 2 whole Bay Leaves, and return the chicken pieces to the pot, nestling them into the rice.
Step 4: Simmer Until Tender and Fluffy
Bring the mixture to a boil, then reduce heat to low, cover, and let it simmer for 25-30 minutes. Avoid lifting the lid during this time, as the steam is crucial for cooking the rice evenly. You’ll know it’s done when the rice is tender and has absorbed all the liquid, and the chicken reaches an internal temperature of 165°F.
Once done, remove the pot from heat and let it sit covered for 10 minutes. This resting period allows the rice to steam and the chicken to reabsorb some of its juices. Discard the bay leaves before serving—leaving them in could pose a choking hazard and their flavor has already infused the dish.
Pro Tips For Making Costco Chicken And Rice
- Brown the Chicken Well: I learned this the hard way—if the skin doesn’t turn deep golden brown before adding liquid, the rice will taste bland. Use medium-high heat and don’t rush it, even if it takes 8-10 minutes per side.
- Toast the Rice First: After removing the chicken, toss the rice in the same pot with the onion and garlic for 2-3 minutes until slightly nutty. This adds a layer of flavor that plain broth can’t.
- Use Homemade Broth: Sounds weird, but it works: simmer the chicken carcass with extra onion and garlic while the rice cooks to make a quick broth. Store-bought works, but homemade tastes richer in this dish.
- Rest Before Serving: Give the chicken and rice a solid 10 minutes off the heat, covered, before serving. I skip this when I’m lazy, but the dish is noticeably better when I don’t—juices redistribute and rice absorbs the last bit of flavor.
Serving Suggestions for This costco chicken and rice
Family-Style Serving
Serve this dish directly from the Dutch oven for a cozy, communal feel. I love how the chicken nestled in rice looks rustic yet restaurant-worthy. Use a large wooden spoon to portion out the chicken with its bed of rice. 💛
Garnish for Freshness
A sprinkle of chopped parsley or green onions adds a pop of color and freshness. I keep a small bowl of lemon wedges on the side for guests who want a bright, citrusy touch to balance the richness.
Side Pairings
A simple green salad with a light vinaigrette complements the hearty meal perfectly. For something warm, roasted broccoli or green beans tossed with garlic and a pinch of red pepper flakes add texture and a hint of spice.
Bread for Soaking Up Flavor
Warm crusty bread or dinner rolls are a must. They’re perfect for soaking up any extra juices and sauce from the bottom of the pot. I often serve this with a basket of sourdough slices.
Plating for Elegance
For a more refined presentation, arrange the chicken pieces on top of a mound of rice on individual plates. Drizzle any pan juices over the top and garnish with fresh herbs. This turns a simple dish into an impressive meal. ✨
Nutrition Facts
Frequently Asked Questions
Can I use boneless chicken for this?
Yes, but bone-in gives better flavor and stays juicier. If using boneless, reduce cooking time to 20-22 minutes to prevent drying out.
What if my rice is still undercooked?
Add ¼ cup hot broth, cover, and simmer for another 5-7 minutes. Avoid stirring to prevent mushiness.
Can I make this in a slow cooker?
Brown chicken first, then transfer to a slow cooker with all ingredients. Cook on low for 4-5 hours or high for 2-3 hours.
How do I store leftovers safely?
Cool completely, then refrigerate in an airtight container for up to 4 days. Freeze for longer storage.

- Jollof Rice Sauce Recipe: West African Tomato and Spice Infusion - September 25, 2026
- Japanese Rice Soup Recipe: Umami-Rich Comfort in a Bowl - September 25, 2026
- Homemade Cream Of Rice Recipe: Silk-Smooth Breakfast in Minutes - September 25, 2026