
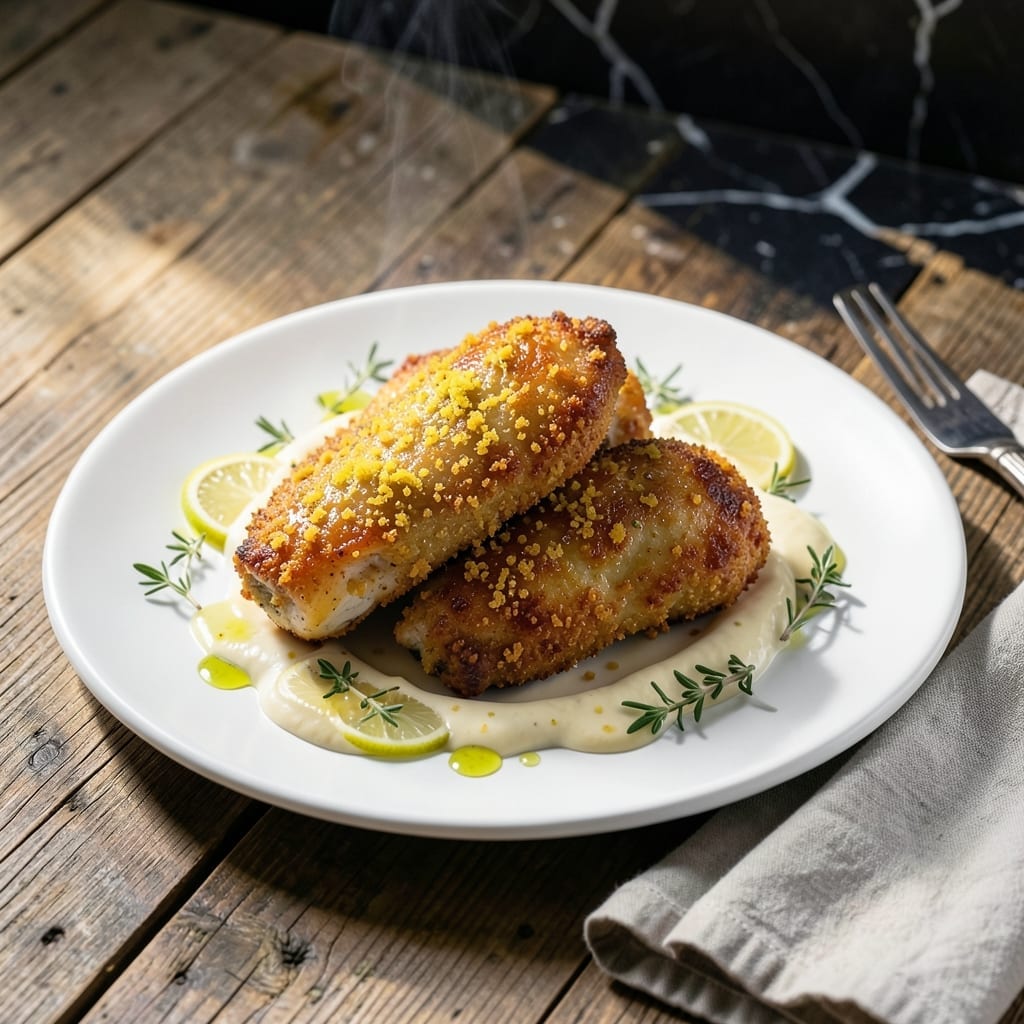
This recipe delivers a crispy, herb-infused chicken with bright lemon flavor that’s impossible to resist. The secret lies in a double-coating technique that creates a shatteringly crispy exterior while keeping the meat juicy inside.
I developed this method after testing countless variations to achieve the perfect balance of texture and zesty flavor. The lemon doesn’t just add tang—it transforms the coating into something addictive with each bite.
What sets this apart is the crispy crust that stays intact even after baking. The herbs and citrus create a flavor combination that’s both bold and balanced, making it a standout dish for any meal.
Serve with fresh greens or roasted vegetables to complement the vibrant flavors. This dish proves that simple ingredients can create extraordinary results.
Ingredients for Crack Lemon Chicken
These carefully selected ingredients create that addictive crispy, zesty chicken everyone craves.
| Ingredient | Amount | Notes |
|---|---|---|
| Chicken Thighs 🍗 | 2 lb | Boneless, skinless, patted dry |
| All-Purpose Flour 🌾 | 1 ½ cups | For initial dredging layer |
| Large Eggs 🥚 | 2 whole | Beaten for binding coating |
| Panko Breadcrumbs 🍞 | 2 cups | For ultra-crispy texture |
| Grated Parmesan Cheese 🧀 | ¾ cup | Freshly grated preferred |
| Lemon Zest 🍋 | 2 tbsp | From 3-4 large lemons |
| Fresh Lemon Juice 🍋 | ¼ cup | About 3-4 lemons juiced |
| Dried Oregano 🌿 | 2 tsp | Mediterranean variety preferred |
| Dried Thyme 🍃 | 2 tsp | Crushed between fingers |
| Garlic Powder 🧄 | 1 tbsp | Not garlic salt |
| Onion Powder 🧅 | 1 tbsp | Fresh ground preferred |
| Kosher Salt 🧂 | 1 ½ tsp | Diamond Crystal brand preferred |
| Ground Black Pepper 🌶️ | 1 tsp | Freshly ground for best flavor |
| Fresh Parsley 🌿 | ¼ cup | Chopped, for garnish |
| Vegetable Oil 🫒 | ½ cup | For frying, high smoke point |
The chicken thighs are non-negotiable here—boneless, skinless ensures even cooking and maximum crispiness. Costco sells them in perfect family-size packages. For the Panko, Kikkoman or Progresso brands deliver consistent texture. The Parmesan must be freshly grated; pre-shredded contains anti-caking agents that prevent proper melting. Always zest your lemons before juicing—organic lemons have thicker, more fragrant peels.
No Panko? Crush stale sourdough into coarse crumbs for similar crunch. Fresh out of lemons? Lime zest and juice work in a pinch (though flavor differs). Dried parsley at one-third the amount can replace fresh. For gluten-free, swap the flour for cornstarch—it creates an even crispier crust. The eggs bind the coating; buttermilk at equal volume works if that’s what you have.
Prep the chicken just before cooking—24 hours max in the fridge if absolutely necessary. Store leftovers in a single layer to preserve crispiness, then reheat in a 400°F oven for 10 minutes. The coating keeps its crunch for 2-3 days in the fridge, though it’s best fresh.
Why You’ll Love This Recipe
- One Pan Wonder: I love that this comes together with just a bowl for dredging and a sheet pan—no fancy equipment.
- That Parmesan Crunch: The panko and Parmesan create a golden crust that’s crispy outside, juicy inside. Honestly, it’s the reason I make this weekly.
- Weeknight MVP: It’s my go-to for busy evenings when I need something reliable and fast. (Yes, even on a Tuesday night)
- Budget-Friendly Feast: Chicken thighs stay affordable, and a little Parmesan goes a long way for maximum flavor without breaking the bank.
Step-by-Step Instructions for Crack Lemon Chicken
Master this technique for perfectly crisp, herb-infused chicken with bright citrus notes.
Step 1: Season and Dredge the Chicken
Pat the 2 lb chicken thighs thoroughly dry with paper towels—this is essential for achieving maximum crispiness. Season both sides evenly with the 1.5 tsp kosher salt, 1 tsp ground black pepper, 1 tbsp garlic powder, 1 tbsp onion powder, 2 tsp dried oregano, and 2 tsp dried thyme. I crush the dried herbs between my fingers to release their aromatic oils.
Dredge each piece in the 1.5 cups all-purpose flour, pressing gently to ensure full coverage. Shake off any excess—you want a thin, even layer that will adhere to the chicken and create a crisp foundation for the next coating.
Step 2: Create the Egg Wash and Breadcrumb Mixture
In a shallow bowl, beat the 2 whole large eggs until uniform. In a separate wide bowl, combine the 2 cups panko breadcrumbs, 0.75 cup grated parmesan cheese, 2 tbsp lemon zest, and the remaining seasoning blend from the chicken dredging. The lemon zest adds a vibrant citrus aroma that will infuse every bite.
Mix the breadcrumb combination thoroughly to distribute the cheese and zest evenly. The panko’s coarse texture will create that signature ultra-crispy crust, while the parmesan adds a rich, savory depth to complement the bright lemon notes.
Step 3: Bread and Rest the Chicken
Dip each floured chicken thigh into the beaten eggs, allowing any excess to drip off. Then press firmly into the panko mixture, turning to coat all sides completely. I use one hand for the egg wash and the other for the breadcrumbs to keep things tidy and efficient.
Place the breaded thighs on a wire rack set over a baking sheet. This allows air circulation underneath, preventing the coating from becoming soggy. Let the chicken rest for 10 minutes—this helps the coating adhere better and prevents it from sliding off during frying.
Step 4: Fry to Golden Perfection
Heat the 0.5 cup vegetable oil in a large, heavy skillet over medium-high heat until shimmering but not smoking (about 350°F). Working in batches to avoid crowding, carefully place the breaded chicken in the hot oil. Fry for 4-5 minutes per side until the coating is deep golden brown and crisp.
The chicken is done when it reaches an internal temperature of 165°F and the juices run clear. Don’t flip too soon—the coating should release easily from the pan when properly crisped. Use a spider or slotted spoon to transfer the fried chicken to a paper towel-lined plate to drain excess oil.
Step 5: Finish with Lemon Juice and Garnish
While the chicken is still hot, drizzle evenly with the 0.25 cup fresh lemon juice. The acidity cuts through the richness of the fried coating and brightens all the flavors. Let the chicken rest for 2 minutes to allow the lemon juice to absorb slightly into the crispy crust.
Garnish with the 0.25 cup fresh parsley just before serving. The parsley adds a fresh, herbal note that complements the lemon and herbs in the breading. Serve immediately while the coating is at its crispiest—the contrast of textures is what makes this dish truly special.
Pro Tips For Making Crack Lemon Chicken
- Preheat the Oil: I learned this the hard way—get that oil smoking hot (about 350°F) before adding the breaded thighs, or the panko will soak up oil instead of crisping into that crackly crust.
- Dry the Thighs: Pat the chicken thighs bone-dry with paper towels before dredging—any moisture left on the skin is the enemy of that golden, shatteringly crisp coating.
- Press Hard on Crumbs: After dipping in egg, really press the panko-parmesan mix into the chicken so it clings tightly; I skip this when I’m lazy, but the crust stays put way better when I don’t.
- Rest Before Serving: Give the chicken a solid 5 minutes on a wire rack after frying—it keeps the crust from turning soggy under the lemon sauce while the juices redistribute.
Creative Variations of This crack lemon chicken
Spicy Sriracha Twist
Add 1 tbsp sriracha to the egg wash for a spicy kick that pairs beautifully with the lemon’s brightness. The heat builds gradually, making each bite more exciting than the last. I also add ½ tsp cayenne to the breadcrumb mix for extra warmth. 🌶️
Honey Lemon Glaze
Replace the lemon juice drizzle with a mixture of ¼ cup honey and 2 tbsp lemon juice warmed together. This creates a sweet-tart glaze that caramelizes slightly on the crispy coating. The contrast between sweet and savory is absolutely addictive.
Garlic Parmesan Style
Boost the parmesan to 1 full cup and add 1 tbsp garlic powder extra to the breading. Finish with a sprinkle of garlic salt right after frying. This version reminds me of my favorite restaurant’s garlic parmesan wings, but with that signature lemon zing.
Air Fryer Method
Spray breaded thighs lightly with oil and air fry at 375°F for 12-14 minutes, flipping halfway. The results are nearly as crispy as pan-frying with less oil. I find the texture works best with 1 lb batches to avoid overcrowding. 💡
Herb Swap Options
Replace the oregano and thyme with 2 tsp dried rosemary and 2 tsp dried basil for a more floral profile. Or try 1 tbsp Cajun seasoning in the flour for a zesty Southern twist. Each variation brings a completely different personality to the dish.
Lighter Baked Version
Arrange breaded thighs on a wire rack over a baking sheet. Bake at 400°F for 20-25 minutes, flipping once. Mist with oil before baking for extra crispiness. While not as shatteringly crisp as frying, it’s still delicious with 60% less oil.
Nutrition Facts
Frequently Asked Questions
Can I use chicken breasts instead of thighs?
Yes, but adjust the cooking time. Breasts cook faster—reduce frying to 3-4 minutes per side and check for 165°F internal temperature. Thighs stay juicier, though.
How do I keep the coating crispy when reheating?
Reheat in a 400°F oven for 10 minutes on a wire rack. Microwaves make it soggy. For extra crunch, spritz lightly with oil before reheating.
Can I make this ahead of time?
Bread the chicken up to 24 hours ahead and refrigerate uncovered. Fry just before serving for maximum crispiness.

- Jollof Rice Sauce Recipe: West African Tomato and Spice Infusion - September 25, 2026
- Japanese Rice Soup Recipe: Umami-Rich Comfort in a Bowl - September 25, 2026
- Homemade Cream Of Rice Recipe: Silk-Smooth Breakfast in Minutes - September 25, 2026