
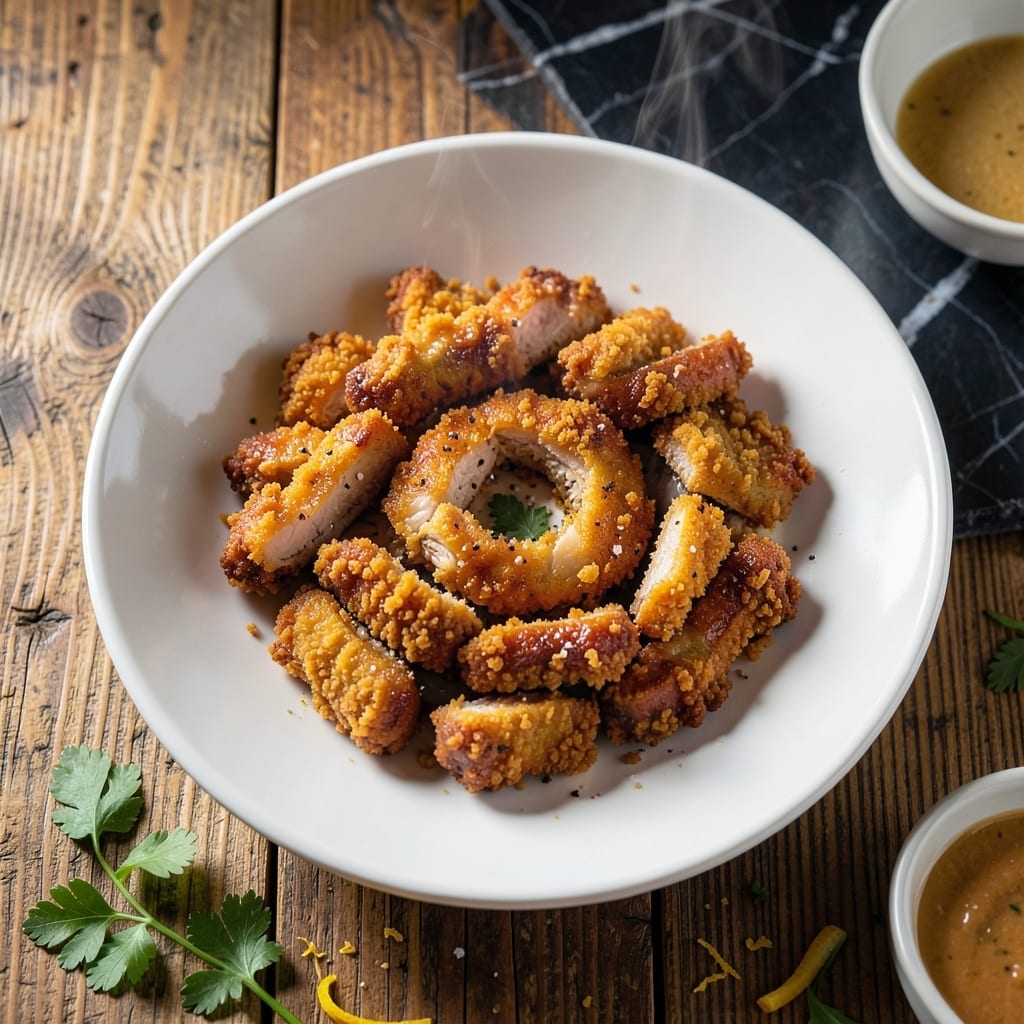
This batter transforms ordinary chicken into a crispy, golden masterpiece every time. I developed this method after years of testing to achieve a coating that stays shatteringly crispy long after frying.
The secret lies in a double-dredging technique combined with the right flour ratio. Cornstarch creates micro-crispness while baking powder adds lift. Resting the coated chicken for 15 minutes before frying ensures the batter adheres perfectly.
You’ll end up with chicken that’s crispy outside and juicy inside, with a coating that doesn’t fall off when bitten. The texture holds up even when served with sauces or gravies.
Fry at 350°F until golden brown, then drain on a rack to maintain that crispy texture. This technique works for tenders, wings, or whole pieces.
Ingredients for Crunchy Chicken Batter
These precise ingredients create a shatteringly crispy coating that adheres perfectly to every piece.
| Ingredient | Amount | Notes |
|---|---|---|
| Chicken Thighs 🍗 | 2 lb | Boneless, skinless, cut into strips |
| All-Purpose Flour 🌾 | 2 cups | Divided for double-dredging |
| Cornstarch 🌾 | ½ cup | Creates micro-crispness |
| Baking Powder 🧂 | 2 tsp | Adds lift to batter |
| Salt 🧂 | 2 tsp | Diamond Crystal kosher preferred |
| Black Pepper 🌶️ | 1 tsp | Freshly ground for best flavor |
| Garlic Powder 🧄 | 1 tsp | Enhances savory depth |
| Onion Powder 🧅 | 1 tsp | Balances seasoning profile |
| Paprika 🌶️ | 1 tsp | Sweet or smoked variety |
| Buttermilk 🥛 | 1 ½ cups | Full-fat for richness |
| Hot Sauce 🌶️ | 2 tbsp | Optional for tangy kick |
| Vegetable Oil 🫒 | 4 cups | For frying, high smoke point |
The flour-to-cornstarch ratio is critical here. King Arthur Flour for the all-purpose and Bob’s Red Mill for cornstarch deliver consistent results. Use Diamond Crystal kosher salt—its coarse texture dissolves evenly in the batter. Buttermilk from a local dairy (or even Whole Foods organic) adds the necessary acidity for tenderness. Baking powder must be fresh—check the expiration date as old leaveners lose potency.
No buttermilk? Whole milk plus 1 tbsp vinegar per cup works in a pinch. Swap cornstarch for arrowroot powder at a 1:1 ratio if needed. For gluten-free, use a 1:1 gluten-free flour blend, but add an extra 2 tbsp cornstarch for crispness. The hot sauce can be omitted or replaced with 1 tsp cayenne for heat without liquid. Chicken breasts can substitute for thighs, but dark meat stays juicier.
Fry in batches to avoid crowding—this maintains oil temperature for optimal crispness. Drain on a wire rack, not paper towels, to prevent sogginess. Coated chicken can rest in the fridge for up to 2 hours before frying. Leftovers reheat best in a 400°F oven for 10-12 minutes to revive the crunch.
Why You’ll Love This Recipe
- One Bowl Wonder: I just dump flour, cornstarch, baking powder, and salt in a bowl—no fancy prep, no mess.
- That Crunch Though: The cornstarch and baking powder team up for a shatteringly crisp coating that stays crunchy even after sitting.
- Weeknight Hero: Honestly, it’s my go-to for quick dinners, picnics, or when I need to feed a hangry crowd fast.
- Stretches Far: A bag of thighs and pantry staples make this absurdly budget-friendly, with leftovers that reheat surprisingly well.
Step-by-Step Instructions for Crunchy Chicken Batter
Master this technique for an ultra-crispy coating that remains crunchy long after frying.
Step 1: Season and Prepare the Chicken
Begin by patting the 2 lb Chicken Thighs completely dry with paper towels. Moisture is the enemy of crispiness, so ensure every piece is thoroughly dried. Cut them into uniform 1-inch thick strips for even cooking.
Season both sides generously with 2 tsp Salt, 1 tsp Black Pepper, 1 tsp Garlic Powder, 1 tsp Onion Powder, and 1 tsp Paprika. This layer of seasoning ensures flavor penetrates the meat, not just the coating.
Step 2: Create the Crispy Batter
In a large bowl, whisk together 1.5 cups Buttermilk and 2 tbsp Hot Sauce until fully combined. The acidity in the buttermilk tenderizes the meat while the hot sauce adds a subtle tang. In a separate bowl, combine 2 cups All-Purpose Flour, 0.5 cup Cornstarch, and 2 tsp Baking Powder.
The cornstarch is the secret to micro-crispness, while the baking powder adds lift to the batter, creating an airy, shatteringly crisp texture. Whisk these dry ingredients thoroughly to distribute the leavening agent evenly.
Step 3: Double-Dredge for Maximum Crunch
Dip each seasoned chicken strip into the buttermilk mixture, ensuring it is fully coated. Let any excess drip off for a moment, then transfer it to the flour mixture. Press the chicken into the flour, turning to coat completely. Shake off the excess, then return the piece to the buttermilk for a second dip.
Dredge it once more in the flour mixture, pressing firmly this time to create a thick, craggy coating. This double-dredging technique builds layers that will puff and crisp beautifully during frying. Place the coated pieces on a wire rack and let them rest for 10 minutes to set the batter.
Step 4: Fry to Golden Perfection
Heat 4 cups Vegetable Oil in a deep, heavy-bottomed pot to 350°F. Use a thermometer to monitor the temperature—this is critical for achieving the ideal crisp without burning the coating. The oil should be deep enough to submerge the chicken pieces completely.
Carefully lower a few pieces into the oil, being careful not to overcrowd the pot. Fry for 6-8 minutes until the coating is a deep golden brown and the internal temperature of the chicken reaches 165°F. Maintain the oil temperature between 325-350°F throughout frying; if it drops too low, the coating will absorb oil and become greasy.
Transfer the fried chicken to a wire rack set over a baking sheet to drain. This allows air to circulate around the pieces, preserving the crispness on all sides.
Pro Tips For Making Crunchy Chicken Batter
- Double Fry for Crunch: Fry the chicken once at 325°F for 8 minutes, rest it 5 minutes, then fry again at 375°F for 3-4 minutes. I learned this the hard way—single frying leaves the crust soggy by the time it hits the plate.
- Dry the Thighs: Pat the chicken thighs bone-dry with paper towels before dredging. After burning three batches, I finally figured out that any moisture turns the batter into a sad, gummy layer instead of a crisp shell.
- Skip the Overmixing: Stir the flour, cornstarch, and baking powder just until combined—lumps are fine. My grandmother swore by this, and she was right: overworking the batter makes the coating dense and chewy.
- Use Cold Liquid: If your recipe calls for any liquid (like water or beer), keep it ice-cold. Sounds weird, but it works: cold liquid reacts with the baking powder to create tiny air pockets for extra crunch.
Storing and Reheating This crunchy chicken batter
Refrigerator Storage
Let the fried chicken cool completely before storing. Place pieces in a single layer on a paper towel-lined plate, then transfer to an airtight container. Store in the fridge for up to 3 days. The paper towel helps absorb any residual moisture. ❄️
Freezer Storage
For longer storage, freeze the cooled chicken in a single layer on a baking sheet first. Once frozen solid, transfer to a ziplock freezer bag with parchment paper between layers. This prevents freezer burn and maintains texture for up to 2 months.
Oven Reheating
Preheat your oven to 400°F. Place chicken on a wire rack over a baking sheet and heat for 10-12 minutes. This method restores crispiness better than any other. I always check the internal temperature reaches 165°F.
Air Fryer Method
Arrange pieces in a single layer in your air fryer basket. Reheat at 375°F for 3-4 minutes, shaking halfway through. The circulating air revives the crunch beautifully. Works perfectly for small batches. 🔥
Avoid the Microwave
Microwaving will make the coating soggy, no matter what you try. If you must use one, place a paper towel under and over the chicken and use 50% power for 1-minute intervals. Even then, expect some texture loss.
Nutrition Facts
Frequently Asked Questions
Why does the batter need to rest before frying?
Resting for 10 minutes allows the coating to hydrate and adhere better to the chicken. This prevents the batter from falling off during frying and ensures even crispiness. Skipping this step can lead to patchy or uneven texture.
Can I use chicken breasts instead of thighs?
Yes, but thighs stay juicier. If using breasts, reduce frying time to 5-6 minutes to avoid dryness. Always check the internal temperature reaches 165°F for safety.
What oil is best for frying?
Use oils with a high smoke point like vegetable, canola, or peanut oil. Avoid olive oil as it can burn at 350°F. Maintain consistent temperature for the crispiest results.
How do I keep the coating crispy after frying?
Drain on a wire rack, not paper towels, to allow air circulation. Avoid covering or stacking pieces, which traps steam and causes sogginess. Serve immediately for maximum crunch.

- Jollof Rice Sauce Recipe: West African Tomato and Spice Infusion - September 25, 2026
- Japanese Rice Soup Recipe: Umami-Rich Comfort in a Bowl - September 25, 2026
- Homemade Cream Of Rice Recipe: Silk-Smooth Breakfast in Minutes - September 25, 2026