
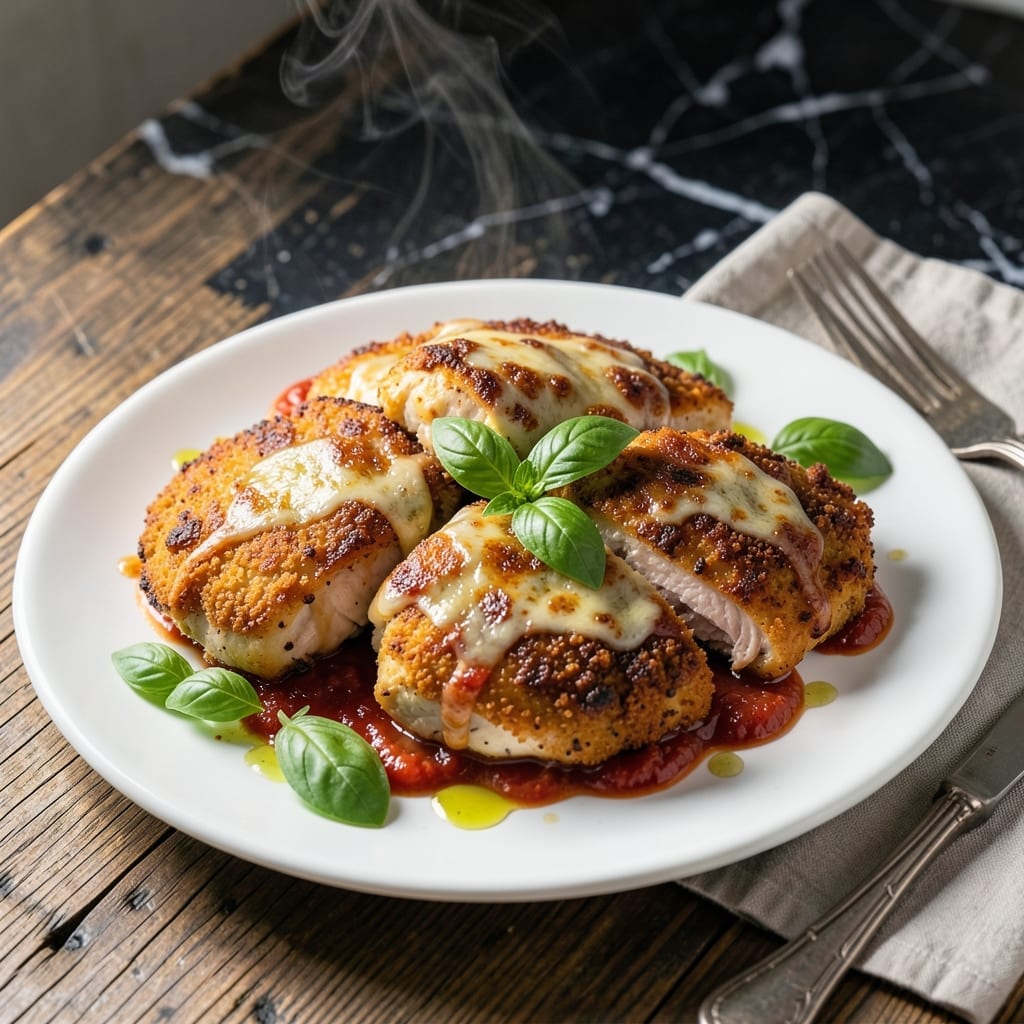
This recipe transforms simple chicken cutlets into restaurant-quality Parmesan-Herb Breaded Cutlets with a golden, crispy crust. The Romano cheese adds a distinct sharpness that elevates the dish beyond ordinary breaded chicken.
I developed this method during my time in Charleston, perfecting the crusting technique to ensure maximum crunch and flavor. The key is using a three-step breading process with flour, egg wash, and a Romano-Parmesan herb mixture.
You’ll achieve a crispy exterior that stays intact, revealing juicy, tender chicken underneath. The herb blend adds aromatic depth that complements the rich Romano cheese.
Serve with marinara for dipping or alongside a fresh salad for a complete meal. This dish delivers on both texture and taste every time.
Ingredients for Crusted Chicken Romano
These premium ingredients create restaurant-quality breaded cutlets with a golden, crispy Romano-Parmesan crust.
| Ingredient | Amount | Notes |
|---|---|---|
| Chicken Breast Cutlets 🍗 | 1 ½ lb | Boneless, skinless, pounded to 1/4-inch thickness |
| All-Purpose Flour 🌾 | 1 cup | For initial dredging step |
| Large Eggs 🥚 | 2 whole | Beaten for egg wash |
| Panko Breadcrumbs 🍞 | 2 cups | Japanese-style for extra crunch |
| Romano Cheese 🧀 | 1 cup | Freshly grated from block |
| Parmesan Cheese 🧀 | ½ cup | Freshly grated, not pre-shredded |
| Fresh Parsley 🌿 | ¼ cup | Finely chopped for herb mixture |
| Fresh Thyme Leaves 🌿 | 1 tbsp | Stems removed, roughly chopped |
| Garlic Powder 🧄 | 1 tsp | For seasoning breadcrumb mixture |
| Onion Powder 🧅 | 1 tsp | Adds depth to breading |
| Dried Oregano 🌿 | 1 tsp | Mediterranean variety preferred |
| Kosher Salt 🧂 | 1 tsp | Plus additional for seasoning chicken |
| Freshly Ground Black Pepper 🌶️ | ½ tsp | Coarse grind ideal |
| Olive Oil 🫒 | ¾ cup | For pan-frying cutlets |
| Marinara Sauce 🍅 | 1 ½ cups | For serving, warmed |
The cheese selection is paramount here. Pecorino Romano provides that signature sharpness that defines this dish—BelGioioso or Locatelli brands deliver consistent quality. The Parmesan should be aged at least 24 months for optimal depth. For breadcrumbs, Kikkoman panko offers superior texture. Most Whole Foods locations carry both cheeses in their specialty case, already aged to perfection.
No panko on hand? Regular breadcrumbs at a 1:1 ratio work in a pinch, though the crust won’t be as crisp. Fresh herbs can be swapped for dried at one-third the amount—just rehydrate in the egg wash. For a gluten-free version, almond flour plus crushed cornflakes creates an excellent alternative. The Romano is non-negotiable for authentic flavor, but in an emergency, aged Asiago offers a similar sharp profile.
The breaded cutlets keep beautifully. Store cooked portions in an airtight container for up to 3 days in the refrigerator, or freeze uncooked breaded cutlets on a sheet pan before transferring to bags for 2 months. Reheat in a 375°F oven to maintain crispness—microwaving will soften that perfect crust.
Why You’ll Love This Recipe
- One Pan Wonder: I love that this only dirties one dish—just dip, dredge, and bake the cutlets with panko and Romano.
- That Romano Kick: The sharp Romano mixed with crispy panko gives it a salty, nutty crunch you just can’t get with parmesan.
- Weeknight Hero: I throw these together after work and they’re done before the kids start asking what’s for dinner.
- Leftovers? Yes Please: Honestly, it reheats surprisingly well—crispy enough to pack for lunch the next day.
Step-by-Step Instructions for Parmesan-Herb Breaded Chicken Cutlets
Master the technique for crisp, golden-brown cutlets with a flavorful herb and cheese crust.
Step 1: Prepare and Season the Breading Station
Set up three shallow dishes for breading. In the first, add the 1 cup All-Purpose Flour and season it with 1 tsp Kosher Salt and 0.5 tsp Freshly Ground Black Pepper. This initial dredge creates a sturdy base for the breading to adhere to.
In the second dish, beat the 2 whole Large Eggs until uniform. The egg wash acts as a binder, ensuring the breadcrumb mixture sticks securely to the chicken. In the third dish, combine the 2 cups Panko Breadcrumbs, 1 cup Romano Cheese, 0.5 cup Parmesan Cheese, 0.25 cup Fresh Parsley, 1 tbsp Fresh Thyme Leaves, 1 tsp Garlic Powder, 1 tsp Onion Powder, and 1 tsp Dried Oregano.
Step 2: Bread the Chicken Cutlets Thoroughly
Pat the 1.5 lb Chicken Breast Cutlets dry with paper towels to remove excess moisture. This step is critical—wet cutlets will cause the breading to slip off during cooking. Season both sides lightly with additional Kosher Salt for enhanced flavor.
Dredge each cutlet in the seasoned flour, shaking off any excess. Then, dip it into the beaten eggs, allowing any excess to drip off. Finally, press the cutlet firmly into the breadcrumb-cheese mixture, ensuring an even, thick coating on all sides. Pressing hard helps the breading cling and creates those coveted crispy edges.
Step 3: Pan-Fry to Golden Perfection
Heat 0.75 cup Olive Oil in a large skillet over medium heat until shimmering but not smoking. The oil should be hot enough that a pinch of breadcrumbs sizzles when dropped in. Carefully place the breaded cutlets in the skillet, ensuring they are not touching to prevent steaming.
Cook for 3-4 minutes per side or until the breading is deep golden brown and crisp. Avoid moving the cutlets too soon—let them develop a crust before flipping. The chicken is done when it reaches an internal temperature of 165°F and the breading is uniformly crispy.
Step 4: Rest and Serve with Warm Marinara
Transfer the cooked cutlets to a paper towel-lined plate to drain any excess oil. This brief rest allows the breading to set and the juices to redistribute within the chicken, ensuring moisture and crispness in every bite.
Warm the 1.5 cups Marinara Sauce in a small saucepan over low heat for 2-3 minutes, stirring occasionally. Serve the cutlets immediately with the marinara on the side for dipping or spooned over the top. The contrast of the crispy exterior and tender interior makes this dish truly exceptional.
Pro Tips For Making Crusted Chicken Romano
- Pound the Chicken: Use a meat mallet or rolling pin to evenly flatten the cutlets to ¼-inch thickness—this guarantees even cooking and prevents dry, chewy spots.
- Grate Fresh Romano: Skip the pre-shredded stuff; freshly grated Romano melts better and gives that sharp, salty kick that defines this dish.
- Double Dip the Crust: After the egg wash, press the cutlets into the panko-Romano mix, then dip again in egg and crust for an extra-thick, crunchy layer that actually stays put.
- Rest Before Frying: Let the breaded cutlets sit for 10 minutes before cooking—this keeps the coating from sliding off when it hits the hot oil. I learned this the hard way.
Essential Equipment for This Dish
Essential Pans
For perfect crusted chicken, I swear by my 12-inch cast iron skillet—it distributes heat evenly and maintains consistent medium heat for that golden crust. A Lodge brand is my go-to, but any heavy-bottomed pan works if properly preheated. 🔥
Breading Station
Set up three shallow dishes for the breading process. I use 9×13-inch glass baking dishes from Pyrex—they’re wide enough for dredging and easy to clean. The first dish holds flour, the second beaten eggs, and the third the Romano-Parmesan mixture.
Temperature Control
An instant-read thermometer is non-negotiable for checking 165°F internal temperature. I rely on my ThermoWorks ThermoPop—it’s fast, accurate, and fits in my apron pocket. Never guess doneness with breaded chicken; the crust can be misleading.
Oil Management
Use olive oil with a high smoke point, like California Olive Ranch. A kitchen thermometer helps monitor oil temp—aim for 350-375°F. Too cool, and the breading absorbs oil; too hot, and it burns before the chicken cooks through.
Draining Rack
A wire cooling rack set over a baking sheet keeps cutlets crisp while draining excess oil. I elevate mine with a OXO steel rack—it’s sturdy and fits perfectly in my half-sheet pan. This setup prevents soggy bottoms.
Serving Tools
Tongs are essential for flipping without piercing the crust. I use OXO spring-loaded tongs—they’re gentle yet firm. Serve on a pre-warmed platter to maintain that perfect crispness until the last bite. 💛
Nutrition Facts
Frequently Asked Questions
Can I bake instead of pan-fry?
Yes! Bake at 400°F for 15-20 minutes, flipping halfway. Use a wire rack on a baking sheet for crispiness. The crust won’t be as deep golden but stays crunchy.
Why did my breading fall off?
This usually happens if the chicken isn’t dry before breading or the oil isn’t hot enough. Pat cutlets thoroughly and ensure oil reaches 350-375°F before adding chicken.
Can I use pre-shredded cheese?
Not recommended. Pre-shredded cheese contains anti-caking agents that prevent proper melting. Always grate Romano and Parmesan fresh from the block for best texture and flavor.
How do I keep it crispy when reheating?
Reheat in a 375°F oven for 8-10 minutes on a wire rack. Avoid microwaving—it’ll make the crust soggy. The oven restores crispness beautifully.

- Jollof Rice Sauce Recipe: West African Tomato and Spice Infusion - September 25, 2026
- Japanese Rice Soup Recipe: Umami-Rich Comfort in a Bowl - September 25, 2026
- Homemade Cream Of Rice Recipe: Silk-Smooth Breakfast in Minutes - September 25, 2026