
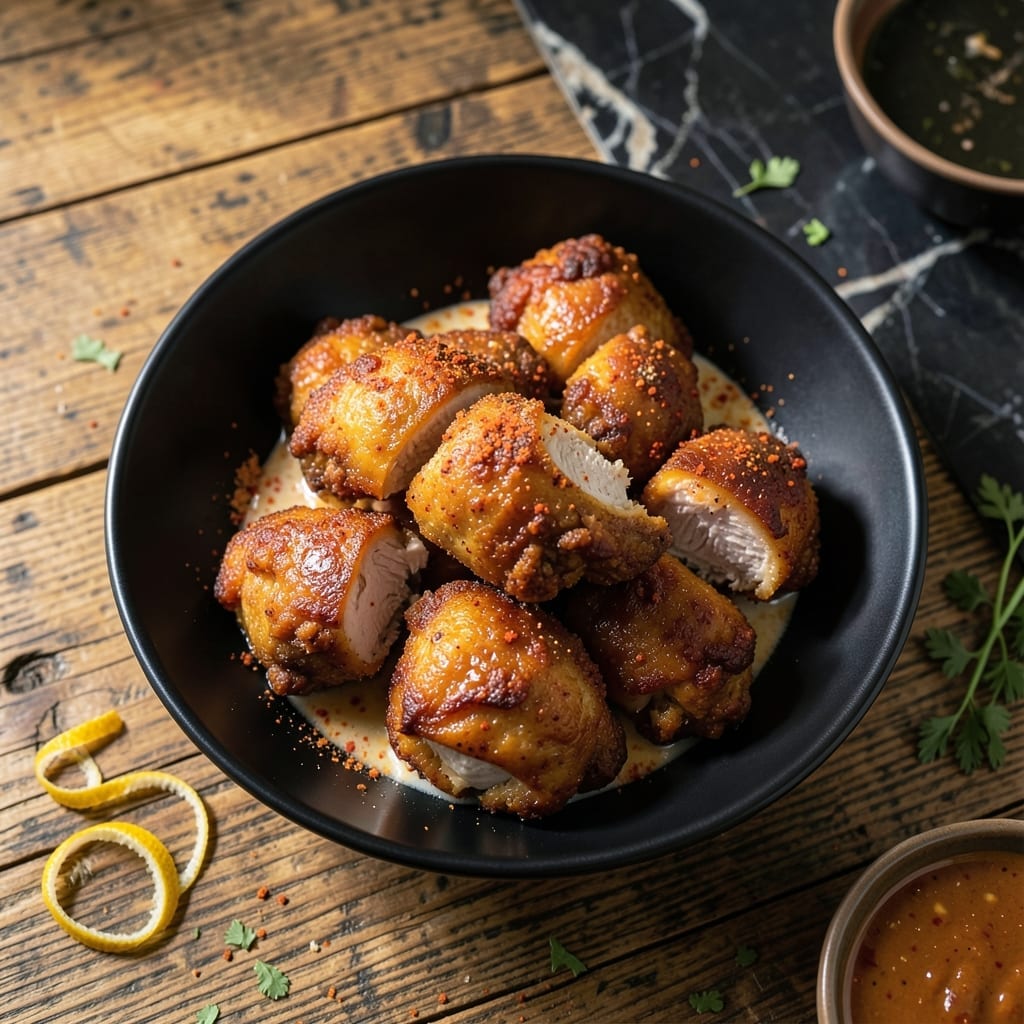
This fried chicken delivers a perfect balance of spicy crunch and creamy centers that will redefine your expectations.
The secret lies in a two-step process: first creating an extra-crispy coating, then filling each piece with a rich, velvety center that bursts with flavor.
I developed this method after years of testing, ensuring every bite has that ideal contrast between the fiery exterior and smooth interior.
What results is restaurant-quality chicken that’s crispy on the outside, juicy on the inside, and packed with bold, punchy flavors.
Ingredients for Deviled Fried Chicken
Pantry staples plus a couple special touches. Nothing too fancy, all about the flavor.
| Ingredient | Amount | Notes |
|---|---|---|
| Chicken Thighs 🍗 | 2 lb | Boneless, skin-on for crispiness |
| Buttermilk 🥛 | 2 cups | Full-fat for richness |
| Hot Sauce 🌶️ | ¼ cup | Like Crystal or Tabasco |
| All-Purpose Flour 🌾 | 2 cups | For crispy coating |
| Cornstarch 🌽 | ½ cup | Extra crispiness booster |
| Cayenne Pepper 🔥 | 2 tsp | Adjust for heat preference |
| Paprika 🌶️ | 1 tbsp | Smoked variety preferred |
| Garlic Powder 🧄 | 1 tbsp | Fresh ground preferred |
| Onion Powder 🧅 | 1 tbsp | Balances spice blend |
| Salt 🧂 | 2 tsp | Diamond Crystal kosher |
| Black Pepper 🌶️ | 1 tsp | Freshly ground for best flavor |
| Cream Cheese 🧀 | 8 oz | Softened for creamy filling |
| Cheddar Cheese 🧀 | 1 cup | Shredded sharp variety |
| Peanut Oil 🫒 | 4 cups | For deep frying (or vegetable oil) |
The chicken thighs are key here—bone-in, skin-on gives you that shatteringly crisp exterior. I grab mine from Whole Foods or Costco (their organic ones are great). Buttermilk matters too—full-fat makes the difference in tenderness. If you’re short on time, a quick brine in salted water works (not as good, but serviceable). For the hot sauce, any vinegar-based brand like Crystal or Tabasco does the trick.
No buttermilk? Mix whole milk with 1 tbsp vinegar or lemon juice per cup and let it sit for 5 minutes. Swap cayenne for gochugaru if you want a different kind of heat (milder, fruitier). Want extra crunch? Panko breadcrumbs mixed into the flour coating. The cream cheese filling can be swapped with brie or goat cheese for a tangier bite. Just make sure it’s soft enough to pipe.
Leftovers keep in the fridge for 3-4 days, but honestly? They’re best fresh out of the fryer. Reheat in a 400°F oven for 10 minutes to crisp back up. Freeze uncooked breaded pieces for up to 2 months—fry straight from frozen, just add a few extra minutes.
Why You’ll Love This Recipe
- One Pan Magic: I just toss the thighs in buttermilk and hot sauce, then coat and fry—no fancy steps, just big flavor.
- Crave-Worthy Heat: That buttermilk-hot sauce soak gives the meat a tangy kick, while the cornstarch crust stays shatteringly crisp.
- Crowd-Pleasing Star: I serve this at game nights and potlucks, and it’s always the first thing gone.
- Budget-Friendly Feast: Chicken thighs are cheap, and this recipe stretches them into a meal that feels like a splurge.
Step-by-Step Instructions for Deviled Fried Chicken
This method delivers crispy, spicy chicken with a gooey cheese center—exactly as promised.
Step 1: Marinate Chicken in Buttermilk and Hot Sauce
Combine the 2 cups Buttermilk and 0.25 cup Hot Sauce in a large bowl. I use full-fat buttermilk here—it tenderizes the meat while adding richness that leaner versions can’t match.
Add the 2 lb Chicken Thighs and ensure they’re fully submerged. Refrigerate for at least 4 hours (overnight works even better). This marinade not only infuses flavor but breaks down proteins for maximum tenderness. You’ll notice the meat plumps slightly as it absorbs the liquid.
Step 2: Prepare the Spiced Flour Coating
In a shallow dish, whisk together the 2 cups All-Purpose Flour, 0.5 cup Cornstarch, 2 tsp Cayenne Pepper, 1 tbsp Paprika, 1 tbsp Garlic Powder, 1 tbsp Onion Powder, 2 tsp Salt, and 1 tsp Black Pepper. The cornstarch is my secret for extra crunch—it creates a lighter, crispier crust than flour alone.
Let the mixture sit for 5 minutes after whisking to allow the spices to bloom. This brief rest intensifies the flavors. When you’re ready to coat the chicken, the mixture should look evenly distributed with no visible streaks of individual spices.
Step 3: Stuff and Bread the Chicken
Mix the 8 oz Cream Cheese and 1 cup Cheddar Cheese in a bowl until smooth. I soften the cream cheese first—this prevents lumps in your filling. Cut a pocket into each thigh and stuff with about 1 tablespoon of the cheese mixture. Don’t overfill or it’ll leak during frying.
Dredge each stuffed thigh in the flour mixture, pressing firmly so the coating adheres well. Shake off excess—you want a thin, even layer that crisps up nicely. The coating should look slightly rough, not smooth, which indicates good adhesion.
Step 4: Deep Fry to Golden Perfection
Heat the 4 cups Peanut Oil in a deep pot to 350°F. I use peanut oil for its high smoke point and neutral flavor. The oil is ready when a pinch of flour sizzles and rises to the surface immediately.
Fry the chicken in batches for 8-10 minutes, turning occasionally, until golden brown and the internal temperature reaches 165°F. Don’t crowd the pot—this lowers the oil temperature and results in greasy chicken. Transfer to a wire rack (not paper towels) to maintain crispiness.
Step 5: Rest and Serve While Hot
Let the chicken rest for 5 minutes after frying. This allows the cheese center to set slightly while keeping the exterior crisp. You’ll see the cheese peeking out from any small tears in the coating—this is normal and delicious.
Serve immediately while the cheese is still gooey. Each bite should deliver crispy, spicy skin giving way to tender meat and a creamy, cheesy center. The contrast of textures and spice levels is what makes this dish unforgettable.
Pro Tips For Making Deviled Fried Chicken
- Double-Dredge the Thighs: After the buttermilk soak, dip the thighs in flour, back into the buttermilk, then flour again—this builds a craggy crust that holds up to the hot sauce glaze and stays extra crispy.
- Rest Before Frying: Let the floured thighs sit on a rack for 10 minutes before frying. I learned this the hard way—without it, the coating sloughs off in the oil, leaving you with sad, patchy chicken.
- Skip Cold Oil: Get your oil to 350°F before adding the chicken. Sounds obvious, but I used to rush it and ended up with greasy, undercooked pieces instead of that golden, shatteringly crisp exterior.
- Add Cornstarch Last: Mix the cornstarch into the flour right before dredging. If it sits too long, it absorbs moisture and turns the coating gummy—this keeps it light and airy, the way fried chicken should be.
Essential Equipment for deviled fried chicken
Deep Fryer Setup
For perfect results, I use a 5-quart Dutch oven with 4 cups peanut oil. The heavy base prevents temperature fluctuations. A candy thermometer clipped to the side is essential for monitoring 350°F heat. 🌡️
Coating Station
Set up three shallow dishes: one for the spiced flour, one for the buttermilk marinade, and one for breading. I recommend stainless steel bowls from OXO—they’re durable and easy to clean. Keep a wire rack nearby for resting coated pieces.
Frying Tools
A spider strainer is my go-to for retrieving chicken from hot oil. The fine mesh lets oil drain while keeping the coating intact. Pair it with tongs for turning pieces during frying. Always use heat-resistant silicone or metal tools.
Cheese Filling Prep
For the cream cheese mixture, a piping bag with a star tip makes stuffing easier. I use Ateco brand bags—they’re sturdy and reusable. A small spoon works too, but the piping bag gives more control for even distribution.
Safety Essentials
Never skip a splatter screen when frying. I keep a fire extinguisher rated for grease fires nearby—just in case. Also, wear an apron to protect from oil splatters. Safety first means you can focus on perfect results. 💡
Serving Prep
Have a wire cooling rack ready for draining fried chicken. This maintains crispiness better than paper towels. I use a half-sheet pan with a rack insert for easy transfer from fryer to serving platter.
Nutrition Facts
Frequently Asked Questions
Can I use chicken breasts instead of thighs?
Thighs work best for juiciness, but breasts can be used. Reduce frying time to 6-8 minutes and monitor internal temp closely to avoid dryness.
How do I prevent the cheese from leaking out?
Seal the pocket opening completely with toothpicks before breading. Don’t overfill—1 tablespoon max per piece. The coating helps contain the filling.
What’s the best oil for frying?
Peanut oil is ideal for its 350°F smoke point and neutral flavor. Vegetable or canola oil work too, but avoid olive oil as it burns at high temps.
Can I make this ahead of time?
Bread the chicken and refrigerate up to 24 hours before frying. Don’t stuff with cheese until ready to cook to prevent sogginess.

- Jollof Rice Sauce Recipe: West African Tomato and Spice Infusion - September 25, 2026
- Japanese Rice Soup Recipe: Umami-Rich Comfort in a Bowl - September 25, 2026
- Homemade Cream Of Rice Recipe: Silk-Smooth Breakfast in Minutes - September 25, 2026