
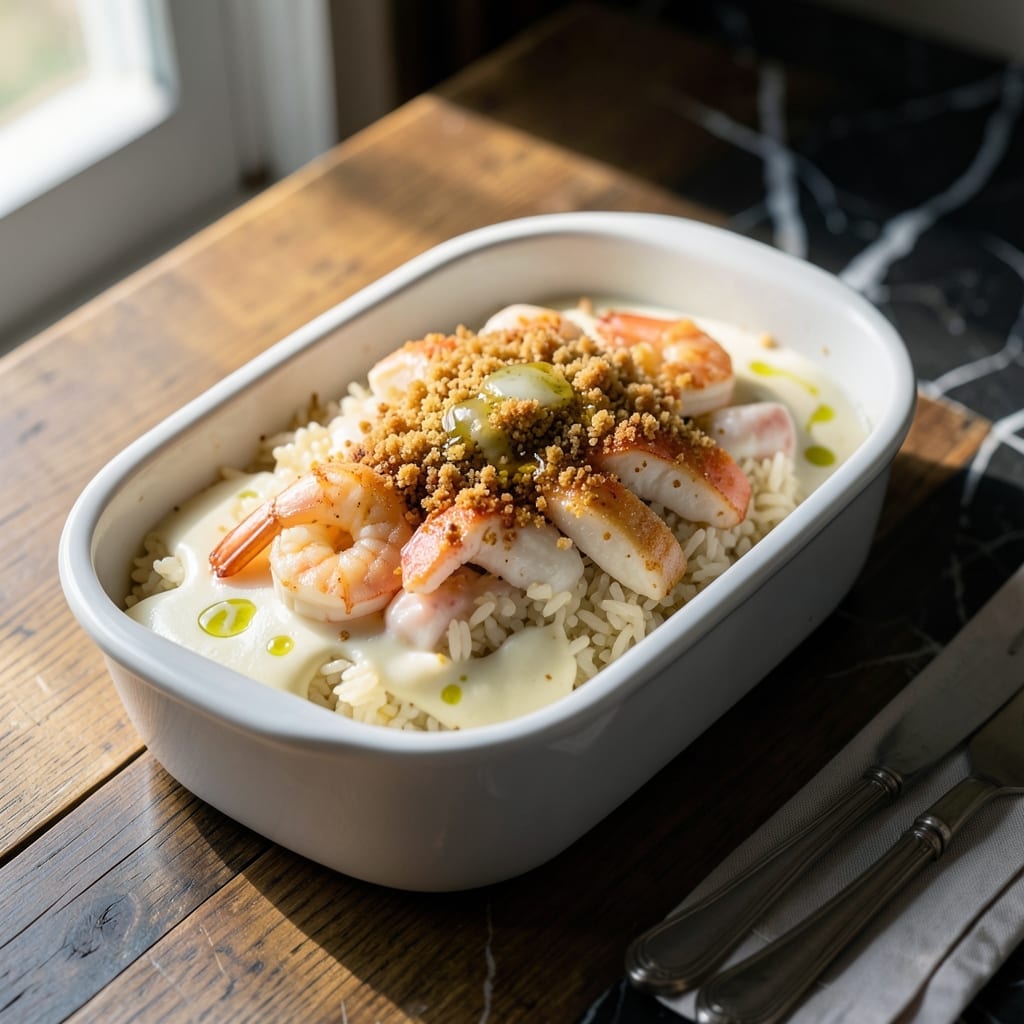
This Japanese baked rice dish delivers creamy comfort in every bite, combining tender grains with rich seafood in a perfectly balanced casserole.
I developed this method to achieve the ideal texture—soft, slightly sticky rice with a golden crust on top. The seafood adds delicate flavor without overpowering the dish’s subtle elegance.
The baking process transforms simple ingredients into something extraordinary. Each spoonful offers layers of creamy rice, savory seafood, and a hint of buttery richness.
Perfect for family dinners or special occasions, this dish brings restaurant-quality results to your home kitchen.
Ingredients for Doria Rice
Japanese short-grain rice and fresh seafood form the base of this elegant baked dish with creamy texture.
| Ingredient | Amount | Notes |
|---|---|---|
| Japanese Short-Grain Rice 🍚 | 2 cups | Rinsed until water runs clear |
| Seafood Mix 🦐 | 1 lb | Shrimp, scallops, and squid |
| Unsalted Butter 🧈 | 4 tbsp | Divided for cooking and topping |
| All-Purpose Flour 🌾 | 2 tbsp | For thickening the sauce |
| Whole Milk 🥛 | 2 cups | Full-fat for creaminess |
| Chicken Stock 🍲 | 1 cup | Low-sodium preferred |
| Onion 🧅 | 1 whole | Finely diced for base |
| Garlic Cloves 🧄 | 2 cloves | Minced for depth of flavor |
| Parmesan Cheese 🧀 | ½ cup | Freshly grated for topping |
| Panko Breadcrumbs 🍞 | ½ cup | For golden crust texture |
| Egg Yolks 🥚 | 2 whole | For custard enrichment |
| Salt 🧂 | 1 tsp | Kosher or sea salt |
| White Pepper 🌶️ | ½ tsp | Freshly ground preferred |
| Nutmeg 🌰 | ¼ tsp | Freshly grated for aroma |
The rice must be Japanese short-grain—Koshihikari or Nishiki brands produce the ideal sticky texture. Seafood should be the freshest available; Whole Foods or a reputable fishmonger is recommended. For the milk, organic whole milk yields superior creaminess. Butter quality matters—Plugrá or Kerrygold are professional standards for baking applications.
No shrimp? Diced white fish fillets like cod or haddock work well. For a richer custard, substitute heavy cream at one-third the volume of milk. Panko can be replaced with fresh breadcrumbs for a denser crust. If Parmesan is unavailable, Pecorino Romano offers a sharper alternative. Egg yolks may be replaced with whole eggs at a 1:1 ratio.
The assembled dish can rest at room temperature for 30 minutes before baking. Leftovers keep 3-4 days refrigerated and reheat well. For best texture, consume within 2 days. The breadcrumb topping may soften upon storage but will crisp under the broiler when reheating.
Why You’ll Love This Recipe
- I’ll be real: this is my go-to for potlucks. It’s filling, impressive, and disappears faster than I can serve it.
- One Pot Wonder: I just dump everything in a baking dish—rice, seafood, and that creamy butter-flour-milk sauce—then let the oven do the work.
- Creamy Comfort: The short-grain rice soaks up the rich, velvety sauce, and the seafood adds this briny sweetness that’s honestly hard to resist.
- Feeds a Crowd: I’ll be real: this is my go-to for potlucks. It’s filling, impressive, and disappears faster than I can serve it.
Step-by-Step Instructions for Japanese Baked Rice with Creamy Seafood
Master this technique for a restaurant-quality dish with a golden crust and velvety sauce.
Step 1: Prepare the Rice and Seafood Base
Rinse the 2 cups Japanese Short-Grain Rice under cold water until the water runs clear. This removes excess starch and ensures the grains stay separate during baking. Drain thoroughly in a fine-mesh strainer.
In a large pot, bring 4 cups of water to a boil. Add the drained rice and cook for 10 minutes until the grains are just tender but still slightly firm. Drain again and set aside. Meanwhile, pat the 1 lb Seafood Mix dry with paper towels to remove excess moisture—this prevents the dish from becoming watery.
Step 2: Create the Creamy Béchamel Sauce
In a saucepan over medium heat, melt 2 tbsp Unsalted Butter. Add the finely diced 1 whole Onion and cook for 5 minutes until translucent and soft. Stir in the minced 2 cloves Garlic Cloves and cook for 30 seconds until fragrant.
Sprinkle in the 2 tbsp All-Purpose Flour and whisk constantly for 1-2 minutes to cook out the raw flavor. Gradually pour in the 2 cups Whole Milk and 1 cup Chicken Stock, whisking continuously to prevent lumps. Bring to a gentle simmer and cook for 5-7 minutes until the sauce thickens enough to coat the back of a spoon.
Season the sauce with 1 tsp Salt, 0.5 tsp White Pepper, and 0.25 tsp Nutmeg. Remove from heat and stir in the 2 whole Egg Yolks one at a time, tempering them to prevent curdling. The sauce should now be rich, creamy, and glossy.
Step 3: Layer and Combine All Components
In a greased baking dish, spread the par-cooked rice in an even layer. Distribute the 1 lb Seafood Mix evenly over the rice, pressing the pieces lightly into the grains. Pour the creamy béchamel sauce over the top, ensuring it fully covers the seafood and rice. Use a spatula to gently fold everything together.
The mixture should look moist but not soupy. If it appears too dry, add a splash of the reserved cooking liquid or additional Chicken Stock. This step ensures every bite is infused with the creamy sauce and seafood flavors.
Step 4: Add Toppings and Bake to Golden Perfection
Sprinkle the 0.5 cup Parmesan Cheese evenly over the top, followed by the 0.5 cup Panko Breadcrumbs. Dot the remaining 2 tbsp Unsalted Butter across the surface for extra richness and browning.
Bake in a preheated oven at 375°F for 25-30 minutes until the top is golden brown and the edges are bubbling. For the final 2-3 minutes, switch the oven to broil to achieve a crisp, golden crust—watch closely to avoid burning.
Remove from the oven and let it rest for 5 minutes before serving. This allows the dish to set slightly, making it easier to portion while keeping the creamy texture intact.
Pro Tips For Making Doria Rice
- Pre-cook the rice: Use day-old or slightly undercooked rice—it absorbs the creamy béchamel better without turning mushy. I learned this the hard way after making gluey doria with fresh rice.
- Sauté the seafood first: Quickly sear the seafood mix in butter before adding flour; it removes excess moisture and locks in flavor. Sounds like extra work, but it prevents a watery sauce.
- Low heat for béchamel: Keep the milk warm and add it slowly to the roux on low heat, whisking constantly. After burning three batches, I finally figured out patience is non-negotiable here.
- Top with breadcrumbs: Toast panko in a little butter and sprinkle on top before baking. This isn’t the prettiest method, but it adds the perfect crunch to contrast the creamy rice.
Essential Equipment for Great doria rice
Baking Dish
A 9×13-inch baking dish is ideal for even cooking and that perfect golden crust. I use stoneware for its heat retention, but glass works beautifully too. Ensure it’s at least 2 inches deep to prevent spillage as the dish bakes. 💡
Saucepan Selection
For the béchamel, use a heavy-bottomed saucepan—I swear by All-Clad stainless steel for even heat distribution. A 3-quart capacity gives you enough room to whisk without making a mess. Avoid nonstick for this step; the fond adds flavor.
Whisk and Spatula
A balloon whisk is essential for creating a lump-free béchamel. I keep a silicone spatula on hand for folding the sauce into the rice. These tools make all the difference in achieving that velvety texture we discussed earlier.
Fine-Mesh Strainer
Rinsing the rice properly requires a fine-mesh strainer. I use OXO’s stainless steel version—it’s sturdy and won’t rust. This ensures no excess starch ruins your dish’s perfect consistency.
Cheese Grater
Freshly grated Parmesan melts beautifully and creates that signature golden top. I recommend a Microplane for fine, even shreds. Pre-grated cheese often has anti-caking agents that affect melt quality.
Oven Thermometer
An oven thermometer (I use Taylor’s) ensures accurate temperature. Many home ovens run hot or cold. For this recipe, precise 375°F heat is crucial for that perfect bake. ✨
Nutrition Facts
Frequently Asked Questions
Can I use long-grain rice instead?
No, Japanese short-grain is essential for the creamy texture. Long-grain stays separate and won’t absorb the sauce properly.
Why does my sauce turn lumpy?
Whisk constantly when adding milk to prevent flour clumps. If it happens, strain the sauce through a fine-mesh sieve before combining.
How do I know when it’s done baking?
The top should be golden brown and bubbling at the edges. Insert a knife in the center—it should come out hot and clean after 25-30 minutes at 375°F.
Can I make this ahead of time?
Assemble the dish, cover, and refrigerate up to 24 hours before baking. Add 5-10 minutes to the baking time if starting cold.

- Jollof Rice Sauce Recipe: West African Tomato and Spice Infusion - September 25, 2026
- Japanese Rice Soup Recipe: Umami-Rich Comfort in a Bowl - September 25, 2026
- Homemade Cream Of Rice Recipe: Silk-Smooth Breakfast in Minutes - September 25, 2026