
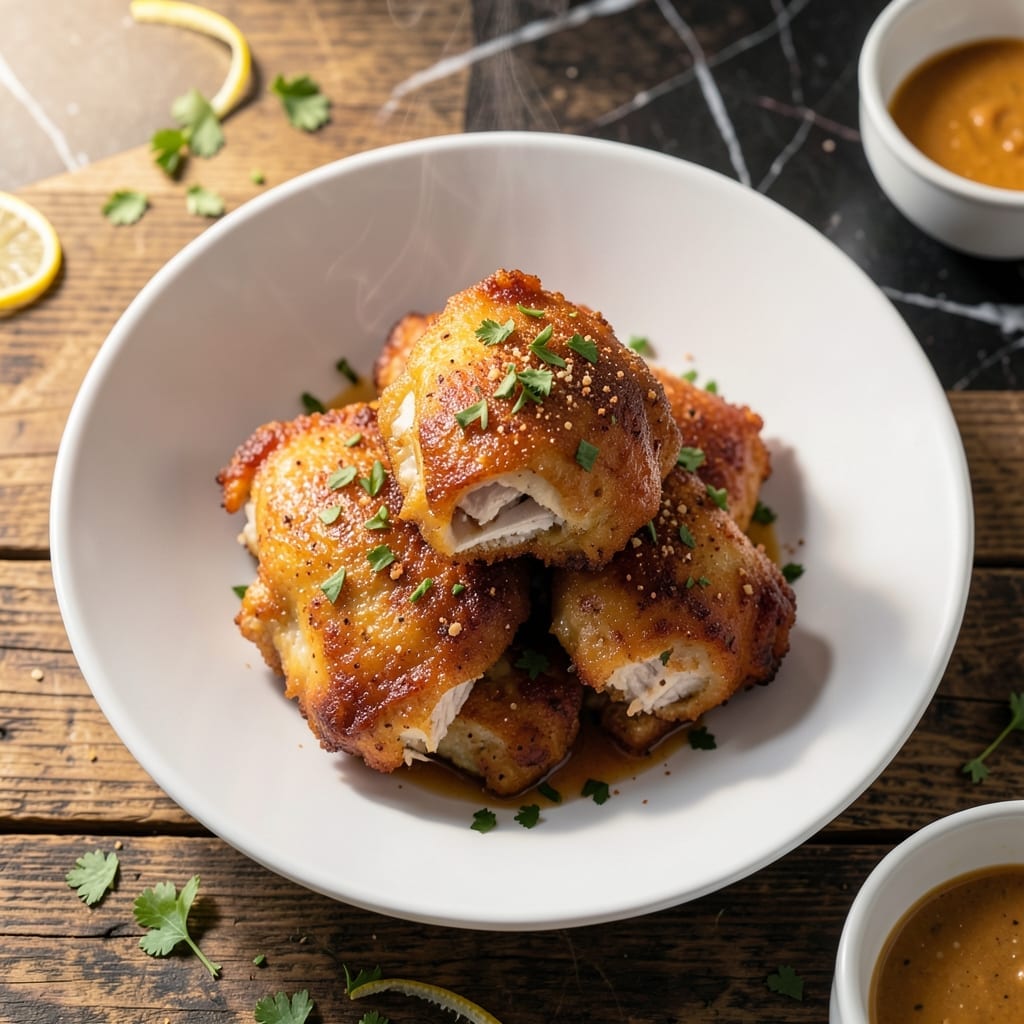
There’s a simple technique for achieving crispy, golden chicken that stays tender inside. This method uses a light egg batter that creates a delicate, shatteringly thin crust when fried to perfection.
The key is maintaining the right oil temperature—too low and the chicken absorbs grease, too high and the outside burns before the inside cooks. I’ve tested this repeatedly to find the sweet spot that guarantees juicy meat and that coveted crunch.
Each piece emerges with a lace-like coating that cracks satisfyingly at first bite, giving way to moist, flavorful chicken. The contrast between the crisp exterior and tender interior makes this dish irresistible.
Serve immediately with your favorite dipping sauces or alongside fresh vegetables for a complete meal. Here’s how to make it perfectly every time.
Ingredients for Egg Battered Chicken
Simple ingredients create that shatteringly crisp, golden egg battered coating everyone loves.
| Ingredient | Amount | Notes |
|---|---|---|
| Chicken Thighs 🍗 | 1 ½ lb | Boneless, skinless preferred |
| Large Eggs 🥚 | 2 whole | Room temperature for best batter |
| All-Purpose Flour 🌾 | 1 cup | Plus extra for dredging |
| Cornstarch 🌽 | ¼ cup | For extra crispiness |
| Baking Powder 🧂 | ½ tsp | Makes coating lighter |
| Salt 🧂 | 1 tsp | Divided for seasoning |
| Black Pepper 🌶️ | ½ tsp | Freshly ground preferred |
| Garlic Powder 🧄 | 1 tsp | For depth of flavor |
| Onion Powder 🧅 | 1 tsp | Balances the seasoning |
| Paprika 🌶️ | 1 tsp | Sweet or smoked variety |
| Vegetable Oil 🫒 | 4 cups | For frying, high smoke point |
| Buttermilk 🥛 | ½ cup | For tenderizing chicken |
| Lemon Wedges 🍋 | 4 pieces | For serving |
The chicken is everything here. Boneless, skinless thighs stay juicier than breasts—Costco or Sam’s Club have great bulk options. For the oil, peanut or vegetable oil works best (high smoke point). I always grab Crisco for frying—consistent results every time. The buttermilk? Don’t skip it (that’s what keeps the meat tender).
No buttermilk? Whole milk plus 1 tbsp vinegar or lemon juice does the trick. Out of cornstarch? Replace with arrowroot powder at the same ratio. The paprika can be swapped for Cajun seasoning if you want heat. Fresh garlic instead of powder? Mince 2 cloves and add to the batter (worth the extra minute).
Fry in batches—don’t crowd the pan or the oil temp drops (and you’ll get soggy chicken). Leftovers? They’ll lose crispiness, but reheat in a 400°F oven for 10 minutes to revive. Best eaten fresh, honestly.
Why You’ll Love This Recipe
- One Bowl Wonder: I just dump the flour, cornstarch, baking powder, and eggs in a bowl—no fancy prep, no extra dishes.
- Unbeatable Crisp: That egg batter fries up golden and shatteringly crisp, with juicy chicken thighs hiding underneath.
- Weeknight Hero: Honestly, it’s my Tuesday lifesaver—ready before the kids finish arguing over who gets the last roll.
- Stretches Far: Leftovers? They reheat surprisingly well, and the ingredients cost less than a fancy takeout run.
Step-by-Step Instructions for Egg Battered Chicken
Here’s the method I use to get that perfect crispy coating while keeping the inside crazy juicy.
Step 1: Season and Prep the Chicken Thighs
Pat the 1.5 lb Chicken Thighs completely dry with paper towels—this is non-negotiable for crispiness. In a bowl, combine 1 tsp Salt, 0.5 tsp Black Pepper, 1 tsp Garlic Powder, 1 tsp Onion Powder, and 1 tsp Paprika. Sprinkle this blend evenly over both sides of each thigh and rub it in.
Let the seasoned chicken sit for 10 minutes while you prep the rest. This short rest allows the spices to penetrate slightly, enhancing flavor. The chicken should look evenly coated with a light dusting of spices.
Step 2: Create the Ultra-Crispy Battering Station
In a shallow dish, whisk together the 1 cup All-Purpose Flour, 0.25 cup Cornstarch, and 0.5 tsp Baking Powder. In another dish, beat the 2 whole Large Eggs with the 0.5 cup Buttermilk until smooth and frothy.
Here’s the key: dip each thigh first into the flour mixture, pressing gently to adhere, then into the egg-buttermilk wash. Let excess drip off for 5 seconds, then return to the flour mixture for a final dredge. This double-dip creates layers that crisp beautifully.
Step 3: Fry to Golden Perfection
Heat the 4 cups Vegetable Oil in a deep, heavy-bottomed pot to 350°F. Use a thermometer—this temperature is critical. The oil should shimmer but not smoke. Carefully lower 2-3 thighs into the oil, avoiding crowding.
Fry for 6-7 minutes per side until the coating turns a deep, even golden brown. You’ll see bubbles forming around the edges—that’s the moisture escaping, creating crispiness. The internal temperature should reach 165°F.
Transfer to a wire rack set over a baking sheet (not paper towels—this prevents sogginess). The coating should be audibly crisp when tapped.
Step 4: Rest and Serve Immediately
Let the fried chicken rest for 5 minutes to allow the juices to redistribute. This step prevents that sad moment when you cut in and all the moisture runs out. The coating should stay crisp even as it cools slightly.
Serve hot with the 4 pieces Lemon Wedges on the side. Each piece should have a shatteringly crisp exterior giving way to tender, seasoned meat. Squeeze a lemon wedge over the top just before eating for a bright finish.
Pro Tips For Making Egg Battered Chicken
- Use Cold Chicken: I learned this the hard way—dipping room-temp thighs in egg batter makes it slide right off. Keep the chicken cold straight from the fridge for better adhesion.
- Add Cornstarch Last: Mix the cornstarch into the flour-baking powder blend just before battering, or it’ll start absorbing moisture from the eggs and turn gummy.
- Double Dip for Crisp: After the first egg-flour coat, let it rest 2 minutes then dip again—this builds a thicker, crunchier shell without extra effort.
- Fry in Batches: Crowding the pan drops the oil temp and steams the coating into a soggy mess. Give each piece space, even if it means an extra 5-minute round.
Troubleshooting This Recipe
Oil Temperature Issues
If your chicken absorbs too much oil, your oil wasn’t hot enough. Use a thermometer to maintain 350°F consistently. I recommend ThermoWorks for accuracy. If the coating burns before cooking through, lower the heat to 325°F and extend frying time by 1-2 minutes per side. 🌡️
Batter Not Sticking
This usually happens with wet chicken. Pat the thighs completely dry before dredging. If the batter still slides off, chill the floured chicken for 10 minutes before the egg dip to help it adhere better.
Soggy Coating
Crowding the pan drops oil temperature, causing sogginess. Fry in batches with 2-3 inches between pieces. Also, use a wire rack, not paper towels, to drain. This allows air circulation to maintain crispiness.
Uneven Browning
Hot spots in your pan create uneven cooking. Use a heavy-bottomed pot like Le Creuset for even heat distribution. Rotate pieces halfway through frying for consistent color.
Dry Chicken
Overcooking dries out the meat. Use a meat thermometer to pull chicken at exactly 165°F internal temperature. Remember, carryover cooking adds 5°F as it rests.
Bland Flavor
Boost seasoning by adding 1 tsp cayenne or 1 tbsp Cajun seasoning to your flour mix.
Nutrition Facts
Frequently Asked Questions
Can I use chicken breasts instead of thighs?
Yes, but thighs stay juicier. If using breasts, reduce frying time to 5-6 minutes per side to prevent dryness. Always check internal temp reaches 165°F.
Why does the batter need buttermilk?
Buttermilk tenderizes the meat and adds tang. Its acidity also helps the coating adhere better. No buttermilk? Use whole milk + 1 tbsp vinegar.
How do I keep it crispy for longer?
Drain on a wire rack, not paper towels. To reheat, use a 400°F oven for 10 minutes. Avoid microwaving—it makes the coating soggy.
Can I bake instead of fry?
Bake at 400°F for 20-25 minutes, flipping halfway. Use a wire rack over a baking sheet for air circulation. Results will be less crispy but healthier.

- Jollof Rice Sauce Recipe: West African Tomato and Spice Infusion - September 25, 2026
- Japanese Rice Soup Recipe: Umami-Rich Comfort in a Bowl - September 25, 2026
- Homemade Cream Of Rice Recipe: Silk-Smooth Breakfast in Minutes - September 25, 2026