
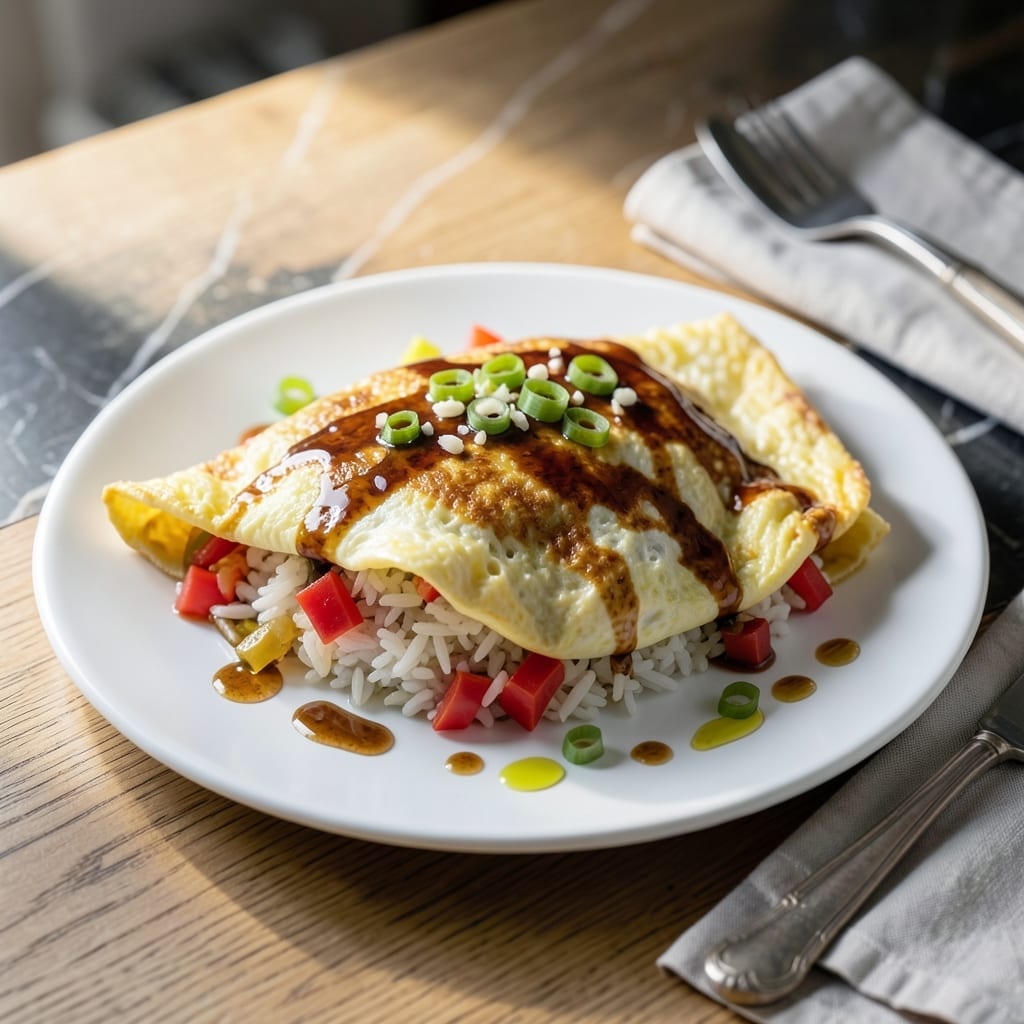
This egg rice omelette delivers a fluffy interior with golden crisp edges that make it irresistible for breakfast. I’ve refined the technique to ensure perfect texture every time.
The secret lies in cooking the rice just right before folding it into beaten eggs. This creates a dish that’s filling, flavorful, and simple to make with basic pantry staples.
Ingredients for Egg Rice Omelette
Basic pantry staples transform into this fluffy, crisp-edged breakfast masterpiece.
| Ingredient | Amount | Notes |
|---|---|---|
| Large Eggs 🥚 | 6 whole | Room temperature preferred |
| Cooked White Rice 🍚 | 2 cups | Day-old, chilled works best |
| Unsalted Butter 🧈 | 2 tbsp | Divided for cooking |
| Green Onions 🧅 | 4 whole | Thinly sliced, green parts only |
| Garlic Cloves 🧄 | 2 cloves | Minced finely |
| Soy Sauce 🫒 | 1 tbsp | Low-sodium preferred |
| Sesame Oil 🫒 | 1 tsp | Toasted variety for depth |
| Salt 🧂 | ½ tsp | Diamond Crystal kosher |
| Black Pepper 🌶️ | ¼ tsp | Freshly ground |
| Vegetable Oil 🫒 | 1 tbsp | Neutral flavor, high smoke point |
| Red Bell Pepper 🌶️ | ½ whole | Diced finely for color |
The rice is critical here. Day-old, chilled white rice (jasmine or long-grain) absorbs the egg without turning mushy. Freshly cooked rice releases too much starch and makes the omelette gummy. For best results, use rice leftover from the night before. If you must cook fresh, spread it on a tray to cool completely and dry slightly before using.
No green onions? Shallots or chives work beautifully. The soy sauce can be swapped for tamari (for gluten-free) or coconut aminos for a milder flavor. Sesame oil is non-negotiable for that nutty depth, but in a pinch, a drop of toasted walnut oil can substitute. The bell pepper adds sweetness and crunch—zucchini or mushrooms if you prefer.
Store cooked rice in an airtight container for up to 3 days before using. The omelette is best served immediately, but leftovers keep 2 days refrigerated. Reheat gently in a skillet to preserve the crisp edges—microwaving makes them soggy.
Why You’ll Love This Recipe
- One Pan Wonder: I just throw everything in a skillet—eggs, leftover rice, butter—and dinner’s ready before the kids finish bickering over who gets the last green onion.
- Buttery Garlic Bite: The sizzle of garlic in butter with those crispy egg edges? Honestly, it’s the reason I keep making this.
- Lunchbox Hero: It’s my go-to for using up last night’s rice and packing a protein punch for tomorrow’s lunch.
- Penny Pincher: Between us, this costs less than a takeout container and tastes twice as good with ingredients I already have.
Step-by-Step Instructions for Egg Rice Omelette
Master this technique for a fluffy interior with perfectly crisp golden edges every time.
Step 1: Prepare the Aromatics and Rice Base
Heat 1 tbsp Vegetable Oil in a large non-stick skillet over medium heat. Add 0.5 whole Red Bell Pepper (diced finely) and sauté for 2-3 minutes until slightly softened. Stir in 4 whole Green Onions (thinly sliced) and 2 cloves Garlic Cloves (minced) and cook for 30 seconds until fragrant.
Add 2 cups Cooked White Rice to the skillet, breaking up any clumps with your spatula. Drizzle with 1 tbsp Soy Sauce and 1 tsp Sesame Oil, then season with 0.5 tsp Salt and 0.25 tsp Black Pepper. Cook for 2-3 minutes, stirring constantly, until the rice is heated through and begins to crisp slightly.
Step 2: Whisk and Temper the Eggs
In a large bowl, whisk 6 whole Large Eggs until the yolks and whites are fully combined and the mixture is uniform in color. For best texture, ensure the eggs are at room temperature—this helps them cook evenly without developing a tough exterior.
Slowly pour about ¼ cup of the hot rice mixture from the skillet into the beaten eggs while whisking constantly. This tempering step raises the egg temperature gradually, preventing curdling when they meet the hot pan. The eggs should remain smooth and fully liquid after this process.
Step 3: Combine and Cook to Fluffy Perfection
Add 1 tbsp Unsalted Butter to the skillet with the remaining rice, swirling to coat the surface. Pour the tempered egg mixture evenly over the rice. Let it cook undisturbed for 1-2 minutes until the edges begin to set and turn golden brown.
Using a spatula, gently lift the edges and tilt the pan to allow the uncooked egg to flow underneath. Cook for another 2-3 minutes until the top is mostly set but still slightly runny in the center. This layering technique creates that signature fluffy texture throughout.
Step 4: Fold and Finish with Buttery Crispness
Add the remaining 1 tbsp Unsalted Butter to the pan, letting it melt and foam around the edges. Carefully fold the omelette in thirds: bring one side over the center, then fold the opposite side over that, creating a neat rectangular shape.
Cook for an additional 1-2 minutes until the bottom is deep golden brown and crisp, and the center is fully set. The omelette should release easily from the pan when properly crisped. Slide it onto a plate and let rest for 1 minute before slicing to allow the layers to set.
Pro Tips For Making Egg Rice Omelette
- Pre-cool the rice: Spread your cooked white rice on a plate and let it cool for 10 minutes—hot rice turns the eggs gummy and ruins the texture.
- Beat eggs vigorously: Whisk the eggs until the yolks and whites are fully combined, about 20-30 seconds; this creates a lighter, fluffier omelette that holds the rice better.
- Skip soggy green onions: Pat the chopped green onions dry with a paper towel before adding them—excess moisture makes the omelette steam instead of set.
- Start hot, finish low: Sear the garlic and rice in butter over medium-high for 30 seconds, then drop to low heat when adding eggs to avoid a burnt exterior and raw center.
Make-Ahead Tips for egg rice omelette
Prep the Rice Ahead
Cook your 2 cups white rice the night before and refrigerate it uncovered for 1-2 hours to dry out slightly. This prevents the omelette from turning mushy. I use jasmine rice for its fragrant aroma. 💡
Pre-Mix Dry Ingredients
Combine your 0.5 tsp salt and 0.25 tsp black pepper in a small bowl the evening before. This saves time and ensures even seasoning distribution throughout your dish.
Chop Veggies in Advance
Dice your 0.5 red bell pepper and slice 4 green onions the night before. Store them in separate airtight containers in the fridge to maintain freshness and crispness.
Pre-Measure Liquids
Measure out your 1 tbsp soy sauce and 1 tsp sesame oil into small ramekins. Having these ready prevents frantic measuring while cooking and ensures accurate ratios. ✨
Egg Prep Tip
Crack your 6 large eggs into a bowl the night before and cover tightly with plastic wrap. Let them sit at room temperature for 30 minutes before cooking for even texture.
Storage Strategy
Store prepped ingredients in the fridge for up to 24 hours. The rice can last 3 days if kept dry and covered. This makes morning assembly a breeze.
Nutrition Facts
Frequently Asked Questions
Can I use freshly cooked rice?
No, day-old chilled rice works best. Fresh rice releases excess starch, making the omelette gummy. If needed, spread freshly cooked rice on a tray to cool and dry slightly before using.
Why does the recipe call for tempering the eggs?
Tempering prevents curdling by gradually raising the egg temperature. Adding hot rice slowly while whisking ensures smooth, fluffy eggs every time.
How do I get crispy edges?
Cook the omelette undisturbed for 1-2 minutes until edges turn golden brown. Use a non-stick skillet and enough butter to create a crisp, buttery crust.
What can I substitute for green onions?
Try shallots or chives for similar mild onion flavor. Both add freshness without overpowering the dish.

- Rice Pudding Recipe With Eggs and Milk: Old-Fashioned Custard-Style Comfort - September 30, 2026
- Rice Noodle Sauce Recipe: Bold Umami Depth for Authentic Stir-Fry - September 30, 2026
- Rice Pilaf Recipe: Fragrant Basmati With Toasted Vermicelli - September 30, 2026