
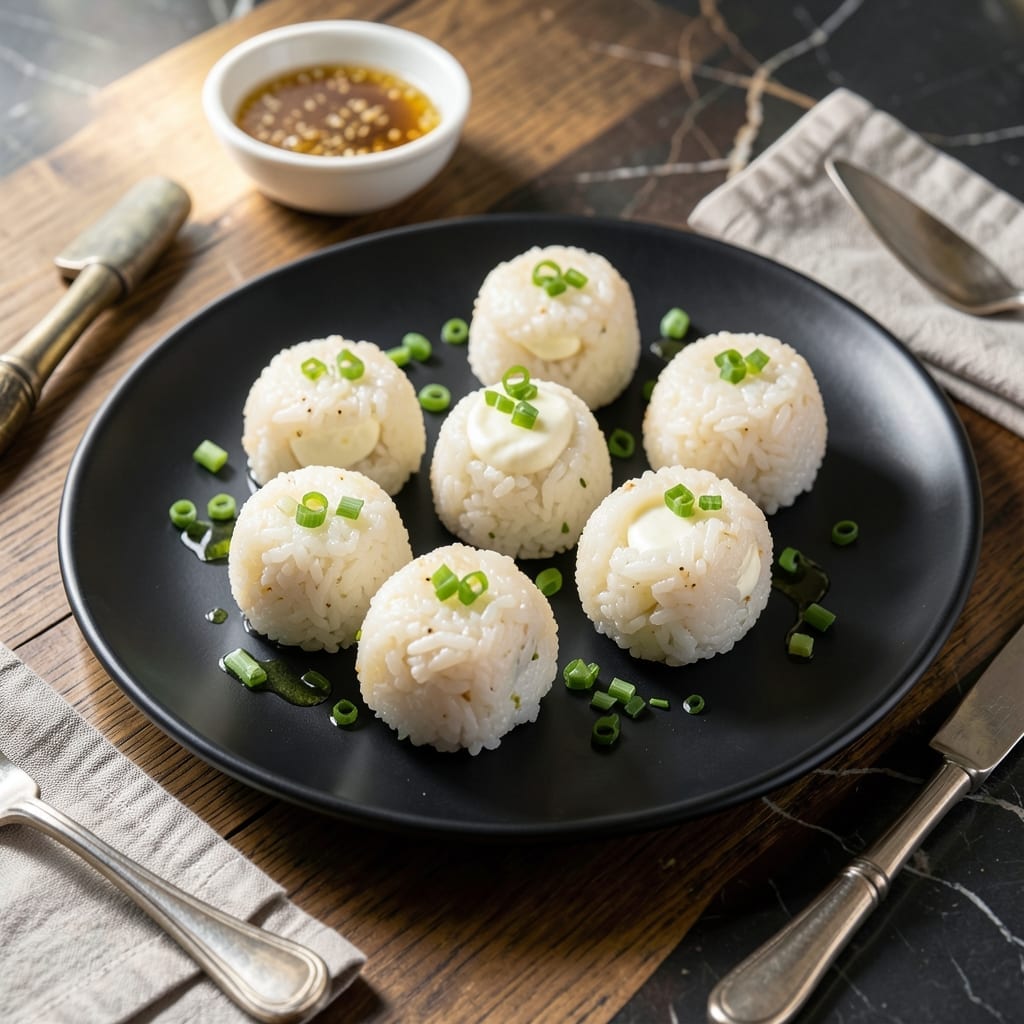
This copycat recipe delivers the signature crispy exterior and creamy center that made Erewhon’s version famous. The secret lies in the perfect rice-to-binder ratio and precise frying temperature.
With simple ingredients and careful technique, you’ll achieve restaurant-quality results at home. These bites capture the essence of Erewhon’s health-conscious approach while satisfying every craving.
Ingredients for Erewhon Rice Balls
Short list of quality staples with one special stop for nori. Nothing out of reach.
| Ingredient | Amount | Notes |
|---|---|---|
| Sushi Rice 🍚 | 2 cups | Short-grain, rinsed thoroughly |
| Rice Vinegar 🍶 | ¼ cup | Seasoned or unseasoned |
| Granulated Sugar 🍚 | 1 tbsp | Dissolved in vinegar |
| Kosher Salt 🧂 | ½ tsp | Diamond Crystal preferred |
| Cream Cheese 🧀 | 4 oz | Full-fat, softened to room temperature |
| Scallions 🧅 | 3 whole | Thinly sliced, green parts only |
| Panko Breadcrumbs 🍞 | 1 ½ cups | Japanese-style for extra crispiness |
| All-Purpose Flour 🌾 | ½ cup | For dredging rice balls |
| Large Eggs 🥚 | 2 whole | Beaten for binding coating |
| Neutral Oil 🫒 | 3 cups | For deep frying, like avocado or vegetable |
| Sesame Seeds 🌰 | 1 tbsp | Toasted, for garnish |
| Nori Sheets 📜 | 2 sheets | Cut into thin strips for decoration |
| Soy Sauce 🥢 | 2 tbsp | For serving or dipping |
The rice is non-negotiable. Short-grain sushi rice (like Koshihikari) delivers the sticky texture that holds these balls together. Whole Foods or Asian markets have the best selection—avoid long-grain varieties. For the cream cheese, Philadelphia is the gold standard (full-fat only). The panko must be Japanese-style—regular breadcrumbs won’t give you that signature crunch.
No rice vinegar? Apple cider vinegar at half the amount works in a pinch, but the flavor won’t be as clean. Fresh out of scallions? Chives at one-third the quantity can substitute. For a gluten-free version, swap panko for gluten-free breadcrumbs and use cornstarch instead of flour. The soy sauce can be tamari for gluten-free needs (or coconut aminos for a lighter touch).
Rice balls hold in the fridge for 2 days but fry them fresh for best texture. Cooked rice keeps 1 day before it dries out. The cream cheese filling can be prepped 3 days ahead—store it airtight. Leftovers reheat in the air fryer at 375°F for 5 minutes to revive crispiness.
Why You’ll Love This Recipe
- No Fuss Rolling: I mix the sushi rice with vinegar, sugar, and salt—then shape it around cream cheese. Honestly, it’s easier than tying my shoes.
- Sweet-Savory Bite: The tangy rice with that cool, creamy center? Ridiculously good first bite, last bite, every bite.
- Grab-and-Go Snack: I pack these for picnics, lunches, or that 3 p.m. slump. They travel like a dream.
- Stretches the Budget: A bag of sushi rice and a block of cream cheese makes a dozen. I’ll be real: it’s my cheap thrill.
Step-by-Step Instructions for Crispy Creamy Rice Balls
Master the technique that transforms simple ingredients into restaurant-quality bites with perfect texture.
Step 1: Season and Prepare the Sushi Rice
Combine the 0.25 cup rice vinegar, 1 tbsp granulated sugar, and 0.5 tsp kosher salt in a small saucepan. Warm over low heat just until the sugar and salt dissolve completely, about 2-3 minutes. This creates the classic sushi rice seasoning base.
Fold the warm vinegar mixture into the 2 cups sushi rice using a cutting motion with a spatula. Work gently but thoroughly until every grain is coated and the rice develops a glossy sheen. The rice should be sticky enough to hold shape but not mushy. Let it cool to room temperature before proceeding.
Step 2: Form and Fill the Rice Balls
With damp hands (to prevent sticking), take about ¼ cup of the seasoned rice and flatten it in your palm. Place ½ oz cream cheese in the center—this creates that signature creamy surprise. The cream cheese should be soft enough to indent slightly when pressed but not runny.
Fold the rice edges up and over the cream cheese, then gently roll between your palms to form a smooth ball about 2 inches in diameter. Repeat with the remaining rice and cream cheese to make 8-10 balls. The rice should completely enclose the filling with no visible cream cheese.
Step 3: Bread and Coat for Maximum Crispiness
Set up a breading station with three shallow dishes. Place the 0.5 cup all-purpose flour in the first, the 2 whole large eggs (beaten until uniform) in the second, and the 1.5 cups panko breadcrumbs in the third. The panko’s coarse texture is essential for that ultra-crispy exterior.
Dredge each rice ball in flour, shaking off excess, then dip in egg, allowing any excess to drip off. Finally, roll in panko, pressing gently to ensure full coverage. The coating should be thick and even—this is your insurance against oil absorption and ensures a satisfying crunch.
Step 4: Deep-Fry to Golden Perfection
Heat the 3 cups neutral oil in a deep, heavy pot to 350°F. Use a thermometer for accuracy—oil that’s too cool will make greasy rice balls, while oil that’s too hot will burn the outside before the inside warms through. Fry the breaded rice balls in batches to avoid crowding, which lowers oil temperature.
Cook for 3-4 minutes until golden brown all over, turning occasionally with a slotted spoon. The breading should be deeply colored and crisp, and you’ll hear a steady sizzle. Drain on a wire rack or paper towels to maintain crispiness.
Step 5: Garnish and Serve Immediately
While the rice balls are still hot, sprinkle with the 1 tbsp sesame seeds and thin strips of 2 sheets nori sheets. The residual heat will help the nori soften slightly and adhere to the surface. Arrange on a serving platter with the 3 whole scallions scattered on top for freshness and color.
Serve immediately with 2 tbsp soy sauce for dipping. The contrast of the hot, crispy exterior with the cool, creamy center is best experienced right away. The rice balls should hold their shape but yield easily when bitten, with the cream cheese oozing slightly.
Pro Tips For Making Erewhon Rice Balls
- Chill the Rice: Let the seasoned sushi rice cool to room temperature before shaping—I learned this the hard way after my first few rice balls turned into sticky, warm messes that wouldn’t hold their form.
- Cut Cream Cheese Small: Use cold cream cheese and cut it into ½-inch cubes so it doesn’t ooze out when you bite into the rice ball. Larger chunks melt too fast and make the filling leak.
- Wet Your Hands: Keep a bowl of water nearby and dip your hands in it before handling the rice—this prevents sticking and makes shaping smoother, especially with the sticky sushi rice.
- Salt Your Water: Boil the sushi rice in lightly salted water (about ½ teaspoon kosher salt per cup) to give it a subtle depth of flavor that complements the sweet and tangy seasoning.
Troubleshooting Great erewhon rice balls
Rice Too Dry
If your rice grains aren’t sticking together, you likely rinsed them too aggressively or overcooked. Use 1.5 cups water per 1 cup rice and rinse just until water runs clear. For rescue, sprinkle 1-2 tsp warm water over rice and fold gently. 💡
Filling Leaks Out
This happens when the cream cheese isn’t properly sealed inside. Use ½ oz cream cheese per ball max and ensure rice completely encloses it. Chill filled balls for 15 minutes before breading to firm them up.
Breading Falls Off
The egg wash is your glue. Beat eggs until completely uniform and let excess drip off before panko. Press breadcrumbs firmly into each ball. If using gluten-free flour, add 1 tsp cornstarch to help binding.
Greasy Results
Oil temperature is critical. Maintain 350°F precisely—use a thermometer. Fry in small batches to prevent temperature drops. Drain on a wire rack (not paper towels) to allow air circulation.
Uneven Browning
Turn balls frequently during frying for even color. If some brown too fast, your oil may be too hot. Lower to 340°F and extend cooking time slightly. Always use fresh oil for best results.
Cold Centers
This means the oil wasn’t hot enough or balls were too large. Form 2-inch diameter balls max. Fry at 350°F for 3-4 minutes. Rest 2 minutes after frying to let centers warm through. 🔥
Nutrition Facts
Frequently Asked Questions
Can I make these ahead of time?
Shape and bread the rice balls up to 4 hours ahead. Refrigerate uncovered to dry the coating. Fry just before serving for maximum crispiness.
What oil works best for frying?
Use neutral oils with high smoke points like avocado, vegetable, or peanut. Maintain 350°F for perfect results. Avoid olive oil as it can impart unwanted flavor.
How do I keep them from falling apart?
Ensure rice is properly seasoned and sticky. Use ½ oz cream cheese per ball max. Chill filled balls for 15 minutes before breading to set the shape.
Can I bake instead of fry?
Bake at 400°F for 15-20 minutes, flipping halfway. Spray with oil first for crispiness. Note that texture won’t be identical to frying.

- Fried Rice Mix Recipe: Customizable Pantry Staple for Quick Meals - October 6, 2026
- Fruit Loop Rice Crispy Treats Recipe: Colorful Crunch With Marshmallow Magic - October 6, 2026
- Erewhon Rice Balls Recipe: Copycat Crispy and Creamy Bites - October 6, 2026