
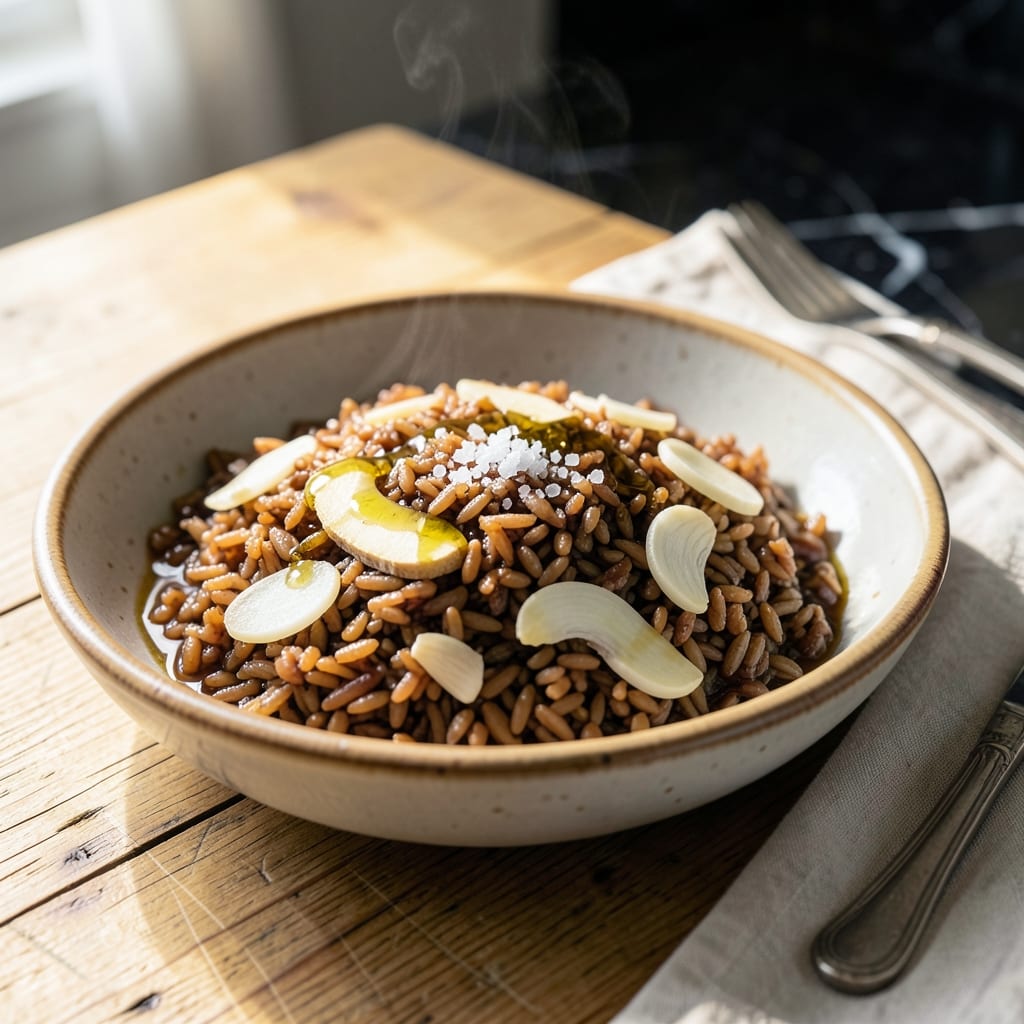
This traditional fermentation method transforms simple rice into a gut-friendly powerhouse with complex, tangy flavors. I developed this recipe after studying ancient practices that turn ordinary ingredients into probiotic-rich foods.
The process is straightforward but requires patience as natural bacteria work their magic over 2-3 days at room temperature. You’ll notice the rice developing a slightly sour aroma and soft texture as beneficial microbes multiply.
What emerges is a dish with deep umami notes and digestive benefits that go beyond ordinary rice. The fermentation enhances nutrient absorption while creating that distinctive tang that makes this creation so special.
Perfect for those exploring gut health or seeking new flavor profiles in their cooking. Here’s how to make it safely at home.
Ingredients for Fermented Rice Probiotic
Simple ingredients transform into a probiotic powerhouse with deep, tangy complexity.
| Ingredient | Amount | Notes |
|---|---|---|
| Short-Grain Brown Rice 🌾 | 2 cups | Rinsed thoroughly, organic preferred |
| Filtered Water 💧 | 4 cups | Chlorine-free for fermentation |
| Sea Salt 🧂 | 1 tsp | Fine grain, non-iodized |
| Raw Apple Cider Vinegar 🍏 | 2 tbsp | With the mother for starter culture |
| Garlic Cloves 🧄 | 3 cloves | Peeled, lightly crushed |
| Fresh Ginger Root 🌿 | 1 tbsp | Peeled, finely grated |
| Turmeric Powder 🌶️ | ½ tsp | Ground, for color and anti-inflammatory benefits |
| Dried Bay Leaves 🍃 | 2 pieces | Whole, for infusion |
| Green Onions 🧅 | 4 whole | Thinly sliced, for garnish |
| Sesame Seeds 🌰 | 1 tbsp | Toasted, for topping |
| Nori Seaweed Sheets 🌊 | 1 sheet | Cut into strips, optional umami boost |
| Lemon Juice 🍋 | 1 tbsp | Freshly squeezed, to finish |
The rice quality directly impacts fermentation success. Short-grain brown rice (like Lundberg or Annie’s brands) has the right starch structure for microbial growth. Filtered water is non-negotiable—chlorine inhibits fermentation. Sea salt should be unrefined (Redmond Real Salt or Celtic Grey) to provide trace minerals that support beneficial bacteria. Avoid metal utensils during prep as they can react with acidic ingredients.
No apple cider vinegar? Freshly squeezed lemon juice at equal volume works as a starter substitute. Short on time? Pre-soak the rice for 4 hours to jumpstart fermentation. For extra umami, add a dried shiitake mushroom to the soak. The ginger and garlic can be omitted if preferred, but they add antimicrobial properties that balance the fermentation. White rice ferments faster but lacks brown rice’s nutrient density.
Fermented rice keeps in the refrigerator for 5-7 days in a sealed glass container. The flavor intensifies with time, developing more tang and complexity. For longer storage, freeze portions for up to 3 months. Always use a clean utensil when serving to prevent contamination. Discard if any mold appears or if the smell turns putrid rather than pleasantly sour.
Why You’ll Love This Recipe
- Set and Forget: I just mix rice, water, and a pinch of salt, then let it ferment overnight—no babysitting required.
- Tangy Garlic Bite: The raw apple cider vinegar and garlic give it this sharp, bright flavor that’s way more interesting than plain rice.
- Meal Prep MVP: I keep a batch in the fridge and toss it into bowls, soups, or even as a side—lasts for days.
- Penny-Pincher Win: Honestly, brown rice and water are cheap, and this turns them into something gut-friendly without fancy ingredients.
Step-by-Step Instructions for Fermented Rice Probiotic
This method ensures proper fermentation with maximum probiotic benefits and vibrant flavor development.
Step 1: Prepare and Rinse the Base
Measure the 2 cups Short-Grain Brown Rice into a fine-mesh strainer and rinse thoroughly under cold water until the water runs clear. This removes excess starch that could inhibit fermentation. I always use organic short-grain brown rice as its higher fiber content supports better bacterial growth.
Transfer the rinsed rice to a clean 4-cup capacity glass jar or ceramic vessel. The container must be non-reactive to prevent any metallic interaction with the raw apple cider vinegar. Add the 4 cups Filtered Water and stir gently to combine.
Step 2: Build the Fermentation Foundation
Add the 1 tsp Sea Salt, 2 tbsp Raw Apple Cider Vinegar, 3 cloves Garlic Cloves, 1 tbsp Fresh Ginger Root, and 0.5 tsp Turmeric Powder to the rice mixture. The apple cider vinegar with the mother provides the essential starter culture for fermentation.
Include the 2 pieces Dried Bay Leaves at this stage—they’ll infuse the mixture with subtle depth during fermentation. Stir well to distribute all ingredients evenly. The liquid should appear slightly cloudy from the turmeric, which also serves as a natural preservative.
Step 3: Initiate the Fermentation Process
Cover the jar with a clean kitchen towel or cheesecloth secured with a rubber band. This allows airflow while keeping out debris. Place the jar at room temperature, ideally between 68-75°F, away from direct sunlight.
Let the mixture ferment for 24-48 hours. You’ll notice small bubbles forming at the surface and a tangy aroma developing—this indicates active fermentation. Stir the mixture once daily to prevent mold growth on the surface.
Step 4: Complete and Store the Fermented Rice
After fermentation, remove the 2 pieces Dried Bay Leaves and 3 cloves Garlic Cloves. The rice should have a slightly effervescent quality and a pleasant sour note. Transfer to airtight containers for storage.
Before serving, garnish individual portions with 4 whole Green Onions (thinly sliced), 1 tbsp Sesame Seeds, 1 sheet Nori Seaweed Sheets (cut into strips), and a drizzle of 1 tbsp Lemon Juice for brightness. Store the fermented rice in the refrigerator for up to 5 days.
Pro Tips For Making Fermented Rice Probiotic
- Use Warm Water: Start with filtered water at about 85°F—too hot kills the good bacteria, too cold slows fermentation. I learned this the hard way after a batch sat for days with no activity.
- Rinse the Rice: Give the short-grain brown rice a quick rinse before soaking to remove excess starch, which can inhibit fermentation. Sounds minor, but it actually changes the outcome.
- Skip Metal Utensils: Use glass or ceramic jars and wooden spoons—raw apple cider vinegar and sea salt react with metal, giving your ferment a weird taste. My first batch tasted off until I figured this out.
- Add Garlic Later: Toss in the garlic cloves after 24 hours to prevent overpowering the ferment’s natural flavors. I was skeptical until I tried it—now I never add it at the start.
Make-Ahead Tips for This Recipe
Pre-Fermentation Prep
I always start this process the night before I plan to ferment. Rinse your 2 cups Short-Grain Brown Rice thoroughly and soak it in 4 cups Filtered Water with the 2 tbsp Raw Apple Cider Vinegar for 8-12 hours in the fridge. This jumpstarts the microbial activity.
Batch Fermentation
Double the recipe and ferment in two separate jars. I use wide-mouth mason jars from my local Boston market—they’re perfect for stirring and monitoring. Label each with the start time using painter’s tape. The fermentation smells stronger in larger batches, so keep them in a well-ventilated area. 💡
Fridge Transition
After 24 hours at room temperature, I move one jar to the fridge to slow fermentation while the other continues at room temp. This gives me two distinct flavor profiles—one more tangy and one milder—to use in different dishes throughout the week.
Storage Containers
Transfer finished batches to glass containers with airtight lids. I swear by the Pyrex Simply Store set from Target—they’re stackable and the lids seal tightly. Leave ½ inch headspace to prevent pressure buildup from continued fermentation.
Freezing Portions
Portion into 1-cup servings in freezer-safe bags, squeezing out all air. These keep well for 3 months. Thaw overnight in the fridge before using. The texture softens slightly after freezing but retains all probiotic benefits.
Weekly Routine
I make a fresh batch every Sunday to maintain a steady supply. The rhythm of weekly fermentation became a comforting ritual, like Nonna’s Sunday gravy tradition but with a modern, gut-healthy twist. ⏰
Nutrition Facts
Frequently Asked Questions
How long does fermentation take?
Fermentation typically takes 24-48 hours at room temperature between 68-75°F. You’ll see bubbles and smell a tangy aroma when it’s ready. Stir daily to prevent mold.
Can I use white rice instead?
Yes, but it ferments faster and lacks brown rice’s nutrients. Short-grain brown rice is ideal for probiotic benefits. Monitor closely if using white rice.
What if I see mold during fermentation?
Discard the batch immediately. Mold means harmful bacteria overtook the good ones. Always use clean utensils and non-reactive containers.
How do I know it’s fermented properly?
Look for bubbles, a sour smell, and a slightly effervescent texture. If it smells putrid or has odd colors, it’s spoiled. Proper batches taste tangy.

- Glutinous Rice Flour Bread Recipe: Soft Pillows with Nutty Depth - October 12, 2026
- Green Rice Casserole Recipe: Cheesy Baked Comfort with Vibrant Herbs - October 12, 2026
- Glutinous Rice Coconut Milk Recipe: Chewy Sweetness With Tropical Depth - October 12, 2026