
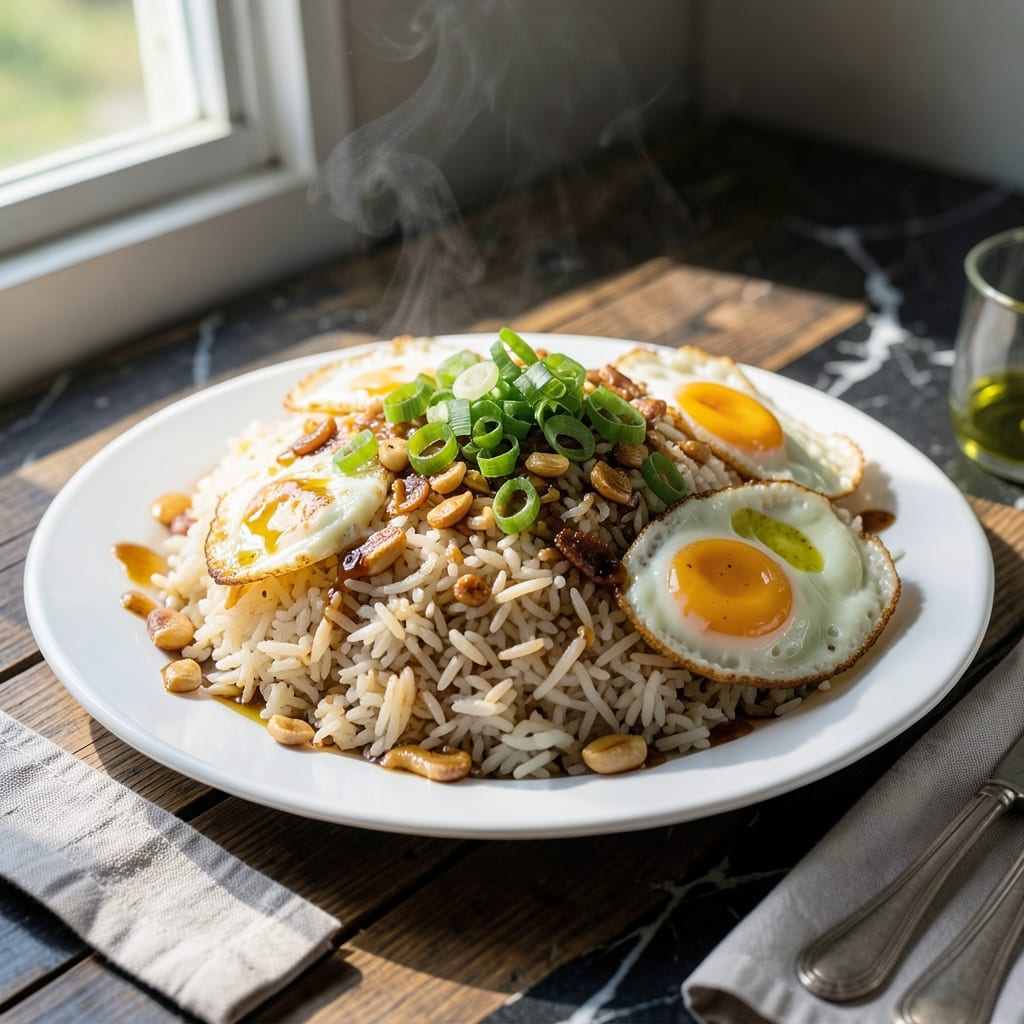
This Filipino fried rice delivers the crispy texture and bold garlic flavor that defines authentic sinangag. I’ve refined this method to ensure every grain stays separate while developing those coveted golden bits.
The key is using day-old rice and high heat to achieve the perfect sear. Garlic is the star here, fried until fragrant and just beginning to crisp. A touch of soy sauce adds depth without overpowering the dish.
You’ll get a plate of rice with distinct crispy edges, infused with garlic and speckled with golden-brown flecks. It’s a simple dish that transforms leftovers into something extraordinary.
Serve it alongside eggs or your favorite protein for a complete meal. This technique guarantees consistent results every time.
Ingredients for Filipino Fried Rice
Day-old rice, fresh garlic, and a hot pan are all you need to nail this classic.
| Ingredient | Amount | Notes |
|---|---|---|
| Day-Old Cooked Jasmine Rice 🍚 | 4 cups | Cold, dry, separated grains |
| Garlic Cloves 🧄 | 8 cloves | Minced for even frying |
| Neutral Cooking Oil 🫒 | ¼ cup | High smoke point preferred |
| Soy Sauce 💧 | 2 tbsp | Regular or light variety |
| Green Onions 🧅 | 4 whole | Thinly sliced, green parts only |
| Large Eggs 🥚 | 2 whole | Optional, for serving |
| Ground Black Pepper 🌶️ | ½ tsp | Freshly cracked for best flavor |
| Kosher Salt 🧂 | ½ tsp | Adjust to taste at end |
| Sesame Oil 🫒 | 1 tsp | Toasted, for finishing |
| Butter 🧈 | 1 tbsp | Optional, for richness |
| Calamansi or Lime 🍈 | 1 whole | Juiced for brightness |
| Cilantro 🌿 | ¼ cup | Chopped, for garnish |
The rice is non-negotiable—day-old jasmine from the fridge (the good stuff, not the pre-shredded kind) is what gives you those crispy edges. Asian markets have it cheap by the sack, but any grocery store’s rice aisle works. Garlic? Fresh only—none of that jarred stuff. Look for plump cloves with tight skin. I grab mine from Trader Joe’s because their heads are consistently huge and flavorful.
No jasmine? Long-grain white rice works in a pinch (just as dry as possible). Out of soy sauce? Tamari or coconut aminos at one-to-one ratio. Green onions can be subbed with shallots or regular onions, but you’ll lose that fresh bite. The sesame oil is worth the extra minute—Kadoya brand at H-Mart is my go-to. Skip the butter if you want to keep it traditional.
This reheats like a dream—actually gets crispier. Keeps 3-4 days in the fridge, but honestly it’s best fresh. Freeze without the garnishes for up to 3 months. Leftovers make killer fried rice balls (worth the extra minute).
Why You’ll Love This Recipe
- One Pan Wonder: I just dump the jasmine rice, garlic, and soy sauce in and let the skillet do the work—no fancy steps.
- Garlic Bomb: The sizzling garlic cloves hit the oil and fill my kitchen with that deep, savory aroma that makes my mouth water before the first bite.
- Breakfast or Midnight Snack: I’ve served this at sunrise with a fried egg and again at 2 AM straight from the fridge—both times it disappeared fast.
- Pennies per Plate: Between us, a big batch costs me less than a fancy coffee and stretches for days, so I always keep day-old rice on hand.
Step-by-Step Instructions for Garlic-Infused Sinangag
Here’s how I get that signature crispy texture and bold garlic flavor in every bite.
Step 1: Fry the Garlic to Golden Perfection
Heat the 0.25 cup neutral cooking oil in a large skillet or wok over medium heat. Add the 8 cloves garlic cloves and fry for 3-4 minutes, stirring frequently, until they transform from white to deep golden brown.
Watch closely—garlic burns quickly. You want it crispy but not bitter. Once golden, remove the garlic with a slotted spoon and set aside on paper towels to drain. Leave the fragrant garlic oil in the pan; this is your flavor base. The oil should be shimmering but not smoking.
Step 2: Sauté the Rice Until Crispy
Increase the heat to medium-high and add the 4 cups day-old cooked jasmine rice to the skillet. Break up any clumps with your spatula and press the rice down into the pan. Let it sit undisturbed for 2-3 minutes to develop a crust.
You’ll hear it sizzle—that’s the sound of crispy bits forming. Stir the rice, then press it down again. Repeat this process for 8-10 minutes total until you see brown, crispy edges on the grains and the rice is heated through. This is what gives sinangag its signature texture.
Step 3: Season and Combine All Elements
Drizzle the 2 tbsp soy sauce evenly over the rice and stir to distribute. Add the 0.5 tsp ground black pepper, 0.5 tsp kosher salt, and the reserved crispy garlic. Toss everything together for 1-2 minutes until the rice is uniformly coated.
Taste and adjust seasoning if needed. The rice should be savory with a pronounced garlic flavor. Push the rice to one side of the pan and, if using, melt the 1 tbsp butter in the empty space, then stir it into the rice for added richness.
Step 4: Finish and Garnish for Serving
Turn off the heat and stir in the 1 tsp sesame oil. Transfer the fried rice to a serving dish. If using, fry the 2 whole large eggs sunny-side-up in a separate pan and place them on top of the rice.
Garnish with the 4 whole green onions and 0.25 cup cilantro, both thinly sliced. Squeeze the juice from the 1 whole calamansi or lime over everything just before serving. The acidity brightens all the flavors and cuts through the richness perfectly.
Pro Tips For Making Filipino Fried Rice
- Use Cold Rice: Day-old jasmine rice from the fridge works best—it’s drier and fries up fluffier instead of turning mushy. I learned this the hard way after ruining a batch with fresh, warm rice.
- Crisp the Garlic: Slice the garlic thin and fry it in oil until golden and crispy before adding the rice. Sounds weird, but it works: the garlic adds a deep, nutty flavor that defines Filipino fried rice.
- Skip the Crowding: Cook the rice in batches if needed—overcrowding the pan steams the rice instead of frying it. High heat and space guarantee that signature slightly crisp texture.
- Finish with Green Onions: Stir in the chopped green onions at the very end, just before serving. My grandmother swore by this, and she was right: it keeps them bright and fresh instead of wilted.
Creative Variations of This Recipe
Spam Sinangag
Add 1 cup diced spam to the pan after frying the garlic. Cook until lightly browned before adding the rice. This Hawaiian-Filipino fusion adds salty, savory depth. The spam’s edges get crispy alongside the rice. 🔥
Longganisa Style
Remove casings from 4 Filipino longganisa sausages and crumble the meat into the pan. Cook until browned before adding rice. The slightly sweet, garlicky sausage elevates the dish to new heights. I find Vigan longganisa works best.
Vegetable Boost
Stir in 1 cup diced carrots and peas with the rice for added color and texture. Sauté for 2-3 minutes until tender. This version is my go-to when I want to sneak in extra veggies for the kids.
Kimchi Fusion
Add ½ cup chopped kimchi with its juices when combining everything. The tangy, spicy kick contrasts beautifully with the garlic. Use Napa cabbage kimchi for the best texture and flavor balance.
Cheesy Twist
Sprinkle ½ cup shredded cheddar cheese over the rice just before serving. The heat will melt it slightly, creating gooey pockets. This is my daughter’s favorite variation—she calls it “Filipino fried rice pizza.” ✨
Breakfast Special
Mix in ½ cup diced corned beef and ¼ cup raisins for a sweet-savory breakfast version. This combination might sound unusual, but it’s a beloved Filipino breakfast staple that works surprisingly well.
Nutrition Facts
Frequently Asked Questions
What kind of rice works best?
Use day-old jasmine rice for authentic texture. Long-grain white rice can substitute if jasmine isn’t available. The key is using cold, dry rice to achieve those perfect crispy bits.
Can I make this ahead of time?
Store cooked rice in the fridge for up to 3-4 days before frying. The texture improves as the rice dries out, making it ideal for crispy results.
Why does my rice turn out mushy?
Mushy rice usually means it wasn’t dry enough or the heat was too low. Use cold rice and cook over medium-high heat to get those golden, crispy edges.
Can I add other proteins?
Yes! Try diced spam, crumbled longganisa, or leftover meats. Cook proteins first, then add rice to absorb all the delicious flavors.

- Gambia Jollof Rice Recipe: West African One-Pot Spice Fusion - October 5, 2026
- Cream of Wild Rice Soup Recipe Minnesota: Northwoods Creaminess With Foraged Grains - October 5, 2026
- Frozen Cauliflower Fried Rice Recipe: Quick Low-Carb Wok Magic - October 5, 2026