
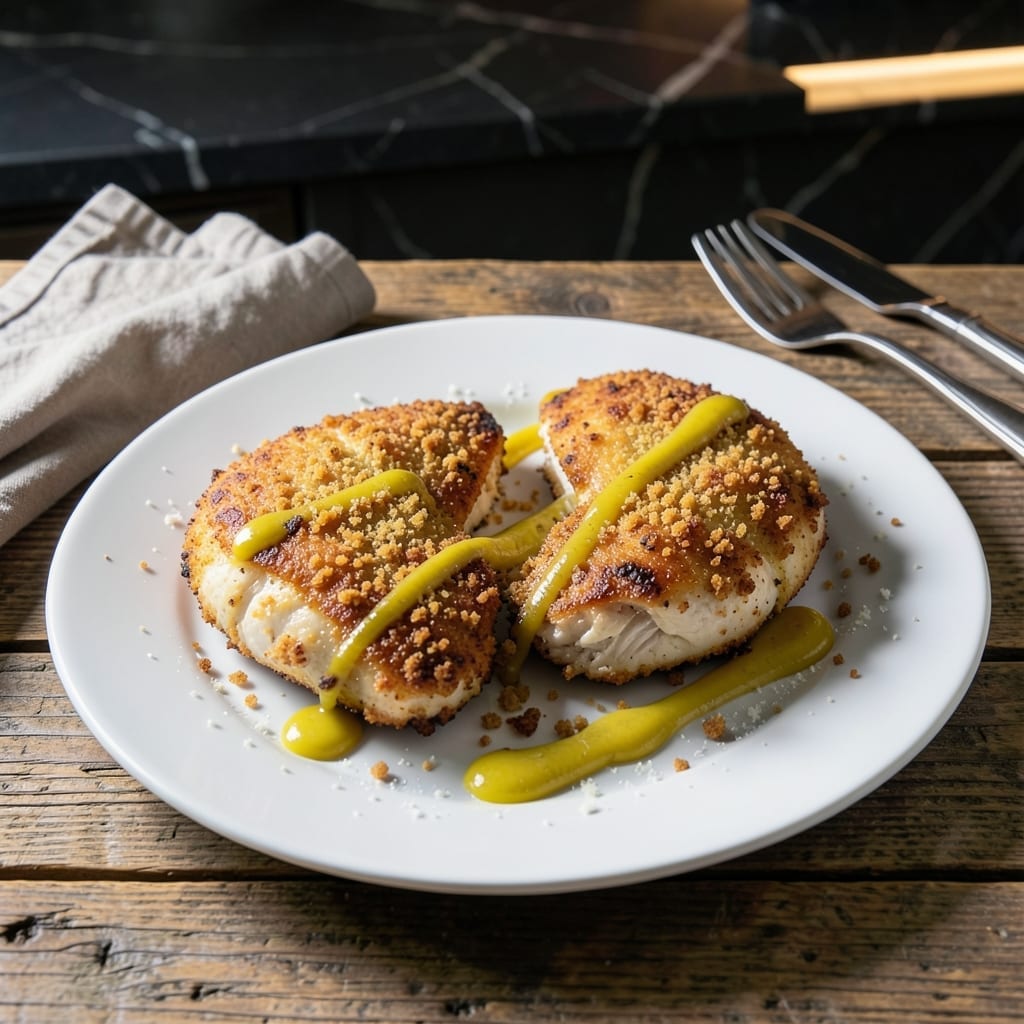
This technique transforms chicken breasts into crispy cutlets with minimal effort and maximum flavor. The key is pounding the meat to an even thickness, which ensures quick, even cooking and that coveted golden exterior.
By flattening the chicken, you create more surface area for browning while reducing cooking time by half. A simple breading of flour, egg, and seasoned crumbs guarantees a shatteringly crispy coating that stays put.
The result is juicy, tender chicken with a perfectly textured crust, ready in under 20 minutes. This method works for weeknight dinners or impressive meals with minimal fuss.
Serve with a fresh salad or roasted vegetables for a complete, satisfying meal. Here’s how to achieve restaurant-quality results at home.
Ingredients for Flattened Chicken
Transform simple chicken breasts into restaurant-quality crispy cutlets with these precise ingredients.
| Ingredient | Amount | Notes |
|---|---|---|
| Chicken Breasts 🍗 | 1 ½ lb | Boneless, skinless, pounded to 1/4-inch thickness |
| All-Purpose Flour 🌾 | ¾ cup | For initial dredging layer |
| Large Eggs 🥚 | 2 whole | Beaten for egg wash binding |
| Panko Breadcrumbs 🍞 | 1 ½ cups | Japanese-style for maximum crispiness |
| Grated Parmesan Cheese 🧀 | ½ cup | Freshly grated from block |
| Dijon Mustard 🟡 | 2 tbsp | Adds tang to egg wash |
| Garlic Powder 🧄 | 1 tsp | For seasoning the breading |
| Onion Powder 🧅 | 1 tsp | For seasoning the breading |
| Paprika 🌶️ | 1 tsp | Sweet or smoked variety |
| Diamond Crystal Kosher Salt 🧂 | 1 tsp | Divided between chicken and breading |
| Freshly Ground Black Pepper 🌶️ | ½ tsp | Divided between chicken and breading |
| Neutral Cooking Oil 🫒 | ¾ cup | For pan-frying cutlets |
| Unsalted Butter 🧈 | 2 tbsp | Melted, for finishing breading |
| Fresh Lemon 🍋 | 1 whole | For serving, cut into wedges |
The chicken quality is paramount. Air-chilled, free-range chicken breasts from Whole Foods or Costco yield superior texture and flavor. Pounding to an even 1/4-inch thickness is non-negotiable for consistent cooking. The Panko breadcrumbs must be the Japanese variety—Kikkoman or Progresso brands offer the best crisp-to-crumb ratio. For the Parmesan, Parmigiano-Reggiano provides the authentic depth of flavor required.
Substitutions require careful consideration. Regular breadcrumbs can replace Panko at a 1:1 ratio, though texture will be less crisp. Whole wheat flour works for dredging but may darken more quickly. If avoiding dairy, nutritional yeast can replace Parmesan at 1:1. The egg wash is essential for adhesion—aquafaba (3 tbsp per egg) is the only viable vegan alternative that maintains the proper consistency.
Store raw chicken on the bottom shelf of your refrigerator and use within 2 days of purchase. The breading mixture can be prepared 1 day in advance and kept in an airtight container. Cooked cutlets maintain optimal texture for 3-4 days refrigerated, though they are best served immediately after frying for maximum crispness.
Why You’ll Love This Recipe
- One Pan Dinner: I flatten the chicken, bread it, and bake—no splatter, no mess, just one sheet pan to wash.
- Crispy Parmesan Crunch: That panko and parmesan coating fries up golden and crunchy, with the juiciest chicken inside. Honestly, I could eat it plain.
- Weeknight Hero: It’s ready faster than takeout, and the kids actually finish their plates (yes, even on a Tuesday night).
- Stretches Further: Pounding the chicken thin means two breasts feed four, and leftovers taste just as good cold in sandwiches.
Step-by-Step Instructions for Flattened Chicken
This method ensures maximum crispiness while cutting cooking time nearly in half.
Step 1: Prepare and Pound the Chicken Breasts
Begin by placing the 1.5 lb chicken breasts between two sheets of plastic wrap. Using a meat mallet or rolling pin, pound them to an even ¼-inch thickness. This uniform thickness guarantees even cooking and prevents dry, overdone edges.
Season both sides of the pounded chicken with half the Diamond Crystal kosher salt and half the freshly ground black pepper. The thin cut allows the seasoning to penetrate deeply, enhancing flavor in every bite. Set aside while you prepare the breading station.
Step 2: Set Up the Breading Station
Create a breading assembly line with three shallow dishes. In the first, place the 0.75 cup all-purpose flour. In the second, whisk together the 2 whole large eggs, 2 tbsp Dijon mustard, and remaining salt and pepper until fully combined.
For the final dish, mix the 1.5 cups panko breadcrumbs, 0.5 cup grated Parmesan cheese, 1 tsp garlic powder, 1 tsp onion powder, and 1 tsp paprika. The Dijon in the egg wash adds a subtle tang that balances the richness of the Parmesan.
Step 3: Bread the Chicken for Maximum Crispiness
Dredge each chicken breast in the flour, shaking off any excess. This initial layer helps the egg wash adhere properly. Next, dip the floured chicken into the egg mixture, allowing any excess to drip off for 5 seconds.
Press the chicken into the panko mixture, turning to coat completely. Apply gentle pressure to ensure the breading adheres well—this creates that signature crunch. The panko’s coarse texture, combined with the Parmesan, forms an extra-crispy crust that stays golden throughout cooking.
Step 4: Pan-Fry to Golden Perfection
Heat the 0.75 cup neutral cooking oil in a large skillet over medium-high heat until shimmering but not smoking. Carefully place the breaded chicken in the pan, working in batches if necessary to avoid crowding.
Cook for 3-4 minutes per side until the breading is deep golden brown and the internal temperature reaches 165°F. The thin cut ensures quick cooking while maintaining juiciness. Avoid moving the chicken too soon—the breading needs time to set and crisp properly.
Step 5: Finish and Serve Immediately
Transfer the cooked chicken to a paper towel-lined plate to drain excess oil. While still hot, brush each piece with the 2 tbsp melted unsalted butter for added richness and sheen. This final touch enhances the crispiness and adds a luxurious mouthfeel.
Serve immediately with the 1 whole fresh lemon cut into wedges for a bright, acidic contrast to the rich, crispy cutlets. The lemon’s acidity cuts through the richness, making each bite perfectly balanced. These cutlets are best enjoyed fresh from the pan when the crust is at its crispiest.
Pro Tips For Making Flattened Chicken
- Pound Evenly: Use a meat mallet or rolling pin to flatten chicken breasts to an even 1/2-inch thickness—I learned this the hard way after my first batch cooked unevenly.
- Dry the Chicken: Pat the chicken breasts completely dry before dredging, or the coating will slide right off.
- Skip the Overcrowding: Fry in batches with space between each piece, or the panko will steam instead of crisp.
- Rest Before Serving: Let the chicken rest 5 minutes after cooking to keep the juices in—this is the one step I skip when I’m lazy, and I always regret it.
Make-Ahead Tips for flattened chicken
Prep Chicken Ahead
Pound and season the chicken up to 1 day in advance. Store it in an airtight container with parchment paper between layers to prevent sticking. Keep it on the bottom shelf of your fridge at 40°F or below. 💡
Breading Station Setup
Mix your dry ingredients (panko, Parmesan, and spices) the night before. Store in a sealed container. The egg wash should be made fresh—whisk it just before breading to maintain the best texture.
Fully Breaded Cutlets
You can bread the chicken up to 4 hours ahead. Place breaded cutlets on a wire rack set over a baking sheet, uncovered, in the fridge. This keeps the coating dry and crisp when cooked later.
Freezing Uncooked Cutlets
Freeze breaded cutlets on a parchment-lined tray for 1-2 hours, then transfer to a freezer bag. They’ll keep for 1 month. Cook from frozen, adding 1-2 minutes per side. ❄️
Reheating Cooked Chicken
Place cooked cutlets on a wire rack in a 375°F oven for 8-10 minutes to restore crispiness. Avoid the microwave—it’ll make the breading soggy. A toaster oven works well for smaller batches.
Make-Ahead Meal Assembly
Prepare a full meal by breading and freezing cutlets with sides. Thaw overnight in the fridge, then cook as usual. This works great for quick weeknight dinners with minimal effort.
Nutrition Facts
Frequently Asked Questions
Do I need a meat mallet to flatten the chicken?
A meat mallet works best, but a rolling pin or heavy skillet can substitute. Place chicken between plastic wrap to prevent sticking.
Can I bake instead of pan-frying?
Yes, bake at 400°F for 12-15 minutes. Use a wire rack for crispiness. Pan-frying gives better browning though.
Why did my breading fall off?
This usually happens if chicken is moved too soon in the pan. Let it cook undisturbed for 3 minutes first.
What’s the best oil for frying?
Use neutral oils like vegetable, canola, or peanut oil. Avoid olive oil—it has a lower smoke point. Keep oil at medium-high heat.

- Jollof Rice Sauce Recipe: West African Tomato and Spice Infusion - September 25, 2026
- Japanese Rice Soup Recipe: Umami-Rich Comfort in a Bowl - September 25, 2026
- Homemade Cream Of Rice Recipe: Silk-Smooth Breakfast in Minutes - September 25, 2026