
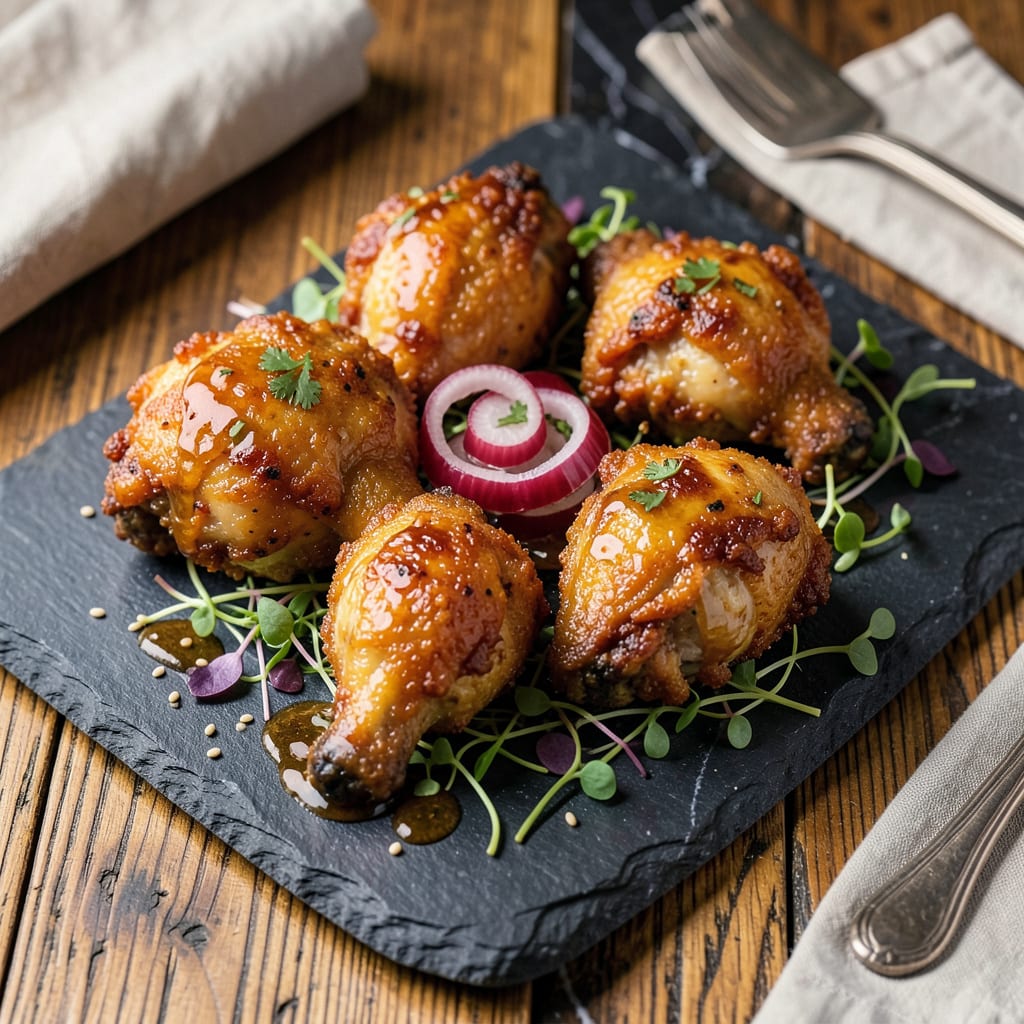
Let me tell you about the game-changing way I discovered to fry chicken—using coconut oil. That might sound unusual, but it creates the crispiest crust you’ve ever had while adding a subtle tropical richness that takes this classic to a whole new level. I was skeptical at first too, until I tried it and realized how much better it is than traditional oils.
The secret starts with choosing the right coconut oil—refined works best because it has a higher smoke point and neutral flavor. I brine the chicken first to keep it juicy, then coat it in a seasoned flour mixture that gets extra crunchy when fried in coconut oil. The oil’s unique properties create a shatteringly crisp exterior while keeping the meat tender and flavorful inside.
What you end up with is golden, crispy fried chicken that stays crunchy longer than any other method I’ve tried. The coconut oil gives it a hint of something special without tasting like coconut—just pure, delicious fried chicken with an unexpected depth of flavor. It’s become my go-to method for everything from weeknight dinners to summer picnics.
Serve it hot with your favorite dipping sauces or alongside classic sides like coleslaw and cornbread. Once you try this method, you’ll never go back to regular fried chicken. Here’s how to make it perfectly every time.
📚 In This Guide
- What You’ll Need
- Instructions
- Tips and Common Mistakes
What Youll Need
- ● Chicken pieces: 3–4 lbs (mix of thighs, drumsticks, or breasts), skin-on for extra crispiness
- ● Refined coconut oil: 3–4 cups (high smoke point, at least 400°F) for deep frying
- ● Buttermilk: 2 cups (for marinating, or sub with yogurt + 1 tbsp vinegar)
- ● All-purpose flour: 2 cups (for dredging, or swap ½ cup with cornstarch for extra crunch)
- ● Spices: 1 tbsp each of paprika, garlic powder, salt, and black pepper (adjust to taste!)
- ● Deep fryer or heavy pot: 5–6 quart capacity with a candy/fry thermometer (for precise temp control)
- ● Tongs or slotted spoon: Heat-resistant, for safe flipping
- ● Wire rack + baking sheet: For draining (skip paper towels to keep it crispy!)
- ● Cayenne pepper: ½ tsp (for a spicy kick)
- ● Panko breadcrumbs: ½ cup (mixed with flour for ultra-crispiness)
- ● Fresh herbs: Rosemary or thyme (for infused oil flavor)
- ● Kitchen splatter guard: Saves your stovetop from oil pops! 🛡️
Instructions
Here’s how to achieve that perfect golden crust with coconut oil’s unique flavor—simple steps, amazing results.
Prepare the Chicken for Maximum Crispiness
Start by patting your chicken pieces completely dry with paper towels. This is crucial—any moisture on the surface will create steam when it hits the hot oil, preventing that beautiful crispy crust from forming. I like to place the dried pieces on a wire rack set over a baking sheet for 10 minutes to let any remaining moisture evaporate.
While the chicken dries, set up your breading station with three shallow dishes. The first will hold your flour mixture, the second will contain beaten eggs (or buttermilk if you prefer), and the third will be your seasoned breadcrumbs or flour. This three-step breading process creates layers that crisp up beautifully when fried.
Heat the Coconut Oil to the Perfect Temperature
Pour enough coconut oil into your deep fryer or heavy-bottomed pot to completely submerge the chicken pieces—typically about 2-3 inches deep. Heat the oil over medium-high heat until it reaches 350°F on a candy or deep-fry thermometer. This temperature is ideal for creating a crispy exterior while cooking the meat through without burning.
The coconut oil will be completely liquid at this temperature. You’ll notice it has a lighter, clearer appearance than when solid. Maintain this temperature carefully—if it gets too hot, the coconut oil can break down and smoke. If it’s not hot enough, the chicken will absorb too much oil and become greasy instead of crispy.
Fry the Chicken in Batches for Even Cooking
Carefully lower a few pieces of breaded chicken into the hot oil using tongs. Don’t overcrowd the pot—this will cause the oil temperature to drop too much. I find that 3-4 pieces at a time works well for maintaining the oil temperature in a standard home fryer.
Fry the chicken for 12-15 minutes, turning occasionally with tongs, until it’s deep golden brown and the internal temperature reaches 165°F when checked with a meat thermometer. The coconut oil will give the crust a subtle sweetness and an extra-crispy texture that’s different from traditional frying oils. You’ll notice the crust develops a beautiful, even color faster than with other oils.
Drain and Rest for Optimal Texture
As each batch finishes frying, transfer the chicken to a wire rack set over a baking sheet or to a plate lined with paper towels. The wire rack method is my preference because it allows air to circulate around the chicken, preventing the crust from getting soggy on one side. Let the chicken drain for 2-3 minutes before serving.
This resting time serves two purposes: it allows the crust to set completely (so it stays crispy when you bite into it) and lets the juices redistribute throughout the meat. You’ll be tempted to dig in right away—I always am—but those few minutes make a noticeable difference in both texture and juiciness. The coconut oil’s aroma will be most pronounced when the chicken is hot, so serve it immediately for the best flavor experience.
Tips and Common Mistakes
Let me share what I’ve learned about getting that perfect crispy crust with coconut oil—these details make all the difference.
Drying is Everything: Don’t rush the 10-minute drying time in Step 1. I’ve found that placing chicken on a wire rack (not a plate) allows air to circulate all around, removing moisture more effectively. If you skip this, you’ll end up with a steamed crust instead of that shatteringly crisp texture we’re after. The difference is night and day.
Temperature Control: Maintaining that 350°F oil temperature in Step 2 is crucial. Here’s what nobody tells you—coconut oil has a lower smoke point than many frying oils, so it can go from perfect to burnt quickly. Use a thermometer and adjust the heat as needed. If you see wisps of smoke, lower the heat immediately. The oil should shimmer but not smoke.
Batch Size Matters: When frying in Step 3, stick to 3-4 pieces at a time. I learned this the hard way after my first attempt with too many pieces dropped the oil temp to 300°F, resulting in greasy chicken. The 12-15 minute cooking time works perfectly when the oil stays at 350°F, so don’t crowd the pot.
Resting Secret: Those 2-3 minutes of resting in Step 4 aren’t just for draining. This is when the crust sets completely and the juices redistribute. If you cut into the chicken immediately, all those delicious juices will spill out onto your plate instead of staying in the meat. Trust me, the wait is worth it.
Pro Tips for Coconut Oil For Frying Chicken
- Let me share what I’ve learned about getting that perfect crispy crust with coconut oil—these details make all the di…
- Drying is Everything: Don’t rush the 10-minute drying time in Step 1. I’ve found that placing chicken on a wire rack …
- Temperature Control: Maintaining that 350°F oil temperature in Step 2 is crucial. Here’s what nobody tells you—coconu…
Frequently Asked Questions
Is coconut oil good for deep-frying chicken, or will it burn?
Coconut oil is excellent for frying chicken thanks to its high smoke point (~350°F for unrefined, 400°F+ for refined). Refined coconut oil is best for deep-frying since it handles higher heat without burning. Just monitor the temp with a thermometer—keep it between 325–375°F for perfect crispiness!
How long does coconut oil last for frying? Can I reuse it?
You can reuse coconut oil 2–3 times if you strain out food particles and store it in a cool, dark place. After that, it starts breaking down and absorbing flavors. Pro tip: Smell it first—if it’s rancid or overly dark, toss it!
Does coconut oil make fried chicken taste like coconut?
Refined coconut oil is neutral in flavor, so your chicken will taste crispy and savory, not tropical. Unrefined (virgin) coconut oil adds a mild coconut aroma, which can be delicious in sweet-spicy glaze recipes! Try both to see what you prefer.
What’s a healthier alternative if I don’t want to use coconut oil?
For a lighter option, try avocado oil (smoke point: 520°F) or peanut oil (450°F). Both are neutral and heart-healthy. Air-frying with a light coconut oil spray also cuts oil use by 80% while keeping crunch!
Why is my coconut oil-fried chicken soggy instead of crispy?
Sogginess usually means:
- Oil temp was too low (below 325°F = greasy chicken).
- Overcrowding the pan (steams instead of fries).
- Skipping the drying step (pat chicken very dry before frying!).
Coconut oil isn’t just a trend—it’s a game-changer for frying chicken! Its high smoke point and rich flavor deliver a golden, crispy crust while keeping the meat juicy. Plus, the subtle tropical aroma adds a unique twist to your classic fried chicken. 🍃
Ready to try it? Grab a jar of unrefined coconut oil, heat up your skillet, and get frying! For extra inspiration, experiment with spices like smoked paprika or garlic powder to make it your own. Happy cooking!

- Rice Cake Cereal Recipe: Crunchy Homemade Breakfast Delight - September 25, 2026
- Pancake Recipe Using Rice Flour: Light and Airy Gluten-Free Stacks - September 25, 2026
- Japanese Rice Porridge Recipe: Silky Congee With Umami Depth - September 25, 2026