
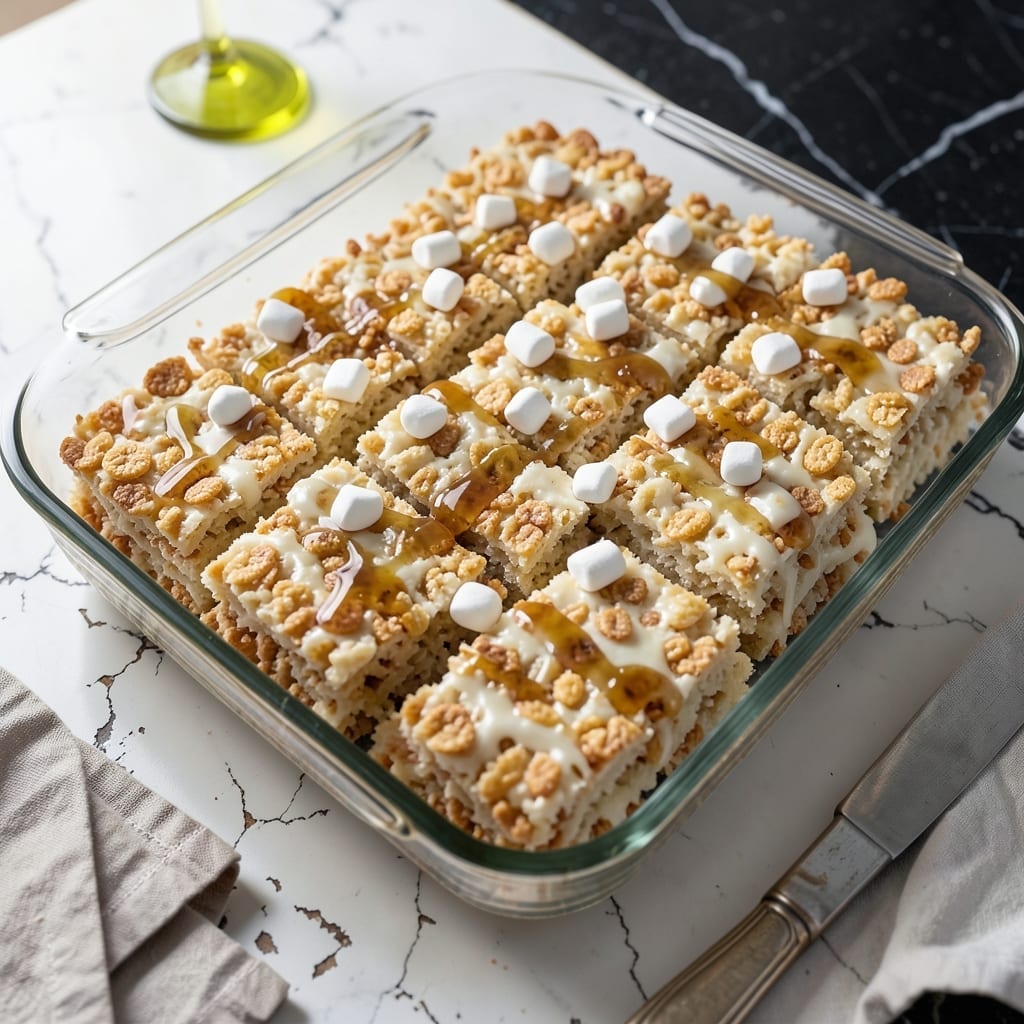
I developed this recipe after one too many dense, brick-like treats that barely resembled the cloud-like version I remembered from childhood.
This method uses a precise ratio of marshmallows to cereal and a specific melting technique that creates those signature fluffy layers we all crave. The key is patience—letting the marshmallow mixture cool just enough before combining with the cereal.
What you get are treats with a buttery crunch on the outside and an airy, melt-in-your-mouth interior. They hold their shape perfectly while remaining light as a feather.
Perfect for lunchboxes, bake sales, or when you need a sweet fix in under an hour. Here’s how to make them right.
Ingredients for Fluffy Rice Krispie Treat
Simple pantry staples transform into these airy, buttery treats everyone loves.
| Ingredient | Amount | Notes |
|---|---|---|
| Rice Krispies Cereal 🥣 | 6 cups | Fresh for maximum crispness |
| Mini Marshmallows 🍬 | 10 cups | Jet-Puffed preferred for texture |
| Unsalted Butter 🧈 | ½ cup | Cut into pieces for even melting |
| Vanilla Extract 🌿 | 1 tsp | Pure for best flavor |
| Kosher Salt 🧂 | ¼ tsp | Diamond Crystal brand preferred |
| Light Corn Syrup 💧 | 2 tbsp | Karo brand recommended |
| Powdered Sugar 🍚 | ¼ cup | For dusting, optional |
The marshmallows are the magic here. Jet-Puffed mini marshmallows melt smoother and faster than the jumbo ones (trust me on this). Kroger’s store brand works too, but avoid the colored ones—they can turn your treats weird shades. For the cereal, fresh Rice Krispies snap louder and stay crisp longer. That stale box at the back of the pantry? Don’t risk it.
No mini marshmallows? Regular ones cut in half work, but they take forever to melt. Out of corn syrup? Honey or agave at the same amount, though the texture might be slightly denser. Want extra flavor? Swap half the vanilla for almond extract. The butter can be salted if that’s all you’ve got—just skip the added salt.
These keep in an airtight container for up to 3 days at room temp. For longer storage, wrap individual treats in parchment and freeze for 2 months. They’ll lose a bit of crispness after thawing (the good stuff, not the pre-shredded kind).
Why You’ll Love This Recipe
- Five Ingredients: I just grab Rice Krispies, marshmallows, butter, vanilla, and salt—no shopping stress.
- That Fluffy Bite: The mini marshmallows melt into this cloud-like texture that crackles with every bite.
- Party or Pajamas: I’ve served these at birthdays and also eaten the whole pan in sweatpants on a Tuesday night.
- Stays Fresh: They keep for days in an airtight container, so I can make a batch and forget about dessert for a while.
Step-by-Step Instructions for Fluffy Rice Krispie Treats
This method delivers cloud-like treats with maximum crispness and perfect buttery flavor every time.
Step 1: Melt and Bloom the Butter Mixture
In a large, heavy-bottomed pot, melt the 0.5 cup Unsalted Butter over low heat. I cut mine into pieces first for even melting. Watch for the foam to subside—that’s your signal the butter is fully melted and ready for the next step.
Immediately add the 10 cups Mini Marshmallows, 2 tbsp Light Corn Syrup, and 0.25 tsp Kosher Salt. Stir constantly with a silicone spatula, scraping the bottom to prevent scorching. The marshmallows will begin to melt and create a glossy, stretchy mixture after 5-7 minutes.
Here’s the thing—this step requires patience. If you rush it over high heat, the marshmallows will burn and develop a bitter taste. You want a smooth, ivory-colored mixture with no visible marshmallow lumps before moving on.
Step 2: Infuse with Vanilla and Prepare the Base
Remove the pot from heat and stir in the 1 tsp Vanilla Extract. The aroma will be incredible—this is where the flavor really starts to develop. I always use pure vanilla here; the imitation stuff just doesn’t deliver the same depth.
While the mixture is still hot, quickly add all 6 cups Rice Krispies Cereal at once. Use your spatula to fold the cereal into the marshmallow mixture, pressing gently to ensure every piece gets coated. You’ll notice the cereal starts to soften slightly—that’s normal and helps create that signature texture.
Work efficiently here. The marshmallow mixture will begin to set as it cools, so you have about 2-3 minutes to fully incorporate the cereal before it becomes too stiff to mix properly.
Step 3: Press with Precision for Fluffiness
Transfer the mixture to a greased 9×13-inch baking dish. Here’s the moment that matters: use a greased spatula or your greased hands to press the mixture evenly into the pan. Don’t pack it down too firmly—this is the secret to keeping them fluffy rather than dense.
I press just enough to create an even layer, leaving a little air between the cereal pieces. This technique creates that cloud-like texture we’re after. If the mixture sticks to your hands, wet them slightly with cool water and continue pressing.
Let the treats cool at room temperature for 30 minutes before cutting. Resist the urge to dig in early—they need this time to set properly. You’ll know they’re ready when they hold their shape when lightly pressed.
Step 4: Cut and Finish with Optional Dusting
Use a sharp knife to cut the treats into 12 equal squares. For clean cuts, I run the knife under hot water between each slice. This prevents the marshmallow from sticking and dragging the cereal with it.
If you’re using the 0.25 cup Powdered Sugar for dusting, sift it lightly over the top of the treats just before serving. This adds a nice presentation touch and a subtle sweetness that complements the buttery flavor.
Store any leftovers in an airtight container at room temperature for up to 3 days. Though I promise, they won’t last that long—they’re just that good.
Pro Tips For Making Fluffy Rice Krispie Treat
- Melt Low and Slow: Use medium-low heat when melting the butter and marshmallows—I learned this the hard way after burning two batches. The marshmallows melt evenly without turning brown or bitter.
- Butter the Pan: Grease your baking dish and the spatula with extra butter before pressing the mixture in. This prevents sticking and makes cleanup a breeze.
- Press Gently Only: Resist the urge to pack the rice krispie mix tightly into the pan. A light press keeps them fluffy, while pressing too hard turns them dense and chewy.
- Add Salt Last: Sprinkle the kosher salt over the cereal after mixing with the marshmallow mixture. This ensures even distribution and prevents the salt from dissolving into the melted butter.
Health Benefits of This Recipe
Energy Boost
These treats provide a quick energy lift thanks to the carbohydrates in Rice Krispies and marshmallows. A single serving offers about 150 calories—perfect for a mid-afternoon pick-me-up when you need a little fuel without feeling weighed down. I keep a batch in my kitchen for those 3pm slumps. 💪
Low Fat Indulgence
With only 4 grams of fat per serving (mostly from butter), this is one of the lighter sweet treats you can enjoy. The fat content is minimal compared to cookies or cakes, making it a guilt-free option for satisfying your sweet tooth.
Iron Fortification
Rice Krispies are fortified with iron and other essential vitamins. One serving provides about 25% of your daily iron needs, which is especially valuable for growing kids or anyone needing an iron boost. It’s a sneaky way to add nutrients to a beloved snack.
Protein for Satiety
While not a protein powerhouse, each treat contains about 1 gram of protein. The combination of carbs and a small amount of protein helps keep you feeling satisfied longer than sugar alone would. It’s why these treats often curb cravings better than candy.
Allergen Considerations
Be mindful of allergens—these contain dairy from butter and may have traces of gluten depending on your cereal brand. For gluten-free versions, use certified GF Rice Krispies. Always check labels if allergies are a concern. 💡
Nutrition Facts
Frequently Asked Questions
Why do my treats turn out dense instead of fluffy?
Over-packing the mixture in the pan is the main culprit. Press just enough to shape, but leave air between cereal pieces. Also, use 10 cups mini marshmallows for the right ratio.
Can I use regular marshmallows instead of mini?
Yes, but cut them in half for faster melting. They take longer to dissolve and may create a slightly denser texture. Jet-Puffed works best for smooth results.
How do I get clean cuts without sticking?
Run your knife under hot water between each cut. This prevents marshmallow from dragging cereal pieces. Let treats cool completely before slicing for best results.
What’s the best way to store leftovers?
Keep in an airtight container at room temperature for up to 3 days. For longer storage, wrap individually and freeze for 2 months.

- Glutinous Rice Flour Bread Recipe: Soft Pillows with Nutty Depth - October 12, 2026
- Green Rice Casserole Recipe: Cheesy Baked Comfort with Vibrant Herbs - October 12, 2026
- Glutinous Rice Coconut Milk Recipe: Chewy Sweetness With Tropical Depth - October 12, 2026