
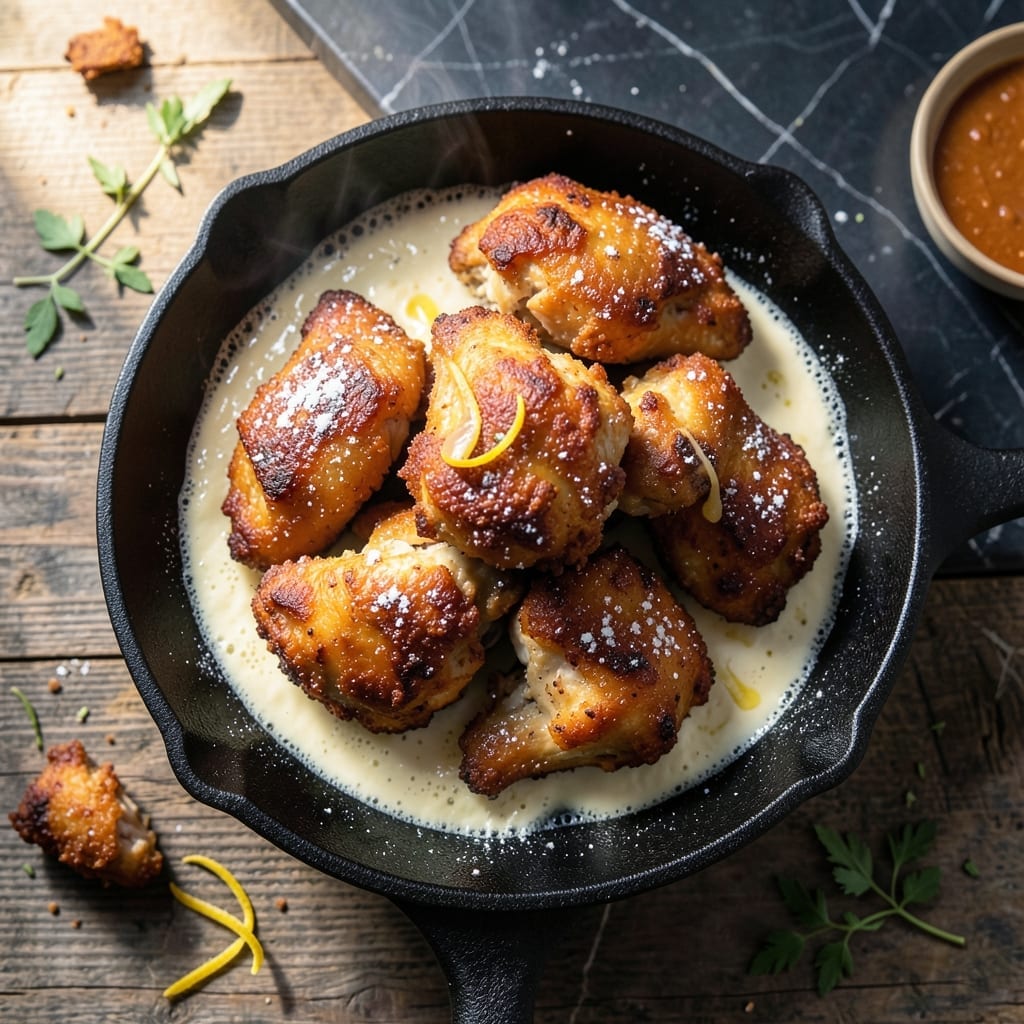
This butter-fried chicken delivers a golden crust with rich, velvety flavor that’s impossible to resist. The butter creates a deeper, more complex taste than traditional oil frying while maintaining perfect crispness.
I developed this method after years of experimenting with different fats, and butter emerged as the clear winner for both flavor and texture. The key is maintaining the right temperature to prevent burning while achieving that signature crispy coating.
The result is juicy chicken with a shatteringly crispy exterior that stays tender inside. Each bite delivers the buttery richness that makes this version truly special.
Serve hot for the best texture, with your favorite dipping sauces. The butter base pairs perfectly with classic sides like mashed potatoes or coleslaw.
Ingredients for Fried Chicken in Butter
Butter makes all the difference here. Rich, golden, and irresistibly crispy every time.
| Ingredient | Amount | Notes |
|---|---|---|
| Chicken Thighs 🍗 | 2 lb | Boneless, skin-on, patted dry |
| All-Purpose Flour 🌾 | 2 cups | For dredging, plus extra |
| Buttermilk 🥛 | 1 cup | Full-fat for richness |
| Unsalted Butter 🧈 | 1 ½ cups | For frying, melted and clarified |
| Large Eggs 🥚 | 2 whole | For binding dredge |
| Salt 🧂 | 2 tsp | Diamond Crystal kosher preferred |
| Black Pepper 🌶️ | 1 tsp | Freshly ground for best flavor |
| Garlic Powder 🧄 | 1 ½ tsp | Not garlic salt |
| Onion Powder 🧅 | 1 ½ tsp | Freshly ground preferred |
| Paprika 🌶️ | 1 tsp | Sweet or smoked variety |
| Cayenne Pepper 🔥 | ¼ tsp | Adjust for heat preference |
| Cornstarch 🌾 | ½ cup | For extra crispiness |
| Vegetable Oil 🫒 | ¼ cup | For preventing butter burn |
The chicken is everything here—thighs stay juicier than breasts. Look for skin-on, bone-in at Whole Foods or your local butcher (they’ll often trim them for you). The butter? Unsalted only—salted can make the crust too salty. I clarify mine first to prevent burning (worth the extra minute). The buttermilk should be full-fat—low-fat just doesn’t give the same richness.
No buttermilk? Whole milk plus a tablespoon of lemon juice works in a pinch. Fresh out of cayenne? Red pepper flakes at half the amount. Want extra crunch? Add crushed cornflakes to the dredge. The paprika is flexible—sweet, smoked, or hot all work. If you’re avoiding gluten, swap the all-purpose flour for a 1:1 gluten-free blend. Just don’t skip the cornstarch.
Fry the chicken in batches—crowding the pan lowers the temp and makes it greasy. Keeps 2-3 days in the fridge, but it’s best hot out of the pan. Reheat in a 350°F oven to keep it crispy. Leftovers? Chop and toss into a salad the next day (trust me on this).
Why You’ll Love This Recipe
- One Pan Magic: I love that I only need a skillet and a bowl—no deep fryer, no mess, just golden chicken thighs sizzling in butter.
- Buttery Crisp Perfection: The butter does something special to the flour crust, giving it that rich, crackling finish with juicy meat underneath.
- Weeknight Hero: Between us, this is my go-to when I need dinner fast but still crave that comfort food feel.
- Budget Stretcher: Chicken thighs stay cheap, and the buttermilk marinade makes every bite taste like a splurge without the cost.
Step-by-Step Instructions for Fried Chicken in Butter
Here’s my tested method for achieving that perfect golden crust with rich buttery flavor every time.
Step 1: Prepare the Flour Dredge and Wet Mixture
In a large bowl, whisk together the 2 cups all-purpose flour, 0.5 cup cornstarch, 2 tsp salt, 1 tsp black pepper, 1.5 tsp garlic powder, 1.5 tsp onion powder, 1 tsp paprika, and 0.25 tsp cayenne pepper until fully combined. This blend creates that signature crispy, flavorful coating.
In a separate bowl, whisk the 2 whole large eggs with the 1 cup buttermilk until smooth. The buttermilk’s acidity tenderizes the chicken thighs while the eggs help the dredge adhere perfectly.
Step 2: Coat the Chicken Thighs
Pat the 2 lb chicken thighs completely dry with paper towels—this is crucial for a crispy crust. Dip each piece first in the buttermilk mixture, allowing excess to drip off, then dredge through the flour mixture, pressing firmly to ensure full coverage.
For extra crispiness, repeat the dredging process once more. Place the coated chicken on a wire rack set over a baking sheet. Let it rest for 10 minutes—this helps the coating set and adhere better during frying.
Step 3: Clarify the Butter for Frying
In a large, heavy-bottomed skillet, melt the 1.5 cups unsalted butter over medium-low heat. Once melted, add the 0.25 cup vegetable oil—this raises the smoke point and prevents the butter from burning. Skim off any milk solids that rise to the surface with a slotted spoon.
You want the butter to reach 325-350°F for frying. Use a candy or deep-fry thermometer for accuracy. The oil should shimmer and a pinch of flour should sizzle when sprinkled in—this tells you it’s ready.
Step 4: Fry the Chicken to Golden Perfection
Working in batches to avoid crowding, carefully place the chicken thighs in the hot butter. Fry for 6-8 minutes per side until the coating is deep golden brown and crispy. Maintain the oil temperature between 325-350°F throughout frying.
Don’t move the chicken too much—let it develop a crisp crust before flipping. You’ll know it’s ready to turn when the edges look golden and the piece releases easily from the pan. Use tongs to turn the chicken, and transfer each batch to a wire rack set over a paper towel-lined baking sheet to drain.
Step 5: Rest and Serve Warm
Once all the chicken is fried, let it rest for 5 minutes before serving. This brief rest allows the juices to redistribute, ensuring moist, tender meat beneath that crispy exterior. The internal temperature should reach 165°F.
Serve immediately while still warm and crispy. The butter will have infused the crust with its rich, nutty flavor, while the inside remains juicy and perfectly cooked. This method delivers that perfect balance of crunch and richness that makes this dish so special.
Pro Tips For Making Fried Chicken In Butter
- Preheat the Pan: Start with a cold pan and melt the butter slowly over medium heat—this prevents burning and ensures even cooking for the chicken.
- brine the thighs: Soak the chicken thighs in buttermilk for at least 2 hours (overnight if possible) to tenderize and add flavor that no quick soak can match.
- Skip Overcrowding: Fry in batches so each piece has space—I learned this the hard way after ending up with steamed, soggy chicken instead of crispy.
- Dredge Twice: Dip the chicken in flour, then buttermilk, then flour again for a thicker, crunchier crust that actually stays put when frying.
Common Mistakes When Making fried chicken in butter
Butter Burning
Butter burns easily at high temperatures. Always clarify it first by melting slowly over medium-low heat and skimming off milk solids. I add ¼ cup vegetable oil to raise the smoke point to 350°F. 🔥
Temperature Fluctuations
Crowding the pan drops the oil temperature, leading to greasy chicken. Fry in batches with at least 1 inch between pieces. Use a thermometer to maintain 325-350°F consistently.
Uneven Coating
Press the flour mixture firmly onto each piece and let it rest for 10 minutes before frying. This ensures the dredge adheres properly. Double-dredging creates an extra-crispy crust that won’t fall off.
Overhandling Chicken
Resist the urge to move pieces too soon. Wait until edges are golden and the coating releases easily before flipping. Use tongs to turn gently, avoiding piercing the crust.
Skipping the Rest
Let fried chicken rest for 5 minutes on a wire rack, not paper towels. This keeps the crust crisp while allowing juices to redistribute. Serving immediately prevents sogginess. 💛
Wrong Chicken Cut
Thighs stay juicier than breasts for this method. Use skin-on, bone-in pieces and pat them completely dry. Bone-in adds flavor, while skin-on ensures maximum crispiness.
Nutrition Facts
Frequently Asked Questions
Can I use salted butter for frying?
No, always use unsalted butter to control the seasoning. Salted butter can make the crust too salty and may cause burning. Clarify it first for best results.
Why add oil to the butter?
The ¼ cup vegetable oil raises butter’s smoke point to 350°F, preventing burning while maintaining rich flavor. This combo gives you crispiness without bitterness.
Can I bake this instead of frying?
For oven-baked, use 400°F for 25-30 minutes, flipping halfway. Brush with melted butter before baking for similar flavor, though it won’t be as crispy.

- Jollof Rice Sauce Recipe: West African Tomato and Spice Infusion - September 25, 2026
- Japanese Rice Soup Recipe: Umami-Rich Comfort in a Bowl - September 25, 2026
- Homemade Cream Of Rice Recipe: Silk-Smooth Breakfast in Minutes - September 25, 2026