
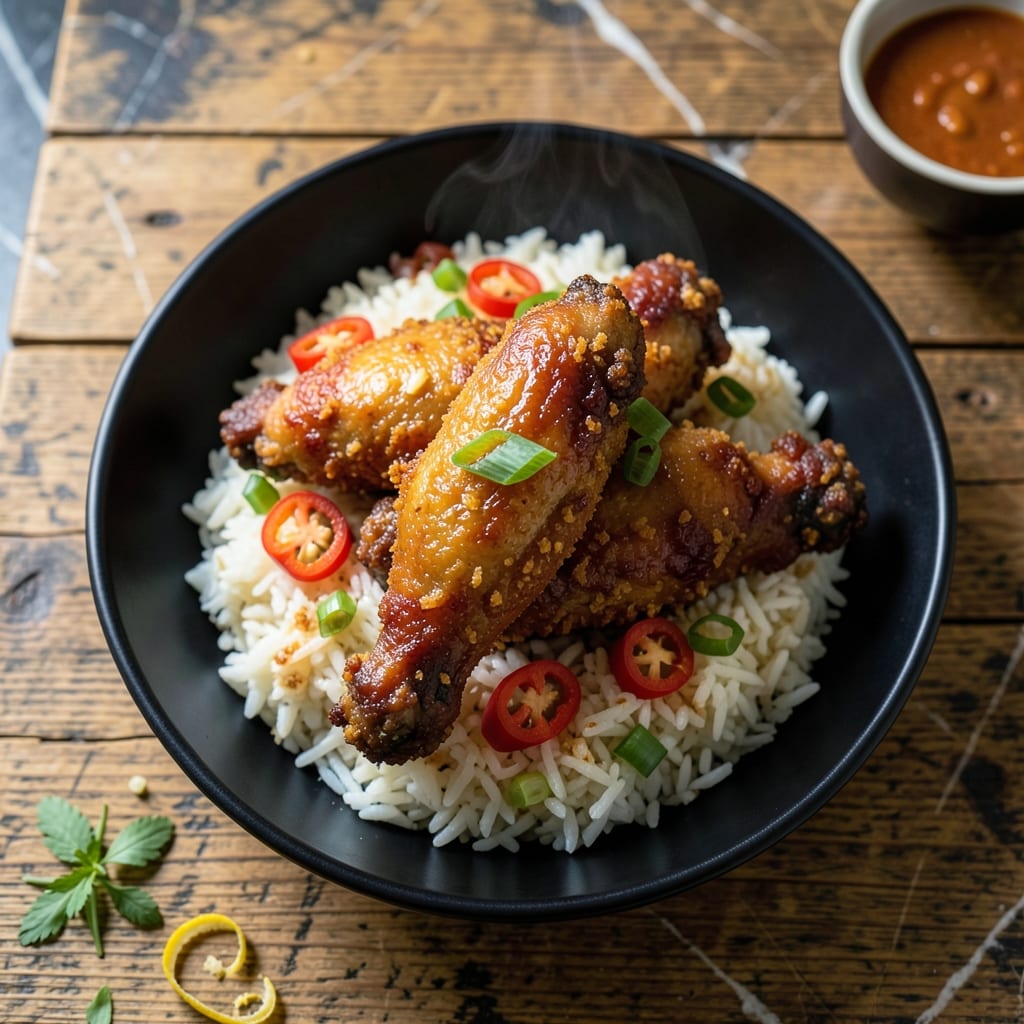
There’s a reason rice flour is the secret to crispy fried chicken that stays shatteringly golden long after frying. I tested this method in my tiny Boston kitchen, and the results were undeniable.
This approach uses rice flour’s unique properties to create a coating that fries up lighter and crispier than traditional all-purpose flour versions. The technique is straightforward, with precise temperatures and timing ensuring consistent success.
You’ll achieve that perfect golden crust that crackles with every bite, while the chicken inside remains tender and juicy. The difference is noticeable from the first crunch.
The method works reliably in home kitchens, delivering restaurant-quality results without specialized equipment. This is fried chicken done right.
Ingredients for Fried Chicken Recipe with Rice Flour
Rice flour delivers that restaurant-quality crispy coating every time. Simple ingredients, extraordinary results.
| Ingredient | Amount | Notes |
|---|---|---|
| Chicken Thighs 🍗 | 2 lb | Boneless, skin-on preferred |
| Rice Flour 🌾 | 2 cups | Fine grain for even coating |
| All-Purpose Flour 🌾 | ½ cup | For initial dredging |
| Kosher Salt 🧂 | 1 ½ tbsp | Diamond Crystal preferred |
| Black Pepper 🌶️ | 1 tsp | Freshly ground for best flavor |
| Garlic Powder 🧄 | 1 tbsp | Not garlic salt |
| Onion Powder 🧅 | 1 tbsp | Balances seasoning blend |
| Paprika 🌶️ | 1 tbsp | Sweet or smoked variety |
| Cayenne Pepper 🔥 | ½ tsp | Adjust for heat preference |
| Buttermilk 🥛 | 1 cup | Full-fat for richness |
| Large Eggs 🥚 | 2 whole | For binding coating |
| Peanut Oil 🫒 | 4 cups | For frying, high smoke point |
| Baking Powder 🧂 | 1 tsp | Creates extra crispiness |
The rice flour is non-negotiable here—Asian markets or the international aisle at Whole Foods carry it. Look for fine, white rice flour (not glutinous). For the chicken, skin-on thighs yield the juiciest results, but breasts work if you prefer. Buttermilk from a Southern brand like Buttermilk Drop adds authenticity, though any full-fat version will do. The oil must have a high smoke point—peanut oil is traditional, but vegetable oil is a fine substitute.
No buttermilk? Whole milk with 1 tbsp vinegar per cup works in a pinch. All-purpose flour can replace rice flour, but the texture won’t be as light. For heat, half the cayenne amount keeps it family-friendly. The baking powder is the secret weapon—don’t skip it—it creates micro-bubbles in the coating for extra crunch. If avoiding gluten, ensure your rice flour is certified gluten-free.
The coated chicken can rest 10 minutes before frying for better adhesion. Leftovers keep 2-3 days in the fridge—reheat in the oven to maintain crispiness. Oil can be reused once if strained and stored in a cool, dark place. Never pour hot oil down the drain.
Why You’ll Love This Recipe
- One Pan Magic: I just toss the chicken thighs in the rice flour mix and fry—no complicated steps, no mess.
- Crispy Perfection: The rice flour gives it this crazy crunch that all-purpose alone can’t match.
- Feeds the Crew: Honestly, I make a big batch and we’re set for lunch the next day too.
- Budget Friendly: Chicken thighs are cheap, and a bag of rice flour goes a long way.
Step-by-Step Instructions for Fried Chicken with Rice Flour
Master the technique for an ultra-crispy crust using this specialized flour blend.
Step 1: Season and Marinate the Chicken Thighs
Pat the 2 lb Chicken Thighs completely dry with paper towels—moisture prevents proper crust adhesion. Place them in a large bowl and season evenly with 1.5 tbsp Kosher Salt, 1 tsp Black Pepper, 1 tbsp Garlic Powder, 1 tbsp Onion Powder, 1 tbsp Paprika, and 0.5 tsp Cayenne Pepper.
Pour 1 cup Buttermilk and 2 whole Large Eggs over the seasoned chicken. Massage the mixture into the meat, ensuring all pieces are fully coated. Cover and refrigerate for at least 1 hour or overnight for maximum flavor penetration and tenderness.
Step 2: Prepare the Dual-Flour Dredge
In a shallow dish, whisk together 0.5 cup All-Purpose Flour and 1 tsp Baking Powder. The baking powder creates micro-bubbles in the coating, enhancing crispiness. In a separate shallow dish, place the 2 cups Rice Flour—its fine texture yields an exceptionally delicate, lacy crust.
This two-step dredging process ensures superior adhesion and texture. The all-purpose flour base provides structure, while the rice flour delivers that signature crunch. Have both dishes ready before removing the chicken from the marinade to maintain even coating.
Step 3: Dredge the Chicken for Maximum Crisp
Remove the chicken from the buttermilk marinade, allowing excess to drip off. Immediately dredge each piece in the all-purpose flour mixture, pressing firmly to create a thin, even base layer. Shake off any excess—thick clumps won’t fry properly.
Transfer the floured chicken to the rice flour, pressing again to ensure complete coverage. The coating should look slightly shaggy but uniform. Place dredged pieces on a wire rack set over a baking sheet—this prevents the coating from getting soggy while you finish the batch.
Step 4: Fry to Golden Perfection
Heat 4 cups Peanut Oil in a deep, heavy pot to 350°F. Use a thermometer for accuracy—oil temperature is critical. Carefully lower 2-3 pieces of chicken into the hot oil, avoiding overcrowding which drops the temperature.
Fry for 12-15 minutes, turning occasionally, until the coating is deep golden brown and the internal temperature reaches 165°F. The rice flour crust will develop a beautiful, intricate lattice pattern when properly fried. Transfer to a wire rack to drain excess oil.
Step 5: Rest and Serve Immediately
Allow the fried chicken to rest for 5 minutes before serving. This brief pause lets the crust set fully while keeping the meat juicy. The coating should remain audibly crisp when handled—this is your indicator of proper texture.
Serve while hot, as the crust loses its crispness as it cools. The contrast between the shatteringly crisp rice flour exterior and the tender, seasoned chicken underneath defines this preparation. The paprika and cayenne provide subtle warmth that complements the richness of the dark meat.
Pro Tips For Making Fried Chicken Recipe With Rice Flour
- Double Dredge: Mix rice flour and all-purpose flour 50/50 for the dredge—rice flour alone can be too delicate and won’t stick as well. I learned this the hard way after my first batch turned into a sad, patchy mess.
- Pat Dry First: Blot the chicken thighs with paper towels until they’re bone-dry. Sounds tedious, but wet skin steams instead of frying, and you’ll end up with flabby coating instead of that shatter-crisp crust.
- Rest Before Frying: Let the dredged chicken sit for 10 minutes before hitting the oil. This gives the flour time to hydrate and cling, so you’re not left with bare spots or a coating that slides right off in the pan.
- Hot Oil Test: Drop a pinch of flour into the oil—if it sizzles and floats immediately, it’s ready. After burning two batches because the oil wasn’t hot enough, I now swear by this test before adding the chicken.
Pro Cooking Tips for Great fried chicken recipe with rice flour
Oil Temperature Control
Maintain 350°F oil temperature precisely—I use a ThermoWorks Instant Read thermometer for accuracy. If the oil drops below 325°F, your crust will be greasy. Too hot above 375°F and the outside burns before the inside cooks through. 🌡️
Dual-Flour Technique
The two-step dredge is non-negotiable. First coat in all-purpose flour creates adhesion, while the rice flour outer layer delivers that signature crunch. Press firmly when dredging to ensure even coverage. Shake off excess—thick clumps fry unevenly.
Frying in Batches
Never overcrowd your pot—2-3 pieces at a time in a 5-quart Dutch oven works perfectly. Overcrowding drops oil temperature and leads to soggy chicken. I use my Lodge enameled cast iron for even heat distribution.
Resting for Crispiness
Let fried pieces rest 5 minutes on a wire rack, not paper towels. The rack allows air circulation, preventing steam from making the crust soggy. This is when the coating achieves its maximum crispness.
Double-Frying Trick
For extra crunch, fry at 325°F for 8 minutes, rest 5 minutes, then fry again at 350°F for 4-5 minutes. This Korean-style method creates an ultra-crispy exterior while keeping the meat juicy. 💡
Oil Reuse
Strain and store used oil in a cool, dark place—it’s good for 1-2 more uses. But honestly, fresh oil gives the cleanest flavor and best results. Never mix old and new oil, as it lowers the smoke point.
Nutrition Facts
Frequently Asked Questions
Why use rice flour instead of regular flour?
Rice flour creates a lighter, crispier crust that stays shatteringly golden longer than all-purpose flour. Its fine texture yields an exceptionally delicate, lacy coating that fries up lighter and crunchier.
Can I substitute another flour for rice flour?
You can, but the texture won’t be as light. Cornstarch works in a pinch, though it may brown too quickly. All-purpose flour alone won’t deliver the same ultra-crispy result.
How do I keep the coating from falling off?
Press firmly when dredging and let the coated chicken rest 10 minutes before frying. The two-step flour process (all-purpose first, then rice) ensures superior adhesion.
What’s the best oil temperature for frying?
Maintain 350°F precisely. Below 325°F yields greasy chicken, while above 375°F risks burning the crust before the meat cooks through.

- Jollof Rice Sauce Recipe: West African Tomato and Spice Infusion - September 25, 2026
- Japanese Rice Soup Recipe: Umami-Rich Comfort in a Bowl - September 25, 2026
- Homemade Cream Of Rice Recipe: Silk-Smooth Breakfast in Minutes - September 25, 2026