
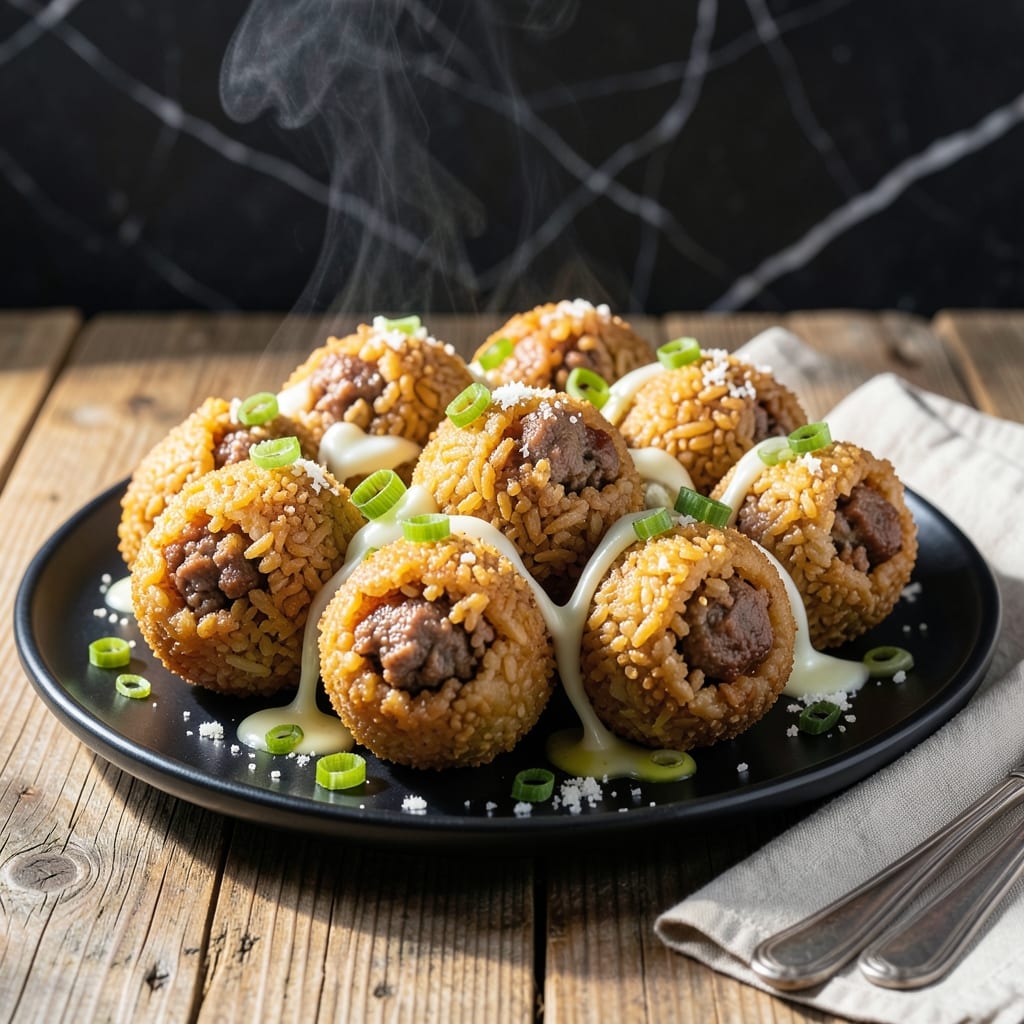
These golden fried rice balls deliver a satisfying crunch with every bite. The secret lies in the perfect balance between a crispy exterior and the savory filling hidden inside.
I developed this method after testing various techniques to ensure the rice holds together while achieving that crispy texture. The key is using day-old rice and chilling the mixture before shaping.
Each orb reveals a surprise center when bitten into, making these as fun to eat as they are to prepare. The contrast between the outer crunch and soft filling creates an irresistible experience.
Serve these as an appetizer or light main course. Here’s how to make them perfectly every time.
Ingredients for Fried Rice Balls
Day-old rice, savory pork, and melty cheese come together for these crispy golden orbs.
| Ingredient | Amount | Notes |
|---|---|---|
| Cooked White Rice 🍚 | 4 cups | Day-old, chilled overnight |
| Ground Pork 🥩 | ½ lb | Or substitute ground chicken |
| Mozzarella Cheese 🧀 | 1 cup | Shredded or cubed small |
| Large Eggs 🥚 | 2 whole | For binding the mixture |
| Breadcrumbs 🍞 | 1 ½ cups | Panko for extra crispiness |
| Parmesan Cheese 🧀 | ½ cup | Freshly grated for best flavor |
| Garlic Cloves 🧄 | 3 cloves | Minced for the filling |
| Green Onions 🧅 | 4 whole | Thinly sliced, divided |
| Olive Oil 🫒 | 1 cup | For frying the rice balls |
| All-Purpose Flour 🌾 | ½ cup | For dredging before breadcrumbs |
| Salt 🧂 | 1 tsp | Kosher or sea salt |
| Black Pepper 🌶️ | ½ tsp | Freshly ground preferred |
| Dried Oregano 🍃 | 1 tsp | For seasoning the filling |
| Red Pepper Flakes 🌶️ | ¼ tsp | Optional for a spicy kick |
The rice is non-negotiable—Use day-old, fully chilled rice (freshly cooked is too moist and will fall apart). Jasmine or short-grain rice works best for stickiness. For the pork, ground pork shoulder has the best fat content for flavor. Whole Foods or Costco carry good options. The mozzarella should be low-moisture to prevent leaking during frying.
No pork? Ground turkey or chicken work just as well. Skip the meat entirely and use mushrooms or spinach for a vegetarian version. Breadcrumbs can be swapped for crushed Ritz crackers (adds a buttery note) or almond flour for gluten-free. If you’re missing Parmesan, Pecorino Romano packs a saltier punch at a 1:1 ratio.
Shape and chill the rice balls for at least 30 minutes before frying to prevent breakage. Leftovers keep in the fridge for 3-4 days and reheat best in an air fryer or oven. These freeze beautifully for up to 3 months—fry straight from frozen, adding a minute or two.
Why You’ll Love This Recipe
- Minimal Effort: I just mix the cooked rice, pork, and cheese, roll them in breadcrumbs, and fry—no fancy techniques here.
- Cheesy Surprise: That first bite when the mozzarella stretches out? Honestly, it’s the reason I make these every week.
- Feeds Everyone: From picky kids to late-night snacks, these disappear fast at my place.
- Leftovers Reinvented: I turn yesterday’s rice into something new—no waste, and the crust gets even crispier the next day.
Step-by-Step Instructions for Fried Rice Balls
Here’s the method. Straightforward, tested, works every time.
Step 1: Prepare the Filling
In a skillet over medium heat, cook the 0.5 lb Ground Pork until browned, breaking it into small pieces. Add 3 cloves Garlic Cloves, half of the 4 whole Green Onions, 1 tsp Salt, 0.5 tsp Black Pepper, 1 tsp Dried Oregano, and 0.25 tsp Red Pepper Flakes. Cook for 2 minutes until fragrant.
Remove from heat and stir in 0.5 cup Parmesan Cheese and 1 cup Mozzarella Cheese. Let the mixture cool completely—this prevents the cheese from melting prematurely when forming the balls.
Step 2: Shape the Rice Balls
In a large bowl, combine the 4 cups Cooked White Rice with the 2 whole Large Eggs. Mix until the rice is evenly coated. Take a handful of the rice mixture and flatten it in your palm. Place 1 tablespoon of the cooled filling in the center.
Gently shape the rice around the filling to form a ball, pressing just enough to hold together. Don’t compact too tightly or the balls will be dense. You should end up with about 16 balls.
Step 3: Bread the Rice Balls
Set up a breading station with three shallow dishes. Place the 0.5 cup All-Purpose Flour in the first, beat 1 Large Egg with 1 tablespoon water in the second, and put the 1.5 cups Breadcrumbs in the third.
Roll each rice ball in flour, shaking off excess, then dip in egg wash, and finally coat with breadcrumbs. Press the breadcrumbs gently to adhere. Place finished balls on a plate and refrigerate for 20 minutes to firm up.
Step 4: Fry to Golden Perfection
Heat 1 cup Olive Oil in a deep skillet over medium-high heat to 350°F. The oil is ready when a breadcrumb sizzles immediately when dropped in.
Fry the rice balls in batches for 3-4 minutes per side until golden brown and crispy. Don’t overcrowd the pan or the temperature will drop. Drain on paper towels and sprinkle with the remaining Green Onions while hot.
Serve immediately while the outside is still crisp and the inside is gooey. The contrast between the crunchy coating and creamy filling is what makes this dish special.
Pro Tips For Making Fried Rice Balls
- Chill the Rice: Use day-old, refrigerated rice—fresh rice is too moist and will make your balls fall apart. I learned this the hard way after my first three attempts turned into a mushy mess.
- Seal the Cheese: Make sure the mozzarella is completely enclosed in the rice mixture, or it’ll leak out during frying and stick to the pan. Sounds obvious, but I lost a few good batches to this.
- Double Coat for Crisp: Dip the balls in egg, then breadcrumbs, then egg again, then breadcrumbs—this double layer guarantees that satisfying crunch without over-frying.
- Fry in Batches: Crowding the pan drops the oil temp, and you’ll end up with greasy, undercooked centers. Two or three at a time, max, unless you’ve got a deep fryer.
Common Mistakes When Making Perfect Results
Using Fresh Rice
Never use freshly cooked rice—it’s too moist and sticky, causing your balls to fall apart during frying. I always use day-old rice that’s been chilled overnight in the fridge. This dries out the grains just enough to hold their shape. 💡
Skipping the Chill
After shaping, resist the urge to fry immediately. Chilling for at least 20-30 minutes firms up the structure and prevents the cheese from oozing out too soon. I once skipped this step and ended up with a sad, cheese-less mess.
Overcrowding the Pan
Fry in small batches to maintain oil temperature at 350°F. Too many balls at once drops the heat, leading to greasy, soggy results. I use a deep skillet and never add more than 4-5 balls at a time.
Under-seasoning the Filling
Taste your pork mixture before stuffing—it should be bold and flavorful. I add 1 tsp salt and 0.5 tsp black pepper as a baseline, then adjust. Bland filling ruins the surprise center.
Wrong Oil Temperature
If the oil isn’t hot enough, your balls will absorb too much oil and turn greasy. Test with a breadcrumb—it should sizzle immediately. I use a candy thermometer for precision, aiming for 350-375°F. 🔥
Rushing the Cooling
Let the filling cool completely before shaping, or the cheese will melt and leak out. I spread mine on a plate and pop it in the fridge for 10-15 minutes to speed up the process.
Nutrition Facts
Frequently Asked Questions
Can I use freshly cooked rice?
No, always use day-old chilled rice for best results. Fresh rice is too moist and will cause the balls to fall apart during frying.
How do I prevent the cheese from leaking out?
Make sure the filling is completely cooled before shaping. Then chill the formed balls for at least 20 minutes before frying to help them hold their shape.
What oil temperature should I use?
Heat the oil to 350°F before frying. Use a candy thermometer for accuracy, and test with a breadcrumb—it should sizzle immediately when dropped in.
Can I make these ahead of time?
Yes! Shape and bread the balls, then refrigerate for up to 24 hours before frying. You can also freeze them for up to 3 months and fry straight from frozen.

- Gambia Jollof Rice Recipe: West African One-Pot Spice Fusion - October 5, 2026
- Cream of Wild Rice Soup Recipe Minnesota: Northwoods Creaminess With Foraged Grains - October 5, 2026
- Frozen Cauliflower Fried Rice Recipe: Quick Low-Carb Wok Magic - October 5, 2026