
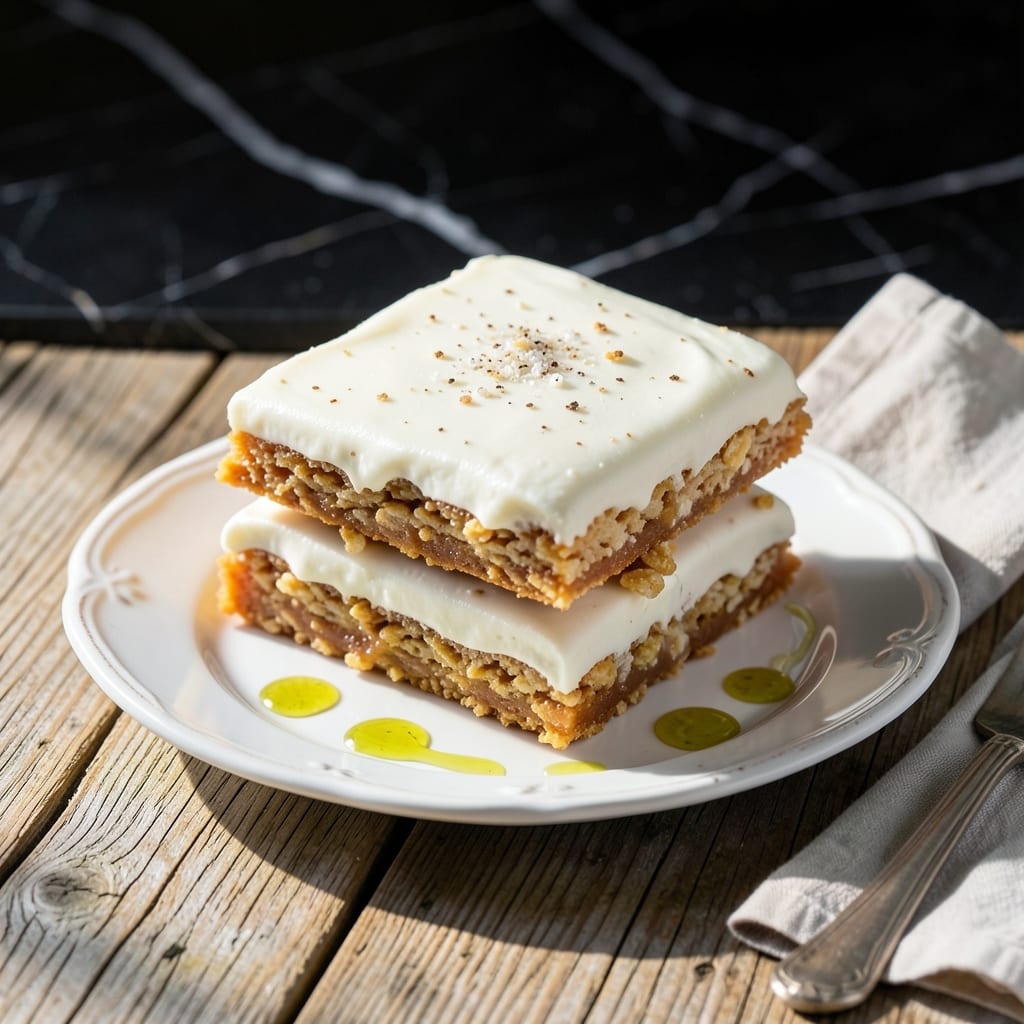
There’s something nostalgic about the snap of a crispy rice cereal base paired with a smooth, sweet frosting layer. This treat brings together childhood memories with a simple, satisfying texture.
I developed this method after testing multiple ratios to achieve the ideal balance of chewy and crunchy. The key is melting the marshmallows just enough to coat the cereal without making it soggy.
The frosting adds a rich, creamy contrast that turns these into an elevated dessert. Each bite delivers the perfect combination of sweetness and crunch.
Ready in under an hour with minimal effort, this recipe is ideal for gatherings or quick indulgence. Here’s how to make them right.
Ingredients for Frosted Rice Krispie Treats
Simple ingredients transform into nostalgic treats with perfect crunch and sweetness.
| Ingredient | Amount | Notes |
|---|---|---|
| Rice Krispies Cereal 🥣 | 6 cups | Classic crispy rice cereal |
| Mini Marshmallows ⚪ | 10 oz | About 4 cups, fresh for best melt |
| Unsalted Butter 🧈 | ¼ cup | For melting marshmallows |
| Vanilla Extract 🌿 | 1 tsp | Pure for best flavor |
| Salt 🧂 | ¼ tsp | Fine grain for balance |
| Powdered Sugar 🍚 | 2 cups | Sifted for smooth frosting |
| Cream Cheese 🧀 | 4 oz | Full-fat, softened to room temperature |
| Heavy Cream 🥛 | 2 tbsp | For frosting consistency |
| Vanilla Extract 🌿 | 1 tsp | Second addition for frosting |
| Unsalted Butter 🧈 | 2 tbsp | For frosting, softened |
The marshmallows are non-negotiable here. Jet-Puffed or Kraft mini marshmallows melt the most smoothly without turning gummy. Use full-fat cream cheese—Philadelphia is the standard—and make sure it’s truly softened (leave it out for at least an hour). The Rice Krispies should be fresh; stale cereal won’t give you that signature snap.
No mini marshmallows? Large marshmallows cut into quarters work in a pinch. Out of cream cheese? Mascarpone at equal amount gets you close on texture. Heavy cream can be swapped with whole milk (add a splash more). For a lighter version, Neufchâtel cheese works but expect a slightly tangier frosting.
Store treats in an airtight container at room temperature for up to 3 days. The frosting softens slightly over time, so eat within 24 hours for best texture. Freeze unfrosted bases for up to 1 month—add frosting after thawing.
Why You’ll Love This Recipe
- One Pot Wonder: I melt the butter and marshmallows in the same pan I use to mix everything—no extra bowls, no fuss.
- That Vanilla Magic: The vanilla extract turns the marshmallow-butter base from sweet to ridiculously good, like a hug in dessert form.
- Party or Pajamas: I’ve served these at birthdays and also eaten half the pan alone on the couch. No judgment.
- Budget Stretch: A box of cereal and a bag of mini marshmallows feed a crowd for under ten bucks. Honestly, it’s my go-to for last-minute gatherings.
Step-by-Step Instructions for Frosted Rice Krispie Treats
Follow this method precisely for perfect texture and flavor in every batch.
Step 1: Melt and Combine Marshmallow Base
In a large pot, melt the 0.25 cup Unsalted Butter over low heat until just liquid. Add the 10 oz Mini Marshmallows and stir constantly with a silicone spatula until completely melted and smooth.
Remove from heat and immediately stir in the 1 tsp Vanilla Extract and 0.25 tsp Salt. The mixture should be glossy and uniform. Work quickly at this stage—marshmallow mixture sets fast as it cools.
Step 2: Incorporate the Rice Krispies Cereal
Add all 6 cups Rice Krispies Cereal to the pot at once. Fold gently but thoroughly with the spatula, ensuring every piece gets coated with the marshmallow mixture. Press down lightly to help distribute the sticky base.
Stop mixing once no dry cereal remains visible. The mixture should hold together when pressed but still look slightly glossy. Avoid overworking, as this can make the treats dense rather than light and crisp.
Step 3: Press and Set the Base Layer
Transfer the mixture to a greased 9×13-inch baking dish or line the dish with parchment paper. Use the spatula or buttered hands to press the mixture evenly into the pan. Press firmly but don’t compact it too tightly—you want a solid base that still has some give.
Let the base layer sit at room temperature for 15-20 minutes to set completely. The top should be firm to the touch and hold its shape when pressed lightly. This ensures a stable foundation for the frosting.
Step 4: Prepare the Cream Cheese Frosting
In a mixing bowl, beat the 4 oz Cream Cheese and 2 tbsp Unsalted Butter together until smooth and creamy. Add the 2 cups Powdered Sugar gradually, mixing on low to prevent a sugar cloud, then increase to medium until fully incorporated.
Pour in the 2 tbsp Heavy Cream and 1 tsp Vanilla Extract, then beat for 1-2 minutes until light and fluffy. The frosting should hold soft peaks when the beaters are lifted.
Step 5: Frost and Finish the Treats
Spread the frosting evenly over the set Rice Krispies base using an offset spatula. Work from the center outward for a smooth, even layer. The frosting should be about ¼-inch thick across the entire surface.
Let the frosted treats sit for 10 minutes to allow the frosting to set slightly before cutting. Slice into squares and serve. The frosting should maintain its shape but remain creamy and spreadable.
Pro Tips For Making Frosted Rice Krispie Treats
- Melt Low and Slow: I learned this the hard way—melt the butter and marshmallows over low heat, stirring constantly, or you’ll end up with a burnt, grainy mess that no amount of Rice Krispies can save.
- Use Fresh Marshmallows: After a batch turned out oddly tough, I realized mini marshmallows stale faster than you think; fresh ones melt smoother and give that perfect gooey texture.
- Press Lightly: Resist the urge to pack the mixture into the pan like you’re making a brick—just press enough to even it out, or your treats will be dense instead of light and crispy.
- Butter Your Hands: Sounds weird, but it works: rub a little butter on your hands before pressing the mixture to prevent sticking and keep things moving quickly before it sets.
Regional Styles of These Flavors
New England Church Potluck
In Boston church basements, these treats often get a maple syrup twist in the frosting. Replace 1 tbsp heavy cream with 1 tbsp pure maple syrup for a subtle New England flair. It reminds me of Sunday mornings after Mass at St. Anthony’s. 💛
Southern Picnic Style
Down South, they add ½ cup chopped pecans to the base mixture for extra crunch. I tested this in my tiny kitchen and found toasting the pecans in 1 tbsp butter for 5 minutes at 350°F enhances their flavor beautifully.
Midwest Fair Favorite
State fairs often feature rainbow versions with food coloring in the frosting. Divide the frosting into 3 bowls, tint each with a few drops of coloring, then swirl together. Use gel food coloring for vibrant hues without thinning the texture.
West Coast Health Twist
In California, they might use brown rice cereal and coconut oil instead of butter. I tried this with Kashi cereal and it worked surprisingly well, though the crunch is slightly different. The frosting stays traditional for balance.
Holiday Peppermint
For Christmas, crush ¼ cup candy canes and fold into the frosting. The mint pairs perfectly with the sweet marshmallow base. I sprinkle extra crushed candy on top for a festive look that wows at holiday parties. 🎄
Boston Irish Pub
Local pubs add 1 tsp Irish cream liqueur to the frosting. Use Baileys for authentic flavor. This adult version is popular at St. Patrick’s Day gatherings in my old neighborhood. Just reduce heavy cream by 1 tsp to compensate.
Nutrition Facts
Frequently Asked Questions
Can I use regular marshmallows instead of mini?
Yes, cut 10 oz large marshmallows into quarters before melting. They’ll melt the same way as minis. Avoid overpacking the measuring cup to prevent too much sugar.
How do I keep the treats from getting soggy?
Press the base firmly into the pan and let it set for 15-20 minutes before frosting. Store in an airtight container at room temperature for up to 3 days.
Can I make these ahead of time?
Prepare the base up to 1 day in advance, but frost just before serving. The frosting softens over time, so adding it early can make the treats too messy.
What if my frosting is too thick?
Add 1 tsp heavy cream at a time until it reaches a spreadable consistency. Be careful not to over-thin, as it won’t hold its shape when piped or spread.

- Glutinous Rice Flour Bread Recipe: Soft Pillows with Nutty Depth - October 12, 2026
- Green Rice Casserole Recipe: Cheesy Baked Comfort with Vibrant Herbs - October 12, 2026
- Glutinous Rice Coconut Milk Recipe: Chewy Sweetness With Tropical Depth - October 12, 2026