
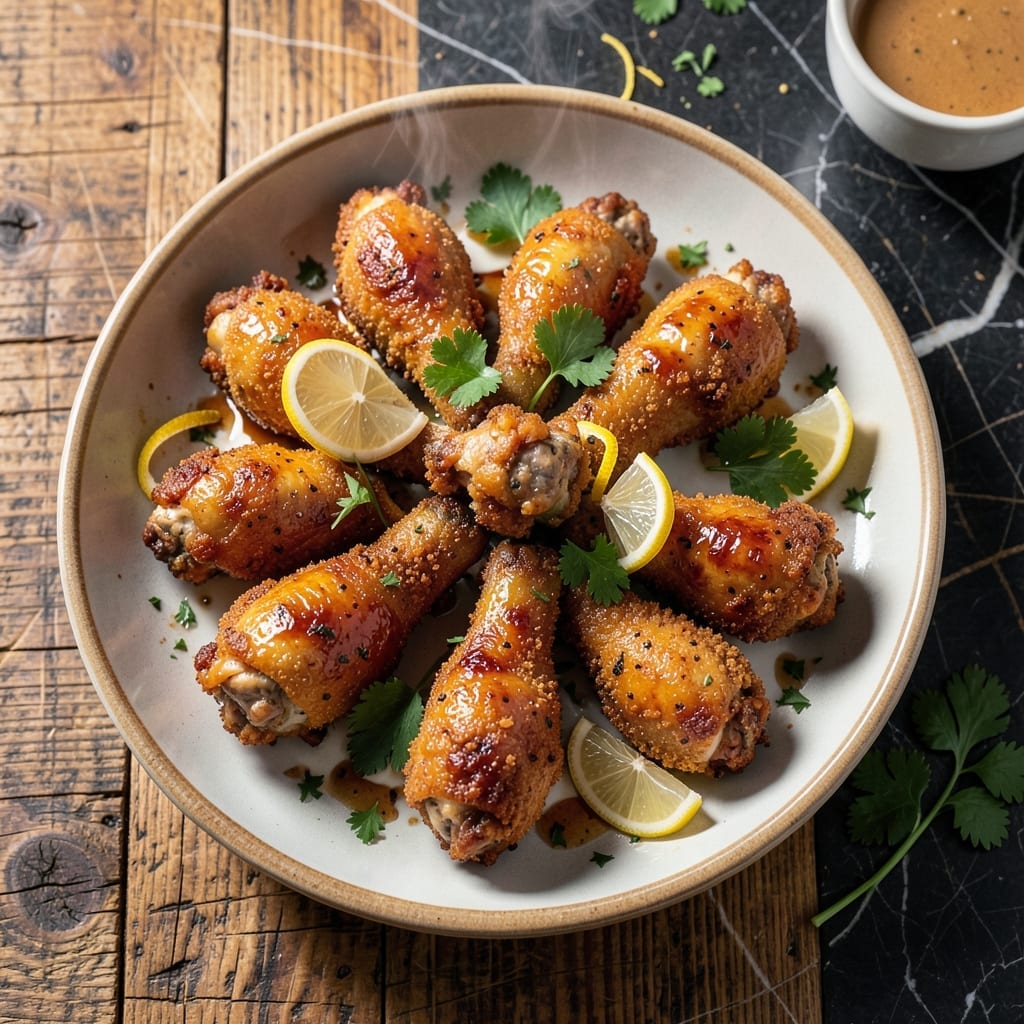
Achieving extra crispy skin while keeping the meat juicy is the hallmark of perfectly fried chicken drumsticks. This method delivers that ideal balance through precise temperature control and a simple but effective seasoning approach.
The key lies in the double-frying technique—first at a lower temperature to cook through, then at a higher heat to create that shatteringly crispy exterior. A brief rest between fries ensures the coating sets properly without absorbing excess oil.
What results is drumsticks with golden, crackling skin that gives way to tender, juicy meat inside. The seasoning penetrates deeply, creating flavor in every bite without overpowering the natural taste of the chicken.
This approach works for both traditional stovetop frying and modern air fryer methods. The technique remains consistent, delivering professional-quality results every time.
Ingredients for Fry Chicken Drumsticks
Quality ingredients transform simple drumsticks into crispy, juicy perfection with professional results.
| Ingredient | Amount | Notes |
|---|---|---|
| Chicken Drumsticks 🍗 | 2 ½ lb | Skin-on, bone-in, patted dry |
| Buttermilk 🥛 | 2 cups | Full-fat for tenderness |
| All-Purpose Flour 🌾 | 1 ½ cups | For dredging coating |
| Cornstarch 🌾 | ¼ cup | For extra crispiness |
| Kosher Salt 🧂 | 2 tbsp | Diamond Crystal preferred |
| Black Pepper 🌶️ | 1 tbsp | Freshly ground, coarse |
| Garlic Powder 🧄 | 1 tbsp | Not garlic salt |
| Onion Powder 🧅 | 1 tbsp | Fine grind preferred |
| Paprika 🌶️ | 1 tbsp | Sweet or smoked variety |
| Cayenne Pepper 🔥 | ½ tsp | Adjust for heat preference |
| Vegetable Oil 🫒 | 4 cups | High smoke point for frying |
| Baking Powder 🧂 | 1 tsp | For lighter coating |
The chicken drumsticks must be skin-on, bone-in for optimal texture and flavor development. Costco or Whole Foods offer excellent quality with consistent sizing. Pat them completely dry before coating—this is non-negotiable for achieving that shatteringly crisp exterior. The buttermilk should be full-fat; low-fat versions won’t provide the same tenderizing effect or rich flavor.
No buttermilk? Whole milk with 1 tbsp lemon juice or vinegar per cup works in a pinch. For gluten-free, swap all-purpose flour for rice flour or cornstarch. The double-frying technique requires a high smoke point oil—peanut oil is ideal but vegetable or canola oil are suitable substitutes. Skip the cayenne if sensitive to heat; the paprika provides sufficient color and mild flavor.
Store raw drumsticks in the coldest part of your refrigerator for up to 2 days before cooking. The coated chicken can rest uncovered in the fridge for 1 hour to help the crust set. Leftovers keep for 3-4 days in an airtight container, though they’re best enjoyed fresh for maximum crispiness.
Why You’ll Love This Recipe
- One Pan Wonder: I just toss the drumsticks in buttermilk, dredge in flour and cornstarch, and fry—no fancy steps.
- Crispy Perfection: That cornstarch in the coating gives it an insane crunch while the buttermilk keeps the meat juicy inside.
- Feeds a Crowd: I make a double batch for Sunday dinner and everyone—kids, picky cousins, even my skeptical dad—cleans their plate.
- Leftovers Rock: Honestly, they taste even better cold the next day straight from the fridge, and drumsticks are cheap to buy in bulk.
Step-by-Step Instructions for Fry Chicken Drumsticks
Master this method for shatteringly crisp skin and succulent meat that stays juicy to the bone.
Step 1: Marinate the Chicken Drumsticks in Buttermilk
Submerge the 2.5 lb Chicken Drumsticks in 2 cups Buttermilk in a large bowl, ensuring each piece is fully coated. The buttermilk’s acidity tenderizes the meat while its fat content keeps the interior moist during frying.
Cover and refrigerate for at least 4 hours, or ideally overnight. This extended marination is non-negotiable for achieving maximum tenderness. You’ll notice the buttermilk turns slightly yellow as it works its magic on the meat.
Step 2: Prepare the Seasoned Dredging Mixture
In a large shallow dish, whisk together 1.5 cups All-Purpose Flour, 0.25 cup Cornstarch, 2 tbsp Kosher Salt, 1 tbsp Black Pepper, 1 tbsp Garlic Powder, 1 tbsp Onion Powder, 1 tbsp Paprika, 0.5 tsp Cayenne Pepper, and 1 tsp Baking Powder until uniformly combined.
The cornstarch creates micro-crispiness while the baking powder produces tiny air pockets in the coating for an ultra-light texture. Use a fork to break up any lumps in the flour mixture for even distribution across each drumstick.
Step 3: Dredge and Rest the Chicken
Remove each drumstick from the buttermilk, letting excess drip off for 5 seconds, then dredge thoroughly in the flour mixture. Press firmly to adhere the coating, creating a thick, craggy surface that will fry up extra crispy.
Place the dredged drumsticks on a wire rack set over a baking sheet. This air circulation prevents the coating from becoming soggy. Let them rest for 15-20 minutes at room temperature—this crucial step helps the coating set, preventing it from sliding off during frying.
Step 4: Fry to Golden Perfection
Heat 4 cups Vegetable Oil in a heavy Dutch oven to 350°F over medium-high heat. Use a deep-fry thermometer for accuracy; the temperature must stay consistent. Carefully lower 3-4 drumsticks into the oil, avoiding overcrowding which lowers the oil temperature.
Fry for 12-15 minutes, turning occasionally, until the coating is deep golden brown and the internal temperature reaches 175°F. The oil should bubble steadily but not violently around each piece. Drain on a wire rack to maintain crispness—paper towels can make the bottoms soggy.
Step 5: Rest and Serve Immediately
Transfer the fried drumsticks to a clean wire rack and let them rest for 5 minutes. This brief pause allows the juices to redistribute throughout the meat, ensuring each bite is moist rather than dry at the edges.
Serve while still hot and crispy. The exterior should audibly crack when bitten into, while the meat inside remains tender and juicy. Any leftovers should be reheated in a 375°F oven for 10-12 minutes to restore crispness.
Pro Tips For Making Fry Chicken Drumsticks
- Double Fry for Crisp: Fry the drumsticks once at 325°F until cooked through, then again at 375°F for 2-3 minutes. I learned this the hard way—single frying leaves the crust soggy by the time the meat’s done.
- Buttermilk Overnight: Soak the drumsticks in buttermilk for at least 12 hours, or up to 24. Sounds like a hassle, but it’s the only way to guarantee tender meat that doesn’t dry out when fried.
- Skip the Crowding: Fry in batches with space between each piece—about 4 drumsticks at a time in a standard skillet. After burning three batches, I finally figured out that overcrowding drops the oil temp and steams the coating instead of crisping it.
- Cornstarch Boost: Replace ¼ of the all-purpose flour with cornstarch in your dredge. My grandmother swore by this, and she was right: it creates a lighter, crunchier crust that actually stays crispy.
Perfect Pairings for fry chicken drumsticks
Classic Southern Sides
I always serve these drumsticks with creamy coleslaw—the cool crunch balances the heat perfectly. Use 1 cup mayonnaise with 2 tbsp apple cider vinegar for the dressing. Buttermilk biscuits are another must for soaking up those crispy bits. 🥗
Comfort Food Pairings
For a hearty meal, try mac and cheese with sharp cheddar and a panko topping. I also love collard greens slow-cooked with smoked turkey necks. Both dishes complement the crispy texture without competing for attention.
Fresh Contrasts
A simple cucumber-tomato salad with red onion and lemon juice cuts through the richness. Toss 2 cups sliced cucumbers with 1 cup cherry tomatoes and ¼ cup red onion. The acidity refreshes your palate between bites. 🍅
Drink Recommendations
Sweet tea is the classic choice—I brew Luzianne tea bags with ½ cup sugar per gallon. For beer lovers, a crisp lager like Miller Lite cuts through the oil beautifully. Avoid heavy stouts that can overwhelm the meal.
Nutrition Facts
Frequently Asked Questions
Why use buttermilk for marinating?
Buttermilk’s acidity tenderizes the meat while its fat keeps it juicy during frying. It also helps the coating adhere better, creating that perfect crispy texture.
Can I skip the resting step after dredging?
No, resting for 15-20 minutes lets the coating set properly. Skipping this can cause the breading to slide off during frying, resulting in uneven crispiness.
How do I know when the oil is hot enough?
Use a thermometer to check for 350°F. Without one, drop a pinch of flour into the oil—it should sizzle immediately and float to the top.
What if my drumsticks aren’t crispy enough?
Double-fry them: first at 350°F to cook through, then at 375°F for a final 2-3 minutes for extra crunch. Drain on a wire rack, not paper towels.

- Jollof Rice Sauce Recipe: West African Tomato and Spice Infusion - September 25, 2026
- Japanese Rice Soup Recipe: Umami-Rich Comfort in a Bowl - September 25, 2026
- Homemade Cream Of Rice Recipe: Silk-Smooth Breakfast in Minutes - September 25, 2026