
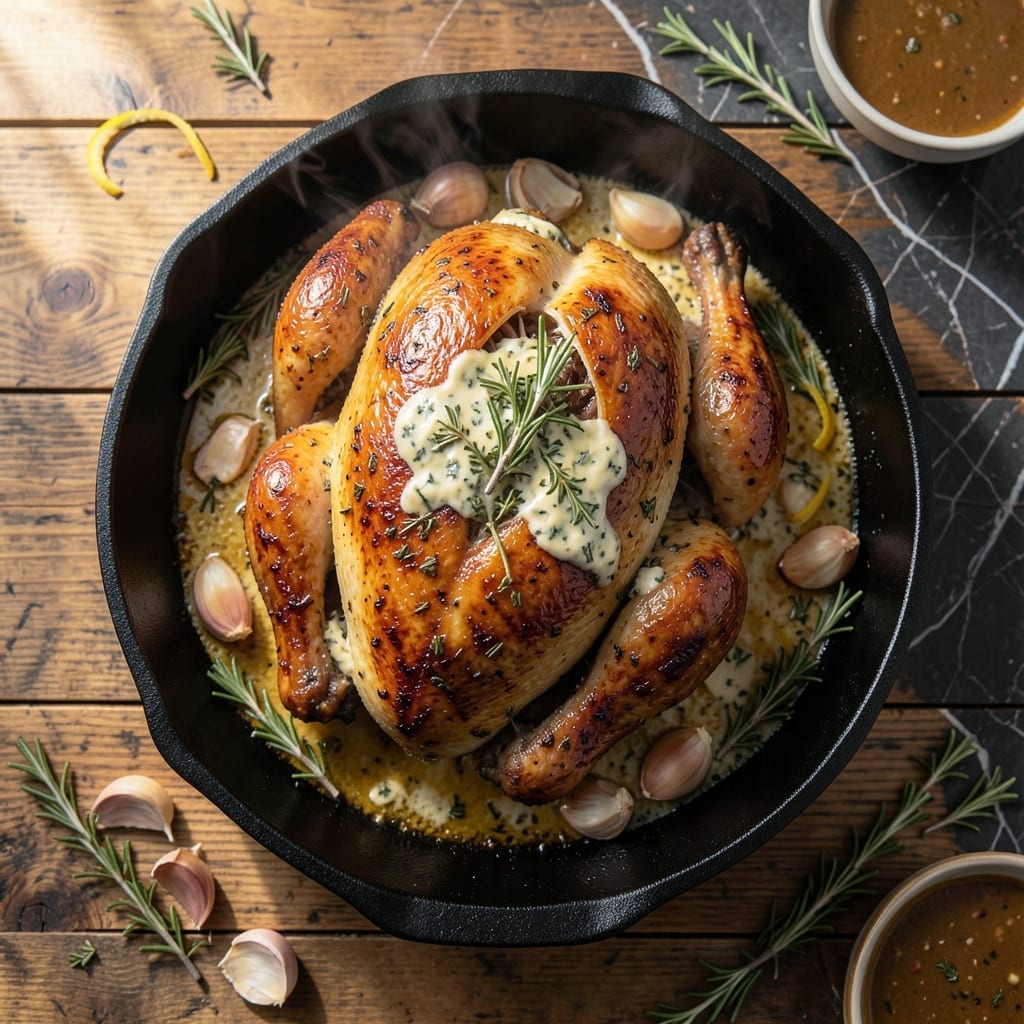
Achieving crispy, golden chicken skin with juicy meat inside is simpler than you think. This method uses a high-heat roast to lock in moisture while creating that perfect crunch.
The secret is patting the chicken completely dry before seasoning, which ensures even browning. A blend of herbs and butter under the skin adds flavor without overwhelming the natural taste.
You’ll end up with a bird that’s crispy on the outside, tender inside, with herb-infused juices in every bite. The aroma alone will have everyone gathering around the table.
Ready in about 90 minutes with minimal hands-on time. Here’s how to make it.
Ingredients for Full Chicken
Nothing fancy here—just a bird, butter, herbs, and a hot oven.
| Ingredient | Amount | Notes |
|---|---|---|
| Whole Chicken 🍗 | 1 whole | 3-4 lb, patted dry inside and out |
| Unsalted Butter 🧈 | ½ cup | Softened for herb mixture |
| Fresh Rosemary 🌿 | 2 tbsp | Finely chopped, stems removed |
| Fresh Thyme 🍃 | 2 tbsp | Leaves stripped from stems |
| Fresh Sage 🌿 | 1 tbsp | Chopped, optional but recommended |
| Garlic Cloves 🧄 | 4 cloves | Minced for herb butter |
| Kosher Salt 🧂 | 1 ½ tbsp | Plus extra for cavity seasoning |
| Black Pepper 🌶️ | 1 tsp | Freshly ground preferred |
| Lemon 🍋 | 1 whole | Cut in half for cavity |
| Yellow Onion 🧅 | 1 whole | Quartered for cavity stuffing |
| Carrots 🥕 | 2 whole | Peeled, cut into chunks |
| Celery Stalks 🥬 | 2 whole | Cut into 3-inch pieces |
| Olive Oil 🫒 | 1 tbsp | For roasting rack preparation |
The chicken is the star, so get a good one. I grab mine from Whole Foods or a local butcher—look for plump birds with smooth skin, no tears. Size matters: a 4-pounder feeds four with leftovers. If you’re using frozen, thaw it completely in the fridge overnight (the good stuff, not the rock-hard kind). The butter should be real, unsalted—it’s going under the skin for maximum flavor.
Fresh herbs are ideal, but dried work in a pinch—use one-third the amount. No thyme? Dried marjoram gets close. Missing a lemon? Orange halves add similar brightness. The onion and celery for the cavity? Swap in whatever aromatics you’ve got (fennel, apple, even extra lemon). If your chicken’s skin is pale, a quick ice water bath before patting dry tightens it up for better browning.
Roast leftovers keep 3-4 days in the fridge—shred for sandwiches or toss into soups. The carcass? Make stock. Freeze it for up to 3 months if you’re not using it right away. Herbs wilt fast, so use them within the week or dry them out for later.
Why You’ll Love This Recipe
- One Pan Magic: I just rub the chicken with butter, stuff it with rosemary and thyme, and let the oven do the rest.
- Herb Heaven: That mixture of fresh rosemary, thyme, and sage under the skin makes every bite ridiculously good.
- Sunday or Tuesday: Honestly, this works for a fancy dinner or a casual family meal with zero extra effort.
- Leftovers for Days: I get at least two more meals from one roasted chicken—sandwiches, tacos, you name it.
Step-by-Step Instructions for Herb-Roasted Chicken with Crispy Golden Skin
Here’s how I get that perfect crisp every time with this roasting method.
Step 1: Make the Herb Butter and Prep the Chicken
In a small bowl, mix the 0.5 cup unsalted butter with the 2 tbsp fresh rosemary, 2 tbsp fresh thyme, 1 tbsp fresh sage, and 4 cloves garlic cloves until well combined. This herb butter will infuse the meat with incredible flavor as it roasts.
Pat the whole chicken completely dry inside and out with paper towels—this is crucial for crispy skin. Season the cavity with a pinch of the 1.5 tbsp kosher salt and 1 tsp black pepper, then stuff it with the lemon, yellow onion, 2 whole carrots, and 2 whole celery stalks.
Step 2: Season and Truss for Even Cooking
Rub the herb butter all over the outside of the chicken, making sure to get some under the skin by gently loosening it with your fingers. This ensures the meat stays moist while the skin gets crispy. Sprinkle the remaining 1.5 tbsp kosher salt and 1 tsp black pepper evenly over the skin.
Tuck the wings under the body and tie the legs together with kitchen twine. This compact shape helps the chicken cook evenly and prevents the breast from drying out. Let it sit at room temperature for 30 minutes while you preheat the oven.
Step 3: Roast at High Heat for Crispy Skin
Preheat your oven to 425°F. Place the whole chicken breast-side up on a roasting rack set in a rimmed baking sheet. Brush the rack with 1 tbsp olive oil to prevent sticking. The rack elevates the chicken, allowing hot air to circulate and crisp the skin all around.
Roast for 1 hour to 1 hour 15 minutes, or until the skin is deep golden brown and crispy, and the juices run clear when you pierce the thickest part of the thigh. Don’t open the oven door during cooking—this lets heat escape and can make the skin steam instead of crisp.
Step 4: Rest and Serve
Transfer the chicken to a cutting board and tent loosely with foil. Let it rest for 15-20 minutes before carving. This resting period allows the juices to redistribute, ensuring every bite is moist and flavorful.
The internal temperature will rise a few degrees during resting (carryover cooking), so pull it from the oven when it reaches 160°F in the thickest part of the thigh. Carve against the grain and serve immediately with your favorite sides.
Pro Tips For Making Full Chicken
- Pat it Dry: Use paper towels to thoroughly dry the chicken skin before seasoning—this guarantees a crispier finish, especially when using butter.
- Room Temp First: Let the chicken sit out for 30-45 minutes before cooking so it cooks more evenly and the herbs stick better to the butter coating.
- Skip the Cold Butter: Soften the unsalted butter slightly before mixing with rosemary, thyme, and sage so it spreads smoothly under the skin without tearing it.
- Rest Before Carving: Give the chicken a solid 15 minutes to rest after roasting—I learned this the hard way when all the juices ran out on the cutting board.
Essential Equipment for full chicken
Roasting Rack
A sturdy roasting rack elevates the chicken, allowing hot air to circulate underneath for even browning and crispy skin all around. I use a stainless steel V-rack that fits perfectly in my half-sheet pan. This small investment makes a huge difference. 💡
Instant-Read Thermometer
Don’t guess—use a reliable instant-read thermometer to check the internal temperature. I recommend the ThermoWorks ThermoPop for its accuracy and speed. Aim for 160°F in the thickest part of the thigh before resting.
Kitchen Twine
Trussing the chicken with kitchen twine keeps it compact for even cooking. Look for 100% cotton twine (unbleached if possible) to avoid any chemical flavors. A 12-inch length is usually plenty for a 3-4 lb bird.
Mixing Bowls
You’ll need a small bowl for mixing the herb butter. I prefer stainless steel—they’re lightweight, durable, and easy to clean. A 1-quart bowl gives plenty of room to combine the butter and herbs without spills.
Basting Brush
A silicone basting brush helps spread the herb butter evenly under and over the chicken skin. The silicone won’t melt or absorb flavors like natural bristles. I keep a dedicated brush just for poultry to avoid cross-contamination.
Paper Towels
Patting the chicken dry is crucial, so have paper towels ready. Use 3-4 sheets per bird to thoroughly dry both the exterior and cavity. This step ensures the skin crisps up perfectly in the oven. ✨
Nutrition Facts
Frequently Asked Questions
Should I wash the chicken before cooking?
Never wash raw poultry—it spreads bacteria in your kitchen. Pat it dry with paper towels instead. This removes moisture for crispier skin while keeping your workspace safe.
Can I use dried herbs instead of fresh?
Yes, use 1/3 the amount since dried herbs are more concentrated. For example, 2 tsp dried rosemary replaces 2 tbsp fresh. rub them into the butter to release their flavors.
Why does my chicken skin turn out pale?
Pale skin usually means too much moisture or low oven heat. Pat the bird completely dry and roast at 425°F for golden results. Avoid opening the oven door during cooking.
How do I know when it’s fully cooked?
Use an instant-read thermometer—the thickest part of the thigh should reach 160°F before resting. The juices should run clear, not pink. Carryover cooking will bring it to 165°F safely.

- Jollof Rice Sauce Recipe: West African Tomato and Spice Infusion - September 25, 2026
- Japanese Rice Soup Recipe: Umami-Rich Comfort in a Bowl - September 25, 2026
- Homemade Cream Of Rice Recipe: Silk-Smooth Breakfast in Minutes - September 25, 2026