
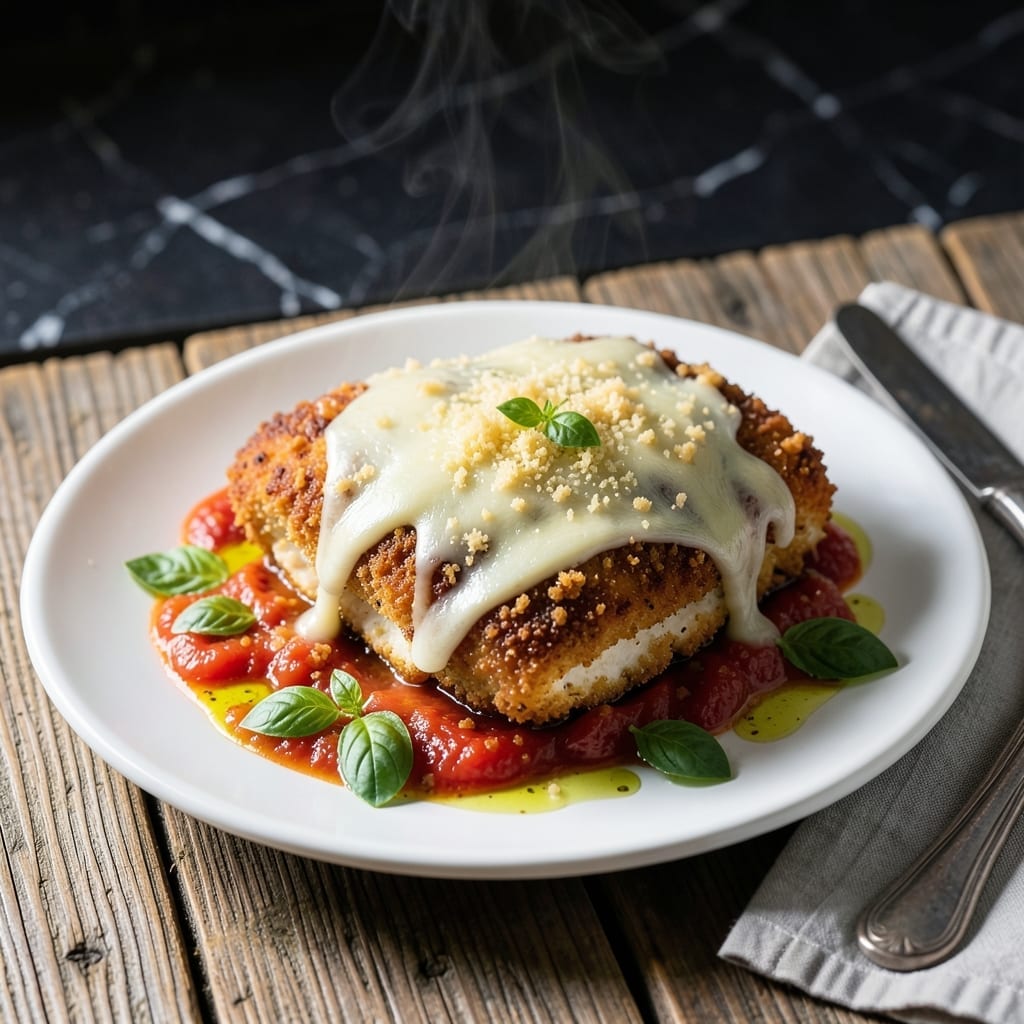
This gluten-free chicken parmesan delivers the crispy texture and rich flavors you love without compromising on quality. The secret lies in a carefully crafted breading process that ensures each cutlet stays perfectly golden and firm.
Traditional techniques meet modern dietary needs with a simple swap of gluten-free breadcrumbs. The result is a dish that maintains the classic appeal while being accessible to everyone at your table.
Each bite offers tender chicken topped with melted mozzarella and tangy marinara, creating a harmonious blend of textures and flavors. The crispy coating holds up beautifully under the cheese, preventing any sogginess.
Whether for a weeknight dinner or special occasion, this recipe proves that gluten-free can be just as satisfying as the original. Here’s how to make it right.
Ingredients for Gf Chicken Parmesan
Pantry staples and a few fresh picks create that crispy, cheesy magic you expect.
| Ingredient | Amount | Notes |
|---|---|---|
| Chicken Breast 🍗 | 1 ½ lb | Boneless, skinless, pounded to 1/2-inch thickness |
| Gluten-Free All-Purpose Flour 🌾 | ½ cup | For initial dredging |
| Large Eggs 🥚 | 2 whole | Beaten for egg wash |
| Gluten-Free Breadcrumbs 🍞 | 1 ½ cups | Panko style for extra crispiness |
| Parmesan Cheese 🧀 | ½ cup | Freshly grated from wedge |
| Mozzarella Cheese 🧀 | 8 oz | Fresh, sliced or shredded |
| Marinara Sauce 🍅 | 2 cups | Quality jarred or homemade |
| Olive Oil 🫒 | ½ cup | For frying cutlets |
| Garlic Cloves 🧄 | 3 cloves | Minced for sauce |
| Fresh Basil Leaves 🌿 | ¼ cup | Chopped for garnish |
| Kosher Salt 🧂 | 1 tsp | Diamond Crystal preferred |
| Black Pepper 🌶️ | ½ tsp | Freshly ground for best flavor |
| Dried Oregano 🍃 | 1 tsp | For seasoning breading |
| Grated Parmesan Cheese 🧀 | ¼ cup | For topping before baking |
The breadcrumbs are non-negotiable here. Aleia’s or Ian’s brands have the right texture for that crispy coating (the good stuff, not the fine dust). For the chicken, butcher-cut breasts or even tenders work—just pound them evenly. I grab mine from Whole Foods when they’re on sale, but any grocery store with decent meat selection will do. The Parm needs to be freshly grated—pre-shredded gets clumpy and won’t melt right.
No gluten-free breadcrumbs? Crush gluten-free cornflakes or pretzels in a food processor—they crisp up nicely. Fresh mozzarella can be swapped for low-moisture if it’s what you have. For the marinara, Rao’s or Victoria jarred sauces are solid (trust me on this). No fresh basil? Dried basil at half the amount works in a pinch. The olive oil can be any neutral oil, but extra-virgin adds better flavor.
Leftovers keep 4-5 days in the fridge—reheat in the oven to revive the crispiness. Freeze unbaked cutlets for up to 3 months. I portion mine with parchment between layers so they don’t stick. Always bring the chicken to room temp before cooking (worth the extra minute).
Why You’ll Love This Recipe
- One Pan Wonder: I love that I can bread, bake, and melt everything on a single sheet pan—minimal cleanup, maximum flavor.
- Crispy & Cheesy: That parmesan in the breadcrumb mix gives it a nutty crunch, while the melted cheese on top is pure comfort.
- Weeknight Hero: It’s my go-to for busy evenings when I need something hearty but quick. (Yes, even on a Tuesday night)
- Leftovers? Yes Please: The flavors actually deepen overnight, so I always make extra for lunch the next day.
Step-by-Step Instructions for GF Chicken Parmesan
Here’s the method that guarantees crispy, golden cutlets with gooey, melted cheese every time.
Step 1: Bread the Chicken for Maximum Crunch
Set up a breading station with three shallow dishes. Place the 0.5 cup gluten-free all-purpose flour in the first dish, seasoned with 1 tsp kosher salt, 0.5 tsp black pepper, and 1 tsp dried oregano. In the second dish, beat the 2 whole large eggs until frothy.
In the third dish, combine the 1.5 cups gluten-free breadcrumbs with the 0.5 cup parmesan cheese. Pat the 1.5 lb chicken breast dry, then dredge each piece in the flour, shaking off excess. Dip into the egg, letting any excess drip off, then press into the breadcrumb mixture, ensuring full coverage. Real talk: this triple-dredge method is what creates that unbeatable crunch.
Step 2: Pan-Fry Until Golden and Crisp
Heat 0.5 cup olive oil in a large skillet over medium-high heat until shimmering. Carefully add the breaded chicken and cook for 3-4 minutes per side until golden brown and crisp. Don’t crowd the pan—work in batches if needed to maintain oil temperature.
You’ll know it’s ready to flip when the edges appear deep golden and the crust releases easily from the pan. Transfer the cooked cutlets to a paper towel-lined plate to drain excess oil. This step creates the crispy foundation that holds up to baking.
Step 3: Layer with Sauce and Cheeses
Preheat your oven to 375°F. Spread 1 cup marinara sauce in the bottom of a baking dish. Arrange the fried chicken cutlets in a single layer. Top each with 2 tablespoons marinara sauce, then 2 oz mozzarella cheese (about one-quarter of the 8 oz), and a sprinkle of the 0.25 cup grated parmesan cheese.
Here’s the thing—don’t skimp on the sauce between layers. It prevents the chicken from drying out during baking and infuses every bite with flavor. The cheese should cover the cutlets completely for that perfect melt.
Step 4: Bake Until Bubbly and Melted
Bake the dish for 15-20 minutes until the cheese is fully melted and bubbly at the edges, and the sauce is heated through. If you want extra browning, broil for 1-2 minutes at the end, watching closely to prevent burning.
While baking, mince the 3 cloves garlic cloves and warm the remaining 1 cup marinara sauce with the garlic in a small saucepan over low heat for 3-4 minutes. This elevated sauce adds depth when served alongside the chicken.
Step 5: Garnish and Serve Immediately
Remove the dish from the oven and let it rest for 5 minutes—this allows the cheese to set slightly. Garnish with the 0.25 cup fresh basil leaves, chopped, and any remaining grated parmesan cheese. The basil adds a fresh contrast to the rich, cheesy topping.
Serve with the warm garlic marinara sauce on the side or drizzled over the top. The key is serving immediately while the crust is still crisp and the cheese is at its melty best. Each bite should deliver that perfect contrast of textures—crispy exterior, tender chicken, and gooey cheese.
Pro Tips For Making Gf Chicken Parmesan
- Pound the Chicken: Use a meat mallet to pound the chicken breasts to an even ½-inch thickness—this guarantees even cooking and prevents dry, overdone edges while the center finishes.
- Double Dredge: Dip each piece in the gluten-free flour, then egg, then breadcrumbs mixed with parmesan, and repeat the egg and breadcrumb step for a thicker, crunchier crust that actually stays put.
- Rest Before Frying: Let the breaded chicken rest for 10 minutes on a wire rack before frying—this keeps the coating from sliding off in the pan, a lesson I learned after ruining two batches.
- Use Fresh Breadcrumbs: Swap store-bought gluten-free breadcrumbs for fresh ones toasted with garlic powder and oregano—it takes 5 extra minutes but adds flavor that pre-packaged versions just can’t match.
Best Sauces and Condiments for This Recipe
Classic Marinara Sauce
I always use Rao’s Homemade or Victoria marinara for that rich, authentic Italian flavor. Warm it with 3 minced garlic cloves for 3-4 minutes on low heat to infuse extra depth. The garlic transforms the sauce from good to outstanding. 🌟
Spicy Arrabbiata
For heat lovers, stir ½ tsp red pepper flakes into your marinara while warming. The spice cuts through the richness of the cheese beautifully. I like Newman’s Own arrabbiata as a shortcut—it already has that perfect kick.
Creamy Alfredo
Drizzle ¼ cup warm alfredo sauce over each serving for a decadent twist. The creamy texture pairs surprisingly well with the crispy chicken. I use Bertolli for convenience, but homemade tastes even better.
Pesto Drizzle
Add 2 tbsp basil pesto to the top of each cutlet before baking for a fresh, herbaceous note. The pesto adds a vibrant contrast to the melted mozzarella. Store-bought works, but homemade is my preference. 🍃
Balsamic Glaze
Drizzle 1 tbsp balsamic glaze over the finished dish for a sweet-tangy contrast. It elevates the flavors without overpowering them. I use Colavita glaze for its perfect balance of sweetness and acidity.
Garlic Butter
Brush the crispy cutlets with 2 tbsp melted garlic butter before adding cheese for extra richness. The butter soaks into the breading, adding another layer of flavor. This is my secret for restaurant-quality results at home.
Nutrition Facts
Frequently Asked Questions
Can I use regular breadcrumbs?
No, regular breadcrumbs contain gluten. Use certified gluten-free breadcrumbs like Aleia’s or Ian’s for safe, crispy results. Always check labels for hidden gluten sources.
How do I keep the coating crispy?
Pan-fry at medium-high heat for 3-4 minutes per side until golden. Bake only briefly at 375°F to melt the cheese without softening the crust.
What if my chicken is too thick?
Pound the breasts to ½-inch thickness between plastic wrap. This ensures even cooking and prevents dry, tough meat. Use a meat mallet or rolling pin.
Can I make this ahead?
Bread and fry cutlets up to 2 days ahead. Refrigerate, then bake with sauce and cheese when ready. Freeze unbaked cutlets for up to 3 months.

- Jollof Rice Sauce Recipe: West African Tomato and Spice Infusion - September 25, 2026
- Japanese Rice Soup Recipe: Umami-Rich Comfort in a Bowl - September 25, 2026
- Homemade Cream Of Rice Recipe: Silk-Smooth Breakfast in Minutes - September 25, 2026