
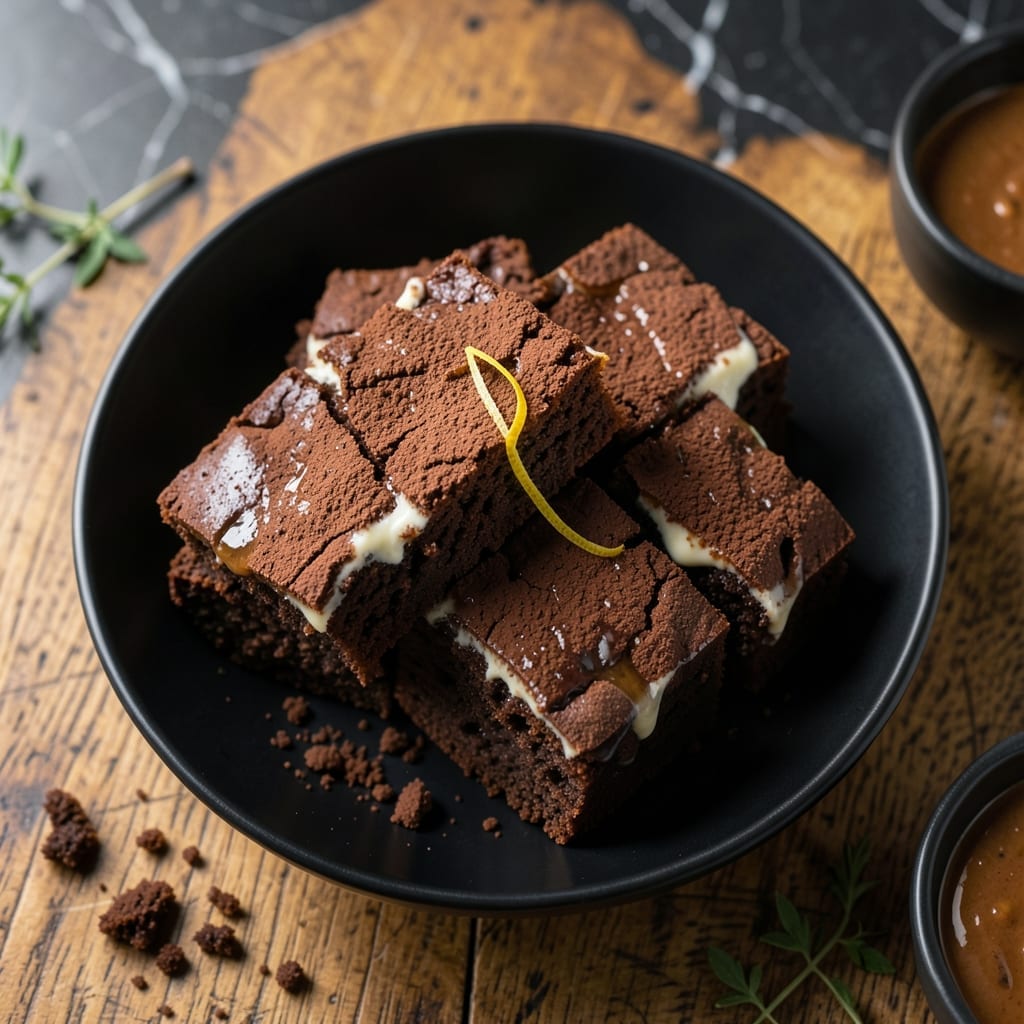
Achieving rich, fudgy brownies without gluten is absolutely possible with this rice flour adaptation. The fine texture of rice flour creates a dense, moist crumb that rivals traditional versions.
This recipe delivers deep chocolate flavor and that signature fudgy texture you expect from classic brownies. The process is straightforward, with precise measurements ensuring consistent results every time.
Ingredients for Gluten Free Brownie Recipe Rice Flour
Fine rice flour and rich cocoa create fudgy, decadent brownies with perfect texture every time.
| Ingredient | Amount | Notes |
|---|---|---|
| White Rice Flour 🌾 | 1 ¼ cups | Fine, sifted for smooth texture |
| Unsweetened Cocoa Powder 🍫 | ¾ cup | Dutch-processed preferred |
| Granulated Sugar 🍚 | 1 ½ cups | Fine white sugar |
| Unsalted Butter 🧈 | 1 cup | Melted and cooled |
| Large Eggs 🥚 | 4 whole | Room temperature |
| Vanilla Extract 🌿 | 2 tsp | Pure vanilla, not imitation |
| Salt 🧂 | ¼ tsp | Fine sea salt |
| Baking Powder 🧂 | ½ tsp | Aluminum-free preferred |
| Semi-Sweet Chocolate Chips 🍫 | ¾ cup | High-quality for best melt |
| Espresso Powder ☕ | 1 tsp | Enhances chocolate flavor |
| Xanthan Gum 🧂 | ¼ tsp | Improves texture in gluten-free baking |
The rice flour is critical here—Bob’s Red Mill or Anthony’s Goods offer consistent quality. Use superfine white rice flour (not brown rice flour) for the smoothest crumb. Dutch-processed cocoa, like Hershey’s Special Dark or Ghirardelli, delivers that intense chocolate flavor. For butter, Plugrá or Kerrygold provide superior richness without overpowering the chocolate.
No xanthan gum? Omit it entirely—the brownies will be slightly crumblier but still delicious. For a deeper chocolate taste, use bittersweet chocolate chips instead of semi-sweet. If avoiding dairy, vegetable oil or coconut oil can replace butter at a 1:1 ratio. The espresso powder isn’t optional (trust me on this)—Medaglia d’Oro is a reliable brand.
Store brownies in an airtight container at room temperature for up to 4 days. For longer storage, freeze for up to 3 months. Slice before freezing for easy single-serving portions. Let cool completely before storing to prevent condensation.
Why You’ll Love This Recipe
- One Bowl Wonder: I mix everything right in the same bowl—rice flour, cocoa, sugar, butter, eggs—and it’s ready for the oven in 10 minutes flat.
- Fudgy Bliss: The rice flour gives these brownies a dense, fudgy texture that’s rich without being heavy, and the cocoa packs a serious chocolate punch.
- Freezer Friendly: I double the batch, bake one pan now, and stash the rest of the batter in the freezer for fresh brownies anytime.
- Pantry Staples: Between us, I always have rice flour and cocoa on hand, so these come together even when I’m low on groceries.
Step-by-Step Instructions for Gluten Free Brownies With Rice Flour
This method ensures dense, fudgy texture and rich chocolate flavor without gluten compromising quality.
Step 1: Prepare and Combine Dry Ingredients
In a medium bowl, whisk together the 1.25 cups White Rice Flour, 0.75 cup Unsweetened Cocoa Powder, 1.5 cups Granulated Sugar, 0.5 tsp Baking Powder, 0.25 tsp Salt, 1 tsp Espresso Powder, and 0.25 tsp Xanthan Gum until fully combined. The espresso powder deepens the chocolate flavor without tasting like coffee.
Sift the mixture if your cocoa powder is lumpy—this prevents dry pockets in the finished brownies. The xanthan gum is crucial here; it mimics the binding properties of gluten and prevents crumbly texture, so don’t omit it.
Step 2: Incorporate Wet Ingredients
In a separate large bowl, whisk the 4 whole Large Eggs lightly. Gradually add the 1 cup Unsalted Butter (melted and cooled to room temperature) while whisking constantly to emulsify the mixture. This creates a smooth, homogenous base for your brownies.
Stir in the 2 tsp Vanilla Extract. Then, gradually fold the dry ingredients into the wet mixture using a silicone spatula. Mix just until no dry streaks remain—overmixing can incorporate too much air, leading to cakey rather than fudgy brownies.
Step 3: Fold in Chocolate Chips and Rest the Batter
Add the 0.75 cup Semi-Sweet Chocolate Chips to the batter and fold gently to distribute them evenly. I use high-quality chips because they melt beautifully, creating those coveted gooey pockets throughout the brownies.
Let the batter rest for 10 minutes at room temperature. This allows the rice flour to fully hydrate and the xanthan gum to activate, which significantly improves the texture. You’ll notice the batter thickens slightly during this time.
Step 4: Bake to Fudgy Perfection
Preheat your oven to 350°F and line a 9×9-inch baking pan with parchment paper, leaving an overhang on two sides for easy removal. Pour the batter into the prepared pan and spread it evenly with a spatula.
Bake for 25-30 minutes, or until a toothpick inserted into the center comes out with a few moist crumbs attached. The edges should be set, but the center should still have a slight jiggle when you gently shake the pan. Avoid overbaking—these continue to set as they cool.
Step 5: Cool Completely Before Slicing
Remove the pan from the oven and let the brownies cool completely in the pan on a wire rack for at least 1 hour. This cooling period is critical for gluten-free baked goods; it allows the structure to set properly so they don’t fall apart when sliced.
Once fully cooled, lift the brownies out of the pan using the parchment overhang and transfer them to a cutting board. Cut into squares with a sharp knife, wiping the blade between cuts for clean edges. The result should be dense, fudgy brownies with a crackly top and rich chocolate flavor in every bite.
Pro Tips For Making Gluten Free Brownie Recipe Rice Flour
- Preheat the Pan: I learned this the hard way—rice flour brownies bake more evenly when the pan is hot before the batter goes in, so preheat it for 5 minutes with the oven.
- Whisk the Eggs: Beat the eggs vigorously for at least 2 minutes until they’re pale and frothy—this adds air and prevents dense, gummy brownies.
- Skip Cold Butter: Use room-temperature butter, about 65°F, so it creams smoothly with the sugar and avoids clumps in the batter.
- Check at 20 Minutes: Rice flour brownies can overbake fast, so start testing with a toothpick at 20 minutes and pull them out when a few moist crumbs cling.
Troubleshooting This Recipe
Dense or Cakey Texture
If your brownies turned out cakey instead of fudgy, you likely overmixed the batter or used too much baking powder. Mix just until combined and measure your 0.5 tsp baking powder precisely. For denser results, reduce it to ¼ tsp. 💡
Dry or Crumbly Brownies
This usually means the rice flour wasn’t properly hydrated or the xanthan gum was omitted. Always rest your batter for the full 10 minutes before baking. If avoiding xanthan gum, add 1 extra egg for better binding.
Sunken Center
A sunken center often indicates underbaking or opening the oven too early. Don’t check before 20 minutes. If it happens, next time bake at 325°F for 35 minutes for more even cooking.
Gummy Texture
This occurs when brownies aren’t baked long enough. The toothpick test should show moist crumbs, not wet batter. If yours are gummy, bake 5 additional minutes next time and ensure your oven is properly calibrated.
Uneven Baking
Hot spots in your oven can cause uneven baking. Rotate your 9×9-inch pan halfway through the 25-30 minute bake time. Also, avoid overcrowding the oven – leave space for air circulation.
Cracked Top
A cracked top is normal for fudgy brownies, but excessive cracking suggests the oven temperature was too high. Try lowering to 340°F and adding 1 tbsp milk to the batter for a more flexible crumb. 🔥
Nutrition Facts
Frequently Asked Questions
Why use rice flour instead of almond flour?
Rice flour creates a smoother, denser texture that closely mimics traditional wheat flour brownies. Almond flour can make brownies grainy and oilier.
How do I know when they’re done baking?
Insert a toothpick in the center after 25 minutes. It should come out with moist crumbs, not wet batter. A slight jiggle in the center is normal.
Can I make these without xanthan gum?
Yes, but add 1 extra egg for binding. The texture will be slightly crumblier but still delicious. Let the batter rest 10 minutes before baking.
What’s the best pan size?
A 9×9-inch pan gives perfect thickness. For thicker brownies, use an 8×8-inch pan and add 5 minutes to baking time.

- Gobi Fried Rice Recipe: Spiced Cauliflower Wok Delight - October 8, 2026
- Glutinous Rice Roll Recipe: Chewy Pillows With Savory Fillings - October 8, 2026
- Garlic Jasmine Rice Recipe: Fragrant Grains with Aromatic Depth - October 8, 2026