
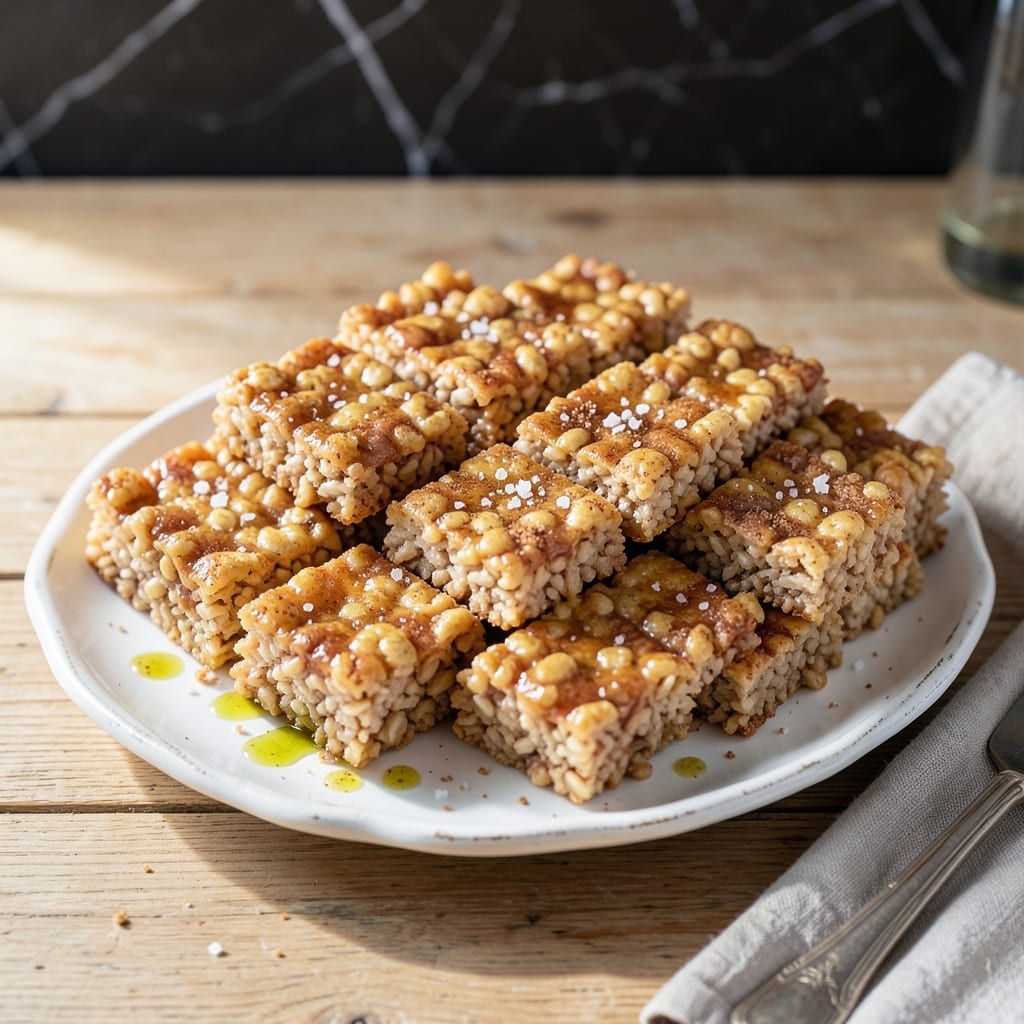
I’ve perfected a version of this classic treat that delivers the same nostalgic crunch and gooey texture without gluten or dairy. The secret lies in using the right cereal and a plant-based marshmallow alternative.
This method ensures every bite stays crispy and chewy, with no compromise on flavor. Simple, reliable, and just as satisfying as the original.
Ingredients for Gluten Free Dairy Free Rice Krispie Treats
Eight ingredients transform into crispy, chewy treats without gluten or dairy compromises.
| Ingredient | Amount | Notes |
|---|---|---|
| Gluten-Free Rice Cereal 🌾 | 6 cups | Plain, unsweetened preferred |
| Vegan Marshmallows ⚪ | 10 oz | Mini or regular size |
| Vegan Butter 🧈 | ½ cup | Or refined coconut oil |
| Pure Vanilla Extract 🌿 | 1 tsp | Alcohol-free if preferred |
| Fine Sea Salt 🧂 | ¼ tsp | Adjust to taste preference |
| Light Brown Sugar 🥚 | 2 tbsp | Optional for extra caramelization |
| Sunflower Oil 🫒 | 1 tsp | For greasing the pan |
| Parchment Paper 📜 | 1 sheet | For easy removal from pan |
The cereal is critical here. Nature’s Path Organic or Erewhon gluten-free rice cereal delivers the right crunch without off-flavors. Vegan marshmallows vary wildly in texture—Dandies brand melts beautifully (the good stuff, not the gummy kind). For the butter, Miyoko’s or Earth Balance work best, but refined coconut oil adds a subtle richness worth trying.
No vegan marshmallows? Homemade marshmallow fluff (aquafaba-based) works in a pinch but requires more effort. Swap the brown sugar for coconut sugar if avoiding refined sugars. The vanilla extract can be omitted, but it adds depth—use the real stuff, not imitation. For nut-free versions, ensure all ingredients are processed in dedicated facilities.
Store in an airtight container at room temperature for 3-4 days (or 1 week refrigerated). Press plastic wrap directly onto the surface to prevent drying. Freezing isn’t recommended—they lose their signature texture when thawed.
Why You’ll Love This Recipe
- One Bowl Wonder: I melt the vegan butter and marshmallows in the same pot I mix everything in—cleanup’s a breeze.
- Vanilla Salt Magic: The vanilla extract and sea salt balance the sweetness just right, making these irresistibly good.
- Crowd Pleaser: Honestly, everyone at the potluck devoured them, gluten-free or not.
- Stays Fresh: They keep perfectly in an airtight container for days, so I always make a double batch.
Step-by-Step Instructions for Gluten Free Dairy Free Rice Krispie Treats
This foolproof method ensures crisp edges and a perfectly gooey center every time.
Step 1: Prepare the Pan and Melt the Vegan Butter
Line a baking dish with the 1 sheet Parchment Paper, leaving overhang on the sides for easy removal. Lightly grease the paper with the 1 tsp Sunflower Oil to prevent sticking. This preparation ensures your treats release cleanly without tearing.
In a large saucepan, melt the 0.5 cup Vegan Butter over low heat. Watch for the edges to just begin shimmering—this indicates it’s fully melted without burning. Stir occasionally with a silicone spatula to maintain even heat distribution.
Step 2: Create the Marshmallow Base
Add the 10 oz Vegan Marshmallows to the melted vegan butter. Stir constantly as they begin to soften and collapse, which takes about 3-4 minutes. The mixture is ready when it becomes smooth and glossy with no visible marshmallow pieces remaining.
Immediately stir in the 1 tsp Pure Vanilla Extract, 0.25 tsp Fine Sea Salt, and 2 tbsp Light Brown Sugar. The sugar will dissolve completely into the warm mixture, adding a subtle caramel depth to the flavor profile.
Remove from heat the moment the mixture reaches a uniform, stretchy consistency. Overheating at this stage will make the final product hard instead of chewy.
Step 3: Incorporate the Gluten-Free Rice Cereal
Working quickly while the marshmallow mixture is still hot, add all 6 cups Gluten-Free Rice Cereal to the saucepan. Use a folding motion to coat every piece evenly—this takes about 1-2 minutes of continuous stirring.
You’ll know it’s properly incorporated when the cereal is completely saturated and the mixture holds together when pressed. The cereal should glisten slightly from the marshmallow coating but retain its distinct pieces for texture contrast.
Step 4: Press and Set the Treats
Transfer the mixture to your prepared pan. Using the back of a greased spatula or your hands (lightly oiled to prevent sticking), press the mixture firmly into an even layer. Apply consistent pressure for 30 seconds to compact the treats without crushing the cereal.
Let the treats cool at room temperature for 1 hour before cutting. This resting period allows the marshmallow to set properly, creating the ideal chewy texture. The surface should appear matte rather than glossy when fully set.
Lift the treats from the pan using the parchment paper overhang and cut into squares with a sharp knife. For clean cuts, dip the knife in hot water between each slice.
Pro Tips For Making Gluten Free Dairy Free Rice Krispie Treats
- Melt Low and Slow: Keep the vegan butter and marshmallows on low heat—vegan marshmallows burn faster than regular ones, and you’ll end up with a bitter, grainy mess if you rush it.
- Press While Warm: Work quick once the mixture is off the heat, pressing it into the pan while still warm and sticky—waiting too long makes it set unevenly, and you’ll be stuck with crumbly edges.
- Use Fresh Cereal: Skip the stale gluten-free rice cereal sitting in your pantry; it won’t crisp up right, and the texture of your treats will be sadly chewy instead of light and snappy.
- Butter the Spatula: Rub your spatula with a little extra vegan butter before pressing the mixture down—it keeps the stuff from sticking and makes smoothing the top almost effortless.
Common Mistakes When Making gluten free dairy free rice krispie treats
Wrong Cereal Choice
Using regular rice cereal instead of certified gluten-free brands like Nature’s Path risks cross-contamination. I always double-check labels—some “gluten-free” cereals still contain dairy-derived ingredients.
Overheating Marshmallows
Vegan marshmallows burn faster than traditional ones. Keep heat at low-medium and stir constantly. Once melted, remove immediately—overheating makes treats rock-hard. Dandies brand works best at 3-4 minutes. 🔥
Skipping the Pan Prep
Not greasing the pan or parchment paper leads to stuck-on treats. I use 1 tsp sunflower oil for the paper and 0.5 cup vegan butter in the mixture. This ensures clean removal every time.
Under-Pressing the Mixture
Lightly pressing the cereal mixture results in crumbly treats. Apply firm, even pressure with a greased spatula for 30 seconds to bind everything. Your hands work too—just oil them first.
Cutting Too Soon
Slicing before the treats cool fully causes messy, uneven pieces. Wait the full 1 hour at room temperature. For clean cuts, dip your knife in hot water between slices.
Ignoring Marshmallow Quality
Cheap vegan marshmallows often contain gums that create a gummy texture. Invest in Dandies or Trader Joe’s for the right melt. Homemade fluff works but requires extra effort.
Nutrition Facts
Frequently Asked Questions
Can I use regular marshmallows?
No, regular marshmallows contain gelatin, which isn’t vegan. Stick with brands like Dandies for a plant-based option that melts just as well.
What if my treats turn out too hard?
This usually happens if the marshmallow mixture was overheated. Next time, melt on low heat and remove from heat as soon as it’s smooth. Stirring in the cereal quickly helps too.
How do I store leftovers?
Keep them in an airtight container at room temperature for up to 4 days. For longer storage, refrigerate for up to 1 week, but avoid freezing.
Can I add mix-ins like chocolate chips?
Yes! Fold in 1/2 cup of vegan chocolate chips or dried fruit after mixing in the cereal. Press gently to avoid crushing them.

- Glutinous Rice Flour Bread Recipe: Soft Pillows with Nutty Depth - October 12, 2026
- Green Rice Casserole Recipe: Cheesy Baked Comfort with Vibrant Herbs - October 12, 2026
- Glutinous Rice Coconut Milk Recipe: Chewy Sweetness With Tropical Depth - October 12, 2026