
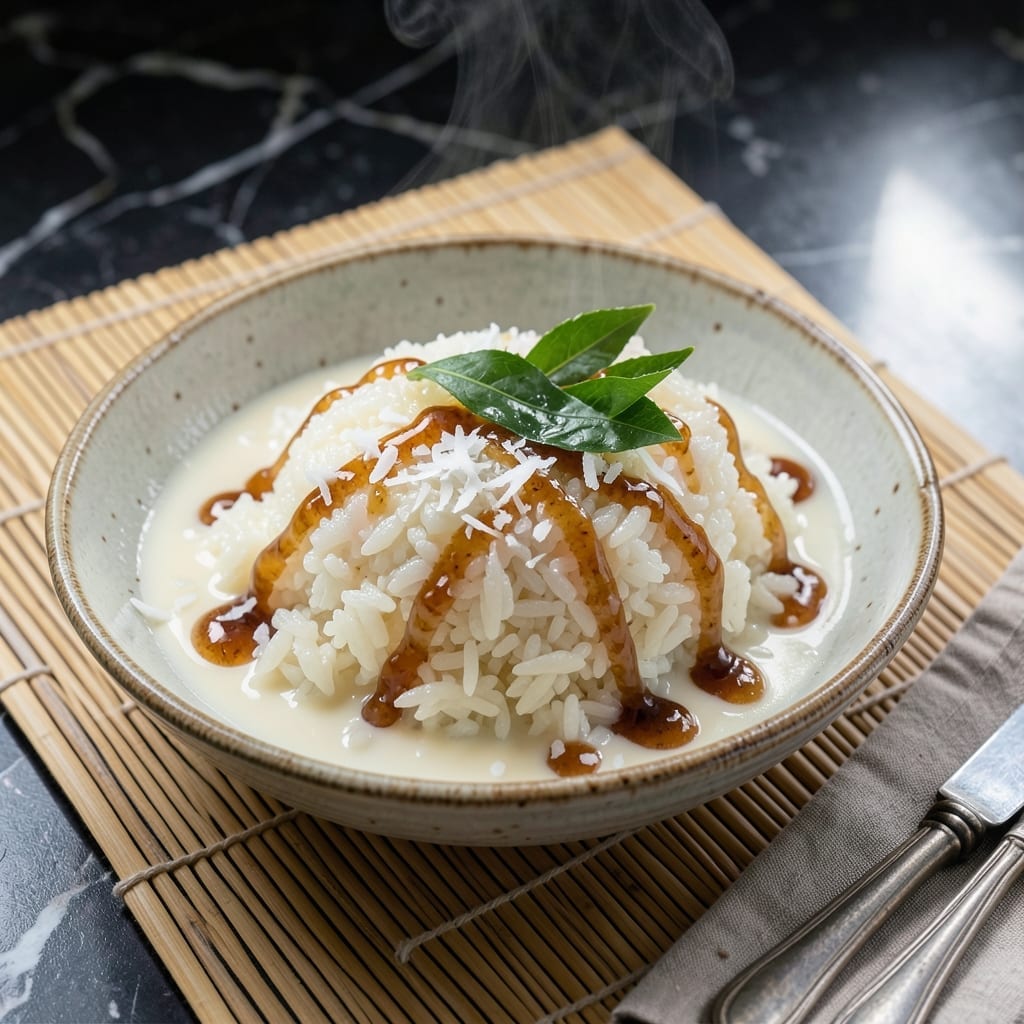
This dessert combines the natural sweetness of glutinous rice with the rich, creamy texture of coconut milk for a truly indulgent treat. The layers of flavor come together beautifully through a simple yet precise method.
What results is a dish with perfectly sticky rice, infused with coconut aroma, and a velvety texture that melts in your mouth. The balance of sweetness and creaminess makes it a standout vegan dessert.
Ingredients for Glutinous Rice Recipe Dessert with Coconut Milk
Simple ingredients create this rich, layered vegan dessert with sticky rice and coconut.
| Ingredient | Amount | Notes |
|---|---|---|
| Glutinous Rice 🍚 | 1 ½ cups | Soaked overnight for best texture |
| Coconut Milk 🥥 | 2 cups | Full-fat for creaminess |
| Sugar 🍚 | ¾ cup | Adjust to taste preference |
| Salt 🧂 | ½ tsp | Balances sweetness |
| Water 💧 | 2 ½ cups | For cooking rice |
| Cornstarch 🌾 | 1 tbsp | Thickens coconut layer |
| Vanilla Extract 🌿 | 1 tsp | Enhances flavor depth |
| Coconut Cream 🥥 | ½ cup | For topping layer |
| Toasted Coconut Flakes 🥥 | ¼ cup | Garnish for texture |
| Pandan Leaves 🍃 | 2 pieces | Optional for aroma |
The rice is everything here. Glutinous rice (also called sweet rice) is non-negotiable—regular white rice won’t give you that sticky texture. Asian markets or the international aisle at Whole Foods carry it. Look for brands like Koda Farms or Bob’s Red Mill. Soaking overnight isn’t optional (the grains need to absorb water), but a quick 4-hour soak works in a pinch.
No coconut milk? Coconut cream thinned with water (1:1 ratio) gets you close. Skip the light coconut milk—full-fat is essential for that velvety texture. Out of pandan leaves? A few drops of pandan extract works, or just omit it. The sugar can be swapped for coconut sugar (same amount), but avoid liquid sweeteners like agave—they’ll make the layers too runny.
The dessert keeps beautifully. Store leftovers in an airtight container for up to 4 days in the fridge. To reheat, microwave in 20-second bursts (it thickens as it cools). The toasted coconut flakes are best added fresh, so keep them separate until serving.
Why You’ll Love This Recipe
- Set and Forget: I toss everything in the pot, let it simmer, and walk away—no stirring, no fuss.
- Creamy Coconut Bliss: The warm, rich coconut milk soaks into the rice so every bite is velvety-sweet.
- Feeds a Party: I make a big batch for gatherings and it disappears faster than the main course.
- Leftovers? Even Better: Honestly, the flavors deepen overnight so I always save some for tomorrow.
Step-by-Step Instructions for Glutinous Rice Dessert With Coconut Milk
Master the layering technique for a dessert that balances sticky rice with rich coconut perfectly.
Step 1: Prepare and Cook the Glutinous Rice
Rinse the 1.5 cups Glutinous Rice thoroughly under cold water until the water runs clear. This removes excess starch and prevents the grains from becoming gummy. Drain well in a fine-mesh strainer.
In a medium saucepan, combine the drained rice with the 2.5 cups Water and the 2 pieces Pandan Leaves. Bring to a boil over medium-high heat, then reduce to low and simmer covered for 15-20 minutes until the water is absorbed and the rice is tender. Remove the pandan leaves and discard.
Step 2: Sweeten the Rice Base
While the rice is still warm, stir in the 0.75 cup Sugar and 0.5 tsp Salt. The sugar should dissolve completely, creating a slightly sticky, sweet base. I use a silicone spatula to fold the ingredients gently, ensuring even distribution without breaking the rice grains.
Taste and adjust sweetness if needed, though remember the coconut layer will add richness. The rice should be tender but not mushy, with a slight bite to contrast the creamy topping. Transfer the sweetened rice to a serving dish and press it down lightly to create an even layer.
Step 3: Create the Coconut Cream Layer
In a separate saucepan, heat the 2 cups Coconut Milk over medium heat until it just begins to simmer. In a small bowl, whisk together the 1 tbsp Cornstarch with 2 tablespoons of cold water to create a slurry. Slowly pour the slurry into the simmering coconut milk while whisking constantly.
Continue cooking for 3-5 minutes, stirring frequently, until the mixture thickens enough to coat the back of a spoon. Remove from heat and stir in the 1 tsp Vanilla Extract. The mixture should be smooth and creamy, not lumpy. Let it cool slightly before pouring over the rice layer.
Step 4: Add the Coconut Cream Topping and Garnish
Once the coconut milk layer has set slightly, carefully pour the 0.5 cup Coconut Cream over the top, spreading it gently to create an even layer. The cream should sit on top without mixing into the lower layers, creating a beautiful visual contrast.
Sprinkle the 0.25 cup Toasted Coconut Flakes evenly over the coconut cream. The flakes should look golden and crisp, adding texture and a nutty aroma to the dessert. Chill the entire dish in the refrigerator for at least 1 hour to allow the layers to set completely before serving.
Pro Tips For Making Glutinous Rice Recipe Dessert With Coconut Milk
- Soak the Rice: Give the glutinous rice a good 4-6 hour soak in warm water—I learned this the hard way after ending up with crunchy bits in my dessert.
- Simmer Low and Slow: Keep the heat on medium-low once the coconut milk goes in; boiling it hard will make the mixture separate and look greasy.
- Use Full-Fat Coconut Milk: Skip the light version—full-fat coconut milk is the thing that matters most for that rich, creamy texture everyone loves.
- Salt the Rice Water: Add a pinch of salt to the water when soaking the rice—sounds weird, but it works and balances the sweetness perfectly.
Essential Equipment for This Dish
Rice Soaking Container
I always soak my glutinous rice in a large glass bowl—it needs room to expand. A 4-quart Pyrex works perfectly for the 1.5 cups this recipe calls for. Avoid metal bowls as they can react with acidic ingredients.
Medium Saucepan
For cooking the rice, a 3-quart saucepan with a heavy base is ideal. I recommend All-Clad for even heat distribution. The rice needs space to absorb the 2.5 cups water without boiling over.
Fine-Mesh Strainer
A fine-mesh strainer is essential for rinsing the rice thoroughly. I use an OXO Good Grips strainer—it fits over my sink perfectly and prevents any grains from slipping through. 💫
Whisk for Slurry
When making the cornstarch slurry, a small wire whisk ensures no lumps. I keep a 9-inch balloon whisk from Cuisinox just for tasks like this. It’s perfect for mixing the 1 tbsp cornstarch with water.
Silicone Spatula
A heat-resistant silicone spatula is my go-to for folding sugar into the warm rice. The GIR brand spatulas won’t melt and have a comfortable grip. They’re great for scraping every bit of rice from the pan.
Serving Dish
Use a shallow glass dish (like an 8×8-inch baking dish) for layering. It lets you press the rice evenly and show off the beautiful coconut layers. Plus, it’s easy to chill in the fridge for that 1-hour setting time. ❄️
Nutrition Facts
Frequently Asked Questions
Can I use regular rice instead?
No, regular rice won’t give you the same sticky texture. Glutinous rice is essential for that signature chewy consistency. It’s also called sweet rice and is available at most Asian markets.
How do I prevent lumps in the coconut layer?
Whisk the cornstarch with cold water first to make a smooth slurry. Then slowly pour it into the warm coconut milk while stirring constantly. This ensures a silky, lump-free texture every time.
What if my dessert is too runny?
Chill it for at least 1 hour to let the layers set. If it’s still loose, you may need more cornstarch next time. Adding 1 extra tablespoon should thicken it sufficiently.
Can I make this ahead of time?
Prepare it up to 2 days in advance. Store covered in the fridge, but add toasted coconut flakes just before serving to keep them crisp.

- Cream of Wild Rice Soup Recipe: Earthy Grains in Silky Broth - October 9, 2026
- Filipino Garlic Rice Recipe: Crispy Fried Aroma With Every Bite - October 9, 2026
- Gobi Manchurian Rice Recipe: Indo-Chinese Fusion in One Bowl - October 9, 2026