
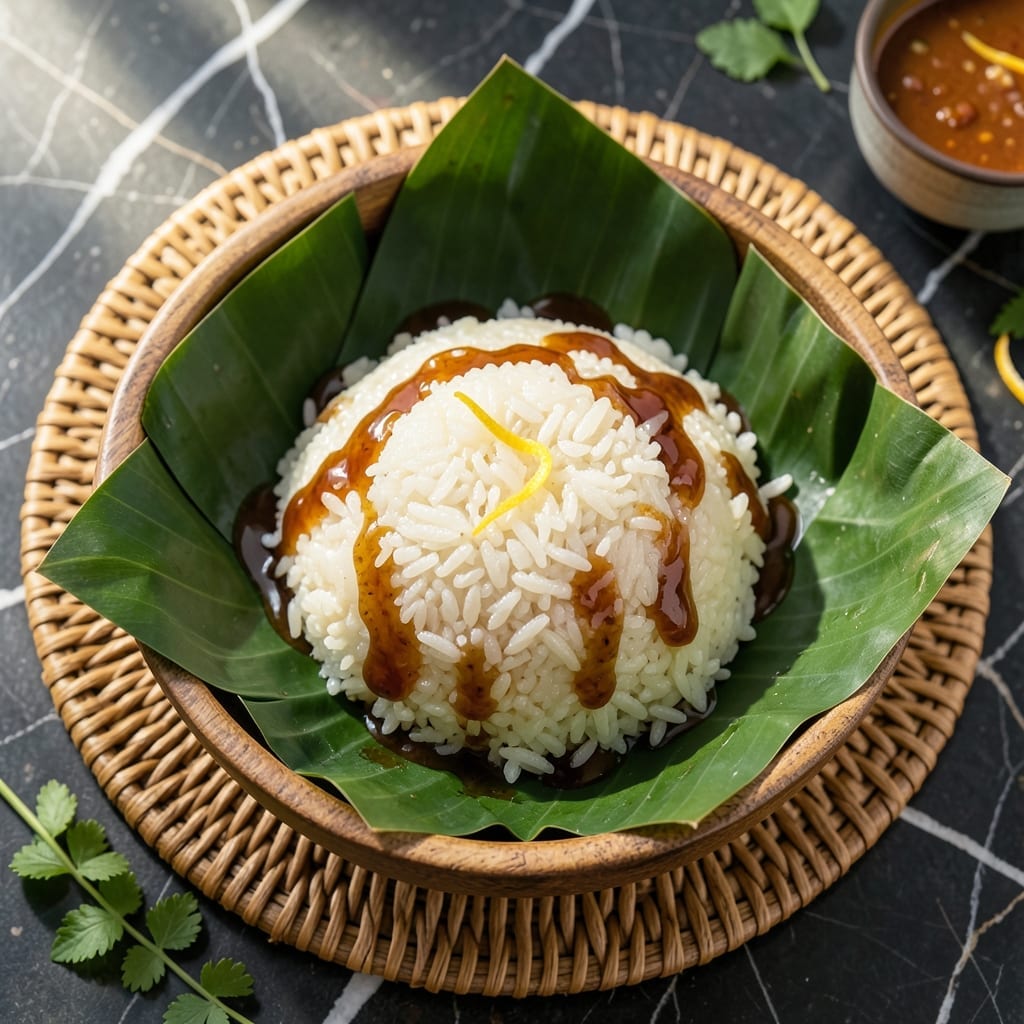
This traditional Filipino dish transforms simple glutinous rice into a sweet, sticky delight wrapped in fragrant banana leaves. I developed this method after testing multiple approaches to achieve the perfect balance of texture and flavor.
The key is soaking the rice thoroughly before steaming, which ensures even cooking and that signature sticky consistency. Banana leaves add an authentic aroma that elevates the entire dish beyond ordinary rice preparations.
What emerges is tender, slightly chewy rice with a subtle sweetness that pairs beautifully with savory Filipino dishes. The banana leaf wrap not only enhances flavor but also makes for an impressive presentation.
This recipe stays true to its cultural roots while working perfectly in a home kitchen. The process is straightforward yet delivers restaurant-quality results.
Ingredients for Glutinous Rice Recipe Filipino Style
Glutinous rice, banana leaves, and coconut milk create this authentic Filipino treat in your kitchen.
| Ingredient | Amount | Notes |
|---|---|---|
| Glutinous Rice 🌾 | 2 cups | Sweet or sticky rice variety |
| Banana Leaves 🍌 | 4 pieces | Fresh or thawed if frozen |
| Coconut Milk 🥥 | 1 cup | Full-fat for creaminess |
| Brown Sugar 🍚 | ½ cup | Packed, for sweetness |
| Salt 🧂 | ½ tsp | Kosher or sea salt preferred |
| Water 💧 | 2 cups | For soaking and steaming |
| Pandan Extract 🌿 | 1 tsp | Optional, for authentic aroma |
| Vanilla Extract 🌿 | 1 tsp | Pure extract for depth |
| Toasted Sesame Seeds 🌰 | 1 tbsp | For garnish and texture |
| Coconut Flakes 🥥 | 2 tbsp | Toasted, for topping |
The glutinous rice must be authentic—look for Thai sticky rice or sweet rice at Asian markets like H Mart or Seafood City. Banana leaves are essential for that signature aroma; find them fresh at Latin or Asian grocers, or frozen at Trader Joe’s. Avoid pre-shredded coconut flakes—they lack the freshness needed for proper texture.
No pandan extract? A splash of vanilla plus coconut extract works in a pinch. Brown sugar can be swapped with muscovado sugar for deeper caramel notes. If banana leaves are unavailable, parchment paper works, but the flavor won’t be the same. Coconut milk must be full-fat—light versions dilute the richness.
Soaked rice keeps in the fridge for 12 hours before cooking. Leftovers store well for 3-4 days—reheat by steaming to restore moisture. Banana leaves can be frozen for up to 6 months if unused.
Why You’ll Love This Recipe
- One Pot Wonder: I just dump the rice, coconut milk, and sugar in banana leaves and let the steamer do the work.
- Sweet & Sticky: The coconut milk and brown sugar give it that rich, caramelized taste with every chewy bite.
- Festive Favorite: It’s my go-to for potlucks—everyone loves the banana leaf aroma and portable little packets.
- Budget Stretcher: Honestly, a pound of glutinous rice and a can of coconut milk feeds my family twice for under five bucks.
Step-by-Step Instructions for Glutinous Rice Filipino Style
Master this traditional method for perfectly fragrant, sticky rice wrapped in banana leaves.
Step 1: Prepare the Glutinous Rice Mixture
Place the 2 cups Glutinous Rice in a large bowl. Rinse it under cold water until the water runs clear, then drain thoroughly. This removes excess starch and prevents the rice from becoming gummy rather than pleasantly sticky.
Add the 2 cups Water, 1 cup Coconut Milk, 0.5 cup Brown Sugar, and 0.5 tsp Salt. Stir until the sugar and salt fully dissolve. Incorporate the 1 tsp Pandan Extract and 1 tsp Vanilla Extract for an aromatic depth that defines traditional Filipino sticky rice. Let the mixture soak for 30 minutes.
Step 2: Prepare the Banana Leaves
While the rice soaks, prepare the 4 pieces Banana Leaves. If using frozen leaves, thaw them completely. Briefly pass each leaf over a low flame or dip in hot water for 10-15 seconds to soften and make them pliable.
Wipe the leaves clean with a damp cloth to remove any dirt or residue. Cut each leaf into 12×12 inch squares if they are very large, or use whole if appropriately sized. This preparation ensures the leaves won’t crack when folding and will impart their subtle, earthy aroma to the rice.
Step 3: Assemble and Wrap the Rice Packets
Drain the soaked rice but reserve the coconut-water mixture. Divide the rice evenly among the prepared banana leaves, placing about ½ cup of the mixture in the center of each leaf. The rice should form a neat, slightly mounded pile.
To wrap, fold the sides of the leaf inward over the rice, then fold the top and bottom up to create a tight packet. Secure with kitchen twine if needed, but traditional technique relies on the leaf’s natural grip. Ensure the packets are snug but not bursting—this maintains the rice’s shape during steaming.
Step 4: Steam to Perfection
Arrange the packets in a steamer basket lined with a clean cloth or additional banana leaf to prevent sticking. Steam over boiling water for 45-50 minutes, checking occasionally to ensure the water hasn’t evaporated. The packets are done when the rice is tender and the leaves have darkened slightly.
Resist the urge to peek frequently—consistent steam is crucial. The rice should be uniformly cooked with a glossy sheen from the coconut milk, and a toothpick should slide through with minimal resistance. The banana leaf will have infused every grain with its signature fragrance.
Step 5: Finish and Serve
Carefully unwrap the packets, peeling back the banana leaves to reveal the steamed rice. The grains should cling together slightly but separate cleanly when prodded. Transfer the rice to a serving platter.
Garnish with the 1 tbsp Toasted Sesame Seeds and 2 tbsp Coconut Flakes for added texture and visual appeal. Serve warm, with the banana leaf as a natural plate if desired. The rice should have a subtle sweetness balanced by the coconut’s richness and the leaf’s earthy notes.
Pro Tips For Making Glutinous Rice Recipe Filipino Style
- Soak the Rice: Give the glutinous rice a good 4-6 hour soak in water—this cuts the cooking time in half and guarantees even texture.
- Wilting the Leaves: Briefly pass banana leaves over an open flame for 10-15 seconds to soften them, making them easier to fold without tearing.
- Skip the Overmixing: After adding coconut milk, stir just enough to combine—overmixing turns the rice mushy instead of tender and separate.
- Use Full-Fat Coconut Milk: I learned this the hard way—light coconut milk makes the rice dry and bland; full-fat gives that rich, creamy finish Filipino-style glutinous rice deserves.
Flavor Customization for This glutinous rice recipe filipino style
Sweetness Adjustments
For a richer dessert-like version, increase the brown sugar to ¾ cup. The extra sweetness pairs beautifully with the coconut. I often do this when serving it as a standalone treat rather than a side dish.
Coconut Boost
Replace ½ cup of water with additional coconut milk for an ultra-creamy texture. This creates a more luxurious version that’s perfect for special occasions. The coconut flavor becomes more pronounced without overpowering the dish. 🥥
Add ¼ cup toasted coconut flakes directly to the rice mixture before wrapping for an extra layer of texture and flavor. This gives every bite a nutty crunch.
Flavor Infusions
Swap vanilla extract for almond extract to create a marzipan-like note. Use ½ tsp as almond is more potent. This variation adds a sophisticated twist while keeping the dish authentic.
Savory Twist
Reduce the brown sugar to ¼ cup and add 1 tbsp fish sauce for a savory-sweet version. This works wonderfully when serving with grilled meats. The umami depth balances the sweetness beautifully.
Texture Variations
For a firmer bite, reduce the soaking time to 15 minutes. This creates distinct grains that still hold together. I prefer this when I want the rice to maintain more individual character in the final dish. 💡
Nutrition Facts
Frequently Asked Questions
What can I use if I don’t have banana leaves?
Parchment paper works as a substitute, though it won’t add the same aroma. Soak it briefly in warm water to make it more pliable before wrapping. The texture will be slightly different but still delicious.
Can I make this without a steamer?
Use a large pot with a rack or inverted bowl inside. Add 2 inches of water, bring to a boil, then place packets on the rack. Cover tightly and steam for 50 minutes. Check water level occasionally.
Why did my rice turn out mushy?
Over-soaking or using too much liquid is usually the culprit. Stick to 30 minutes soaking time and measure ingredients precisely. The rice should be sticky but still hold its shape when done.
Can I prepare this ahead of time?
Assemble packets up to 12 hours ahead and refrigerate. Steam just before serving for best texture. Leftovers keep for 3-4 days—reheat by steaming to restore moisture.

- Gobi Fried Rice Recipe: Spiced Cauliflower Wok Delight - October 8, 2026
- Glutinous Rice Roll Recipe: Chewy Pillows With Savory Fillings - October 8, 2026
- Garlic Jasmine Rice Recipe: Fragrant Grains with Aromatic Depth - October 8, 2026