
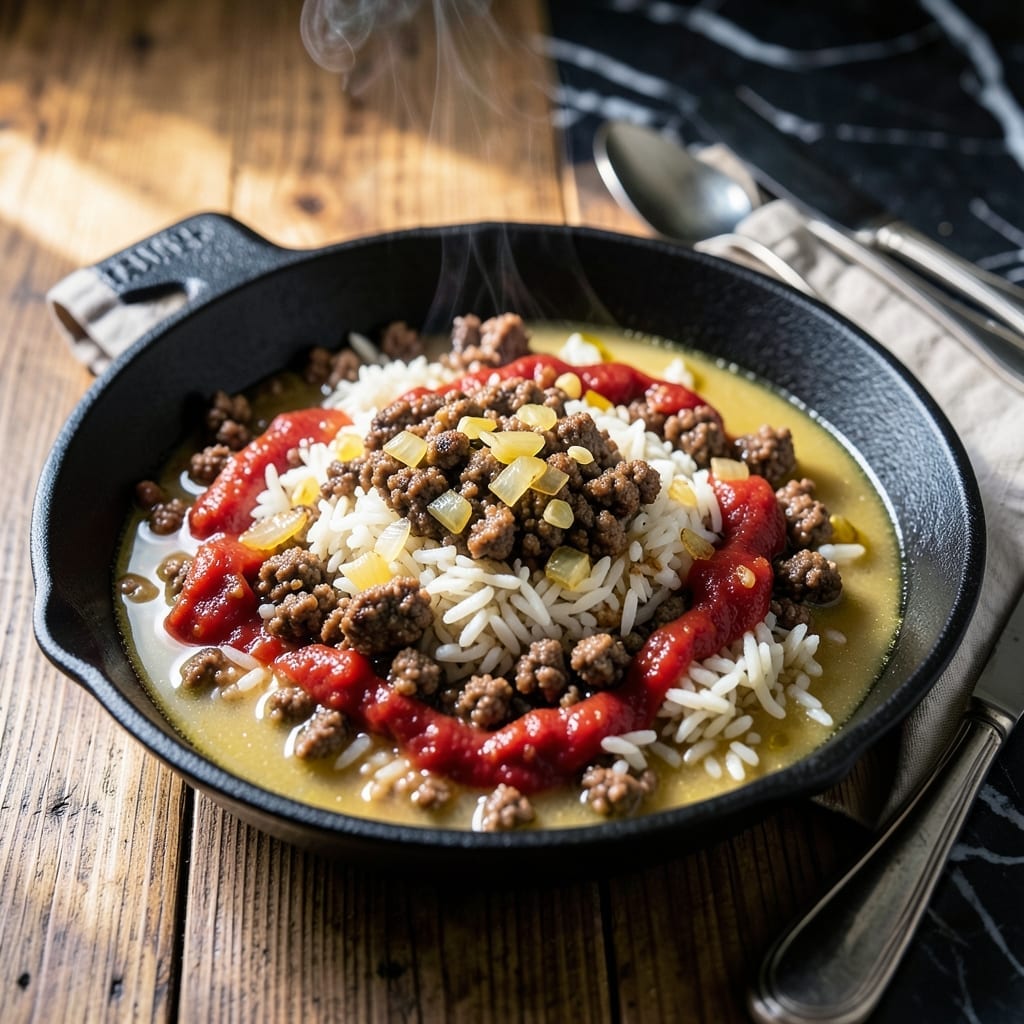
This one-skillet dish delivers comfort with minimal effort and maximum flavor. Ground meat and rice cook together, absorbing savory seasonings for a hearty meal.
Cleanup is simple with everything prepared in one pan. The result is a satisfying, well-balanced dish perfect for any night of the week.
Ingredients for Ground Meat and Rice
Simple pantry staples transform into a hearty, one-skillet meal with rich, layered flavors.
| Ingredient | Amount | Notes |
|---|---|---|
| Ground Beef 🥩 | 1 lb | 80/20 lean-to-fat ratio preferred |
| Long-Grain White Rice 🍚 | 1 ½ cups | Uncooked, rinsed before use |
| Yellow Onion 🧅 | 1 whole | Medium-sized, finely diced |
| Garlic Cloves 🧄 | 3 cloves | Minced for maximum flavor |
| Chicken Broth 💧 | 2 ½ cups | Low-sodium preferred for control |
| Tomato Paste 🍅 | 2 tbsp | Canned or tube variety |
| Worcestershire Sauce 🫒 | 1 tbsp | Adds umami depth to dish |
| Dried Thyme 🌿 | 1 tsp | Crushed between fingers to release oils |
| Dried Oregano 🍃 | 1 tsp | Mediterranean variety preferred |
| Paprika 🌶️ | 1 tsp | Sweet or smoked variety |
| Bay Leaf 🌿 | 1 whole | Removed before serving |
| Kosher Salt 🧂 | 1 ½ tsp | Diamond Crystal brand recommended |
| Black Pepper 🌶️ | ½ tsp | Freshly ground for best flavor |
| Olive Oil 🫒 | 2 tbsp | Extra-virgin for sautéing |
| Frozen Peas 🌱 | ¾ cup | Optional for color and texture |
The ground beef is non-negotiable for flavor and texture—80/20 lean-to-fat ratio gives you juicy results without excess grease. Costco or butcher shops typically have the best quality. Long-grain white rice absorbs the savory broth beautifully, but jasmine rice works too (just reduce liquid by 2 tbsp). For the broth, Swanson or Kitchen Basics offer reliable low-sodium options.
No ground beef? Ground turkey or pork work well (adjust seasoning slightly). Out of tomato paste? 1/4 cup ketchup in a pinch. The Worcestershire adds depth—soy sauce at half the amount if you’re avoiding anchovies. Fresh herbs can replace dried at a 3:1 ratio, but dried are more convenient here. The peas are optional but add a nice pop of color.
Store ground beef in the coldest part of your fridge and use within 1-2 days of purchase. Uncooked rice keeps in the pantry for 6-12 months. Leftovers taste even better the next day and freeze well for up to 3 months.
Why You’ll Love This Recipe
- One Pot Wonder: I brown the beef, toss in rice and broth, cover it, and walk away—dinner practically makes itself.
- Garlic-Kissed Comfort: The sizzle of garlic and onions with the beef creates a depth of flavor that makes every bite feel like a warm hug.
- Feeds Everyone: From picky kids to hungry teens, this dish disappears fast at my table. Even better, leftovers reheat perfectly for lunches.
- Budget Hero: Ground beef and rice stretch further than you’d think. I serve four for the price of one takeout meal.
Step-by-Step Instructions for Ground Meat and Rice
This one-skillet method delivers consistent results with minimal active cooking time.
Step 1: Brown the Ground Beef and Aromatics
Heat the 2 tbsp olive oil in a large, deep skillet over medium-high heat. Add the 1 lb ground beef and cook, breaking it into small pieces with a wooden spoon, for 5-6 minutes until browned and crumbly.
Add the finely diced 1 whole yellow onion and cook for another 3-4 minutes until softened and translucent. Stir in the minced 3 cloves garlic cloves and cook for 30 seconds until fragrant. This builds a flavor foundation for the dish.
Step 2: Toast the Rice and Add Seasonings
Stir in the 1.5 cups long-grain white rice, ensuring it’s well coated with the beef fat and aromatics. Toast for 2 minutes, stirring constantly, until the rice appears slightly opaque and nutty in aroma.
Add the 2 tbsp tomato paste, 1 tbsp Worcestershire sauce, 1 tsp dried thyme, 1 tsp dried oregano, 1 tsp paprika, 1.5 tsp kosher salt, and 0.5 tsp black pepper. Stir to combine and cook for 1 minute to bloom the spices.
Step 3: Simmer with Broth and Bay Leaf
Pour in the 2.5 cups chicken broth and add the 1 whole bay leaf. Stir well, scraping up any browned bits from the bottom of the skillet. Bring the mixture to a boil, then reduce the heat to low.
Cover and let it simmer for 18-20 minutes without stirring. You’ll know it’s ready when the liquid is mostly absorbed and the rice is tender with a slight bite. Resist the urge to peek—this ensures even cooking.
Step 4: Finish with Frozen Peas and Rest
Remove the skillet from heat. Discard the bay leaf, then gently fold in the 0.75 cup frozen peas. Cover and let it rest for 5 minutes—this allows the peas to thaw and the flavors to meld.
The rice should be fully cooked and the liquid absorbed. If it seems dry, add a splash of additional broth or water and let it sit covered for another 2-3 minutes. Serve warm for the best texture.
Pro Tips For Making Ground Meat And Rice
- Brown the Beef First: I learned this the hard way—cook the ground beef until deeply browned before adding onions, or you’ll end up with gray, steamed meat and a bland dish.
- Toast the Rice: After sautéing the onions and garlic, add the dry rice and stir for 1-2 minutes until slightly nutty. It adds a real depth that plain rice just can’t match.
- Skip the Cold Broth: Use warm or room-temperature chicken broth when adding it to the rice. Cold broth slows down the cooking and can leave the rice unevenly done.
- Let It Rest: Once the rice is cooked, turn off the heat and let it sit covered for 5 minutes. Sounds simple, but it makes the grains fluffier and prevents a mushy texture.
Make-Ahead Tips for This Dish
Overnight Prep
Mix 1 lb ground beef with all spices and 2 tbsp tomato paste the night before. Store covered in the fridge. This lets flavors meld deeply, saving you 10 minutes of cooking time the next day. 💡
Rice Prep Hack
Rinse and measure 1.5 cups long-grain white rice the evening before. Keep it submerged in water in the fridge—this jumpstarts the cooking process. Drain before using, and you’ll cut simmering time by 2-3 minutes.
Freezer-Friendly Batches
Cook a double batch, then portion into airtight containers. Freeze for up to 3 months. I use quart-size freezer bags laid flat to save space. Thaw overnight in the fridge before reheating. ❄️
Reheating Method
Add 2-3 tbsp water or broth to each portion before microwaving. Cover with a damp paper towel and heat on 70% power for 2-3 minutes, stirring halfway. This keeps the rice moist and prevents drying out.
Flavor Boost
If reheating from frozen, add 1 tsp Worcestershire sauce and a sprinkle of dried thyme before warming. This revives the savory depth. I always keep Swanson low-sodium broth on hand for this. 🔥
Make-Ahead Timeline
Day 1: Prep ingredients and store separately. Day 2: Cook and serve. Or cook fully, then refrigerate for up to 4 days. The flavors taste even richer after 24 hours as everything marries together.
Nutrition Facts
Frequently Asked Questions
Can I use ground turkey instead of beef?
Yes, ground turkey works well! Use 85/15 lean-to-fat ratio for best results. You may need to add an extra 1 tbsp olive oil since turkey is leaner.
What if my rice is still crunchy after simmering?
Add 1/4 cup hot broth or water, cover, and cook for another 5 minutes on low heat. Avoid stirring to prevent mushy rice.
Can I add other vegetables to the skillet?
Try diced bell peppers or carrots when sautéing onions. For frozen veggies like peas, add them with the peas at the end to avoid overcooking.
How do I prevent the rice from sticking to the pan?
Use a heavy-bottomed skillet and ensure it’s fully preheated. Stir the rice briefly after adding broth, then resist stirring until done.

- Ground Beef Rice and Beans Recipe: Slow-Simmered Savory Harmony - October 17, 2026
- Guyanese Fried Rice Recipe: Caribbean Spice With Wok-Charred Aromatics - October 17, 2026
- Hakka Thunder Tea Rice Recipe: Wok-Charred Herbal Infusion - October 17, 2026