
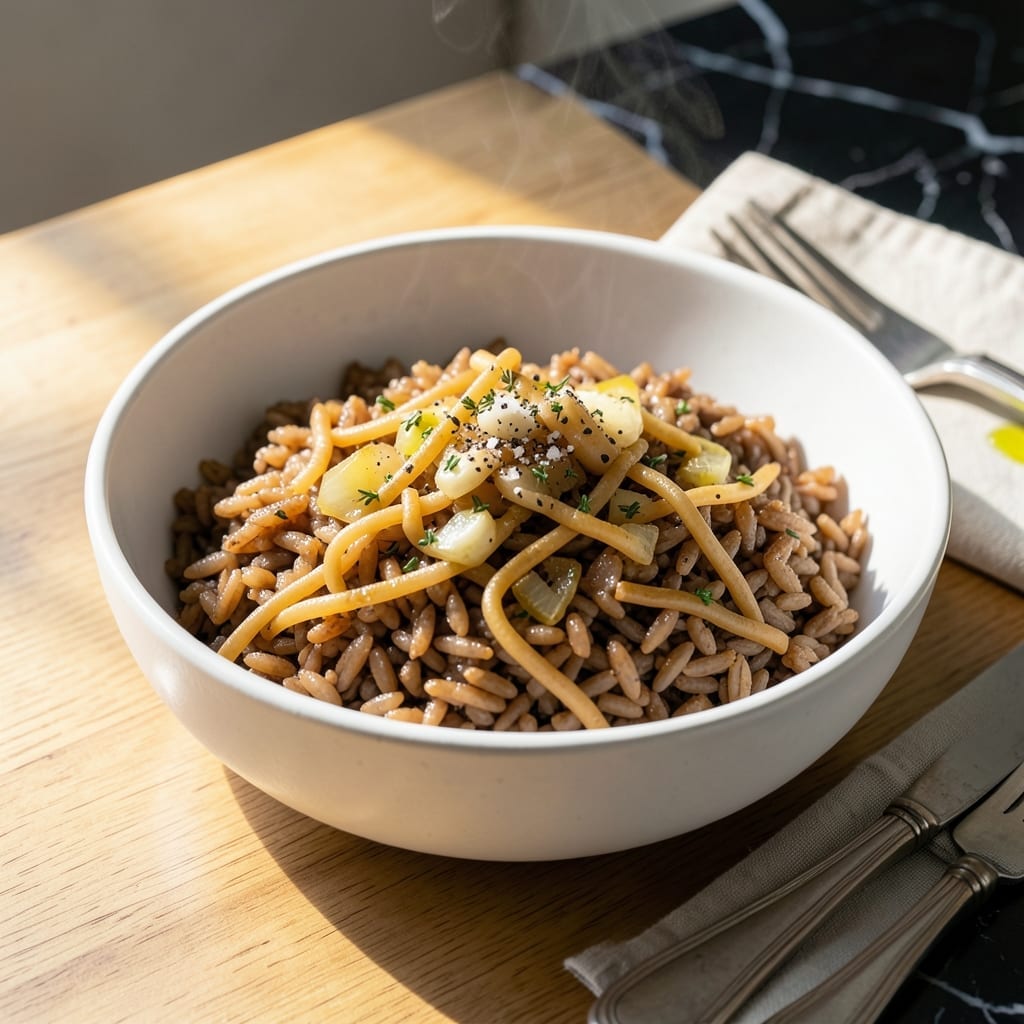
This lightened version transforms a nostalgic favorite into a one-pot meal you can feel good about serving. By swapping in brown rice and reducing sodium, we keep all the comforting flavors while making it genuinely healthy.
You’ll get the same savory, slightly toasted taste of the original with none of the guilt. The whole dish comes together in under 30 minutes, proving that comfort food can be both satisfying and wholesome.
Ingredients for Healthy Rice a Roni
Pantry staples plus a few fresh additions bring this nostalgic dish to life.
| Ingredient | Amount | Notes |
|---|---|---|
| Brown Rice 🍚 | 1 ½ cups | Long-grain preferred for texture |
| Vermicelli Pasta 🍝 | ½ cup | Broken into small pieces |
| Low-Sodium Chicken Broth 🥣 | 3 cups | Reduced sodium for health |
| Olive Oil 🫒 | 1 ½ tbsp | Extra-virgin for richness |
| Garlic Cloves 🧄 | 3 cloves | Minced for even distribution |
| Yellow Onion 🧅 | 1 whole | Finely diced for base flavor |
| Dried Thyme 🌿 | 1 tsp | Ground for better infusion |
| Dried Parsley 🍃 | 1 tsp | For color and freshness |
| Sea Salt 🧂 | ½ tsp | Adjust to taste at end |
| Black Pepper 🌶️ | ¼ tsp | Freshly ground preferred |
| Paprika 🌶️ | ½ tsp | Sweet or smoked variety |
| Bay Leaf 🍃 | 1 whole | Removed before serving |
The brown rice is key here—look for long-grain at Whole Foods or Trader Joe’s (the short-grain can get mushy). I prefer organic chicken broth for depth, but any low-sodium version works. The vermicelli toasts perfectly in olive oil—just break it into small pieces first. For the herbs, dried is fine (fresh can overpower the dish).
No chicken broth? Vegetable broth with a pinch of poultry seasoning gets you close. Short on time? Pre-minced garlic in a jar works (though fresh is better). Swap the paprika for cayenne if you want heat. The onion can be white or red, but yellow gives the best balance. Need to make it gluten-free? Rice noodles or gluten-free pasta instead of vermicelli.
This keeps 4-5 days in the fridge—reheat with a splash of broth to loosen. Freezes beautifully for 3 months (portion into containers for easy grab-and-go). The toasted vermicelli loses a bit of crunch after storage, but the flavor stays spot-on.
Why You’ll Love This Recipe
- One Pot Wonder: I toss everything in—brown rice, vermicelli, broth—and walk away. Honestly, it’s the easiest hands-off side I’ve ever made.
- Garlic Infused: The garlic cloves simmering in olive oil fill my kitchen with this warm, cozy aroma. I’ll be real: I’ve caught myself sneaking bites straight from the pot.
- Meal Prep Magic: It keeps beautifully for four days, so I make a big batch and pair it with whatever protein I have on hand. (Yes, even on a Tuesday night)
- Budget Friendly: Brown rice and pasta stretch so far, and a little broth goes a long way. My wallet notices the difference.
Step-by-Step Instructions for Lightened-Up Rice Pilaf
This one-pot wonder comes together quickly with simple, wholesome ingredients.
Step 1: Toast the Vermicelli and Aromatics
Heat the 1.5 tbsp olive oil in a large pot or Dutch oven over medium heat. Add the 0.5 cup vermicelli pasta and cook for 2-3 minutes, stirring frequently, until it turns golden brown.
Immediately add the finely diced yellow onion and cook for another 3-4 minutes until softened and translucent. Stir in the minced garlic cloves and cook for 30 seconds until fragrant. This toasting step builds deep, nutty flavor in your dish.
Step 2: Bloom the Spices and Rice
Add the 1.5 cups brown rice, 1 tsp dried thyme, 1 tsp dried parsley, 0.5 tsp sea salt, 0.25 tsp black pepper, and 0.5 tsp paprika to the pot. Stir to coat the rice and vermicelli evenly with the oil and spices.
Cook for 1 minute to toast the rice and bloom the spices—this step enhances their aroma and flavor. You’ll notice the mixture becoming slightly fragrant as the spices release their essential oils.
Step 3: Simmer with Broth and Bay Leaf
Pour in the 3 cups low-sodium chicken broth and add the bay leaf. Stir well to combine, then bring the mixture to a boil over medium-high heat.
Once boiling, reduce the heat to low, cover the pot with a tight-fitting lid, and let it simmer for 40-45 minutes. Resist the urge to stir during cooking—this helps the rice cook evenly and develop a fluffy texture.
Step 4: Rest and Fluff for Perfect Texture
After the cooking time is up, remove the pot from the heat and let it sit, covered, for 10 minutes. This resting period allows the rice to steam and absorb any remaining liquid.
Remove the bay leaf before serving. Gently fluff the rice with a fork to separate the grains and distribute the vermicelli evenly. Taste and adjust the seasoning with additional sea salt if needed. The rice should be tender, the vermicelli perfectly cooked, and the flavors beautifully balanced.
Pro Tips For Making Healthy Rice A Roni
- Toast the Vermicelli: Brown the pasta in olive oil for 2-3 minutes until golden before adding liquid—I learned this the hard way after ending up with mushy noodles more than once.
- Use Extra Broth: Brown rice needs more liquid, so add about 1/4 cup extra low-sodium chicken broth to guarantee it cooks through without turning dry.
- Mince Garlic Fine: After burning a few batches, I finally figured out that finely minced garlic cooks evenly in the oil without turning bitter or overpowering.
- Let It Steam: Once the liquid is absorbed, turn off the heat, cover, and let it sit for 10 minutes—this makes a real difference in texture and ensures the rice fully absorbs the flavor.
Make-Ahead Tips for This Dish
Prep Ahead
You can chop the yellow onion and mince the garlic cloves up to 2 days in advance. Store them in separate airtight containers in the fridge. This saves 5-10 minutes of prep work on cooking day.
Measure Dry Ingredients
Combine the brown rice, vermicelli pasta, and all spices in a resealable bag the night before. This ensures you won’t forget any seasonings when you start cooking. I use quart-size freezer bags for this.
Broth Prep
If using homemade chicken broth, prepare it the day before and store it in the fridge. For store-bought, open the carton and measure out the 3 cups you’ll need so it’s ready to pour in. 💡
Partial Cooking
Toast the vermicelli and sauté the aromatics in advance, then store the mixture in the fridge. When ready to cook, simply add the remaining ingredients and simmer. This cuts active cooking time to 20 minutes.
Portion for Storage
Divide the finished dish into individual serving containers before refrigerating. This makes reheating portions quick and easy. I prefer glass containers for better heat distribution. ❄️
Freeze for Later
Cool the dish completely, then portion into freezer-safe bags or containers. It freezes well for up to 3 months. Thaw overnight in the fridge before reheating with a splash of broth.
Nutrition Facts
Frequently Asked Questions
Can I use white rice instead of brown?
Yes, but adjust the liquid to 2.5 cups and cook for only 15-18 minutes. Brown rice needs more time and liquid to soften properly.
How can I make this dish vegetarian?
Swap the chicken broth for vegetable broth and add 1 tsp soy sauce for umami depth. Works perfectly with the same cooking method.
Why does my rice turn out mushy?
Lifting the lid or stirring during cooking releases steam, which makes rice soggy. Always keep it covered until the 10-minute rest is complete.
Can I use fresh herbs instead of dried?
Use 1 tbsp fresh for every 1 tsp dried. Add them at the end of cooking to preserve their delicate flavors.

- Ground Beef Rice and Beans Recipe: Slow-Simmered Savory Harmony - October 17, 2026
- Guyanese Fried Rice Recipe: Caribbean Spice With Wok-Charred Aromatics - October 17, 2026
- Hakka Thunder Tea Rice Recipe: Wok-Charred Herbal Infusion - October 17, 2026