
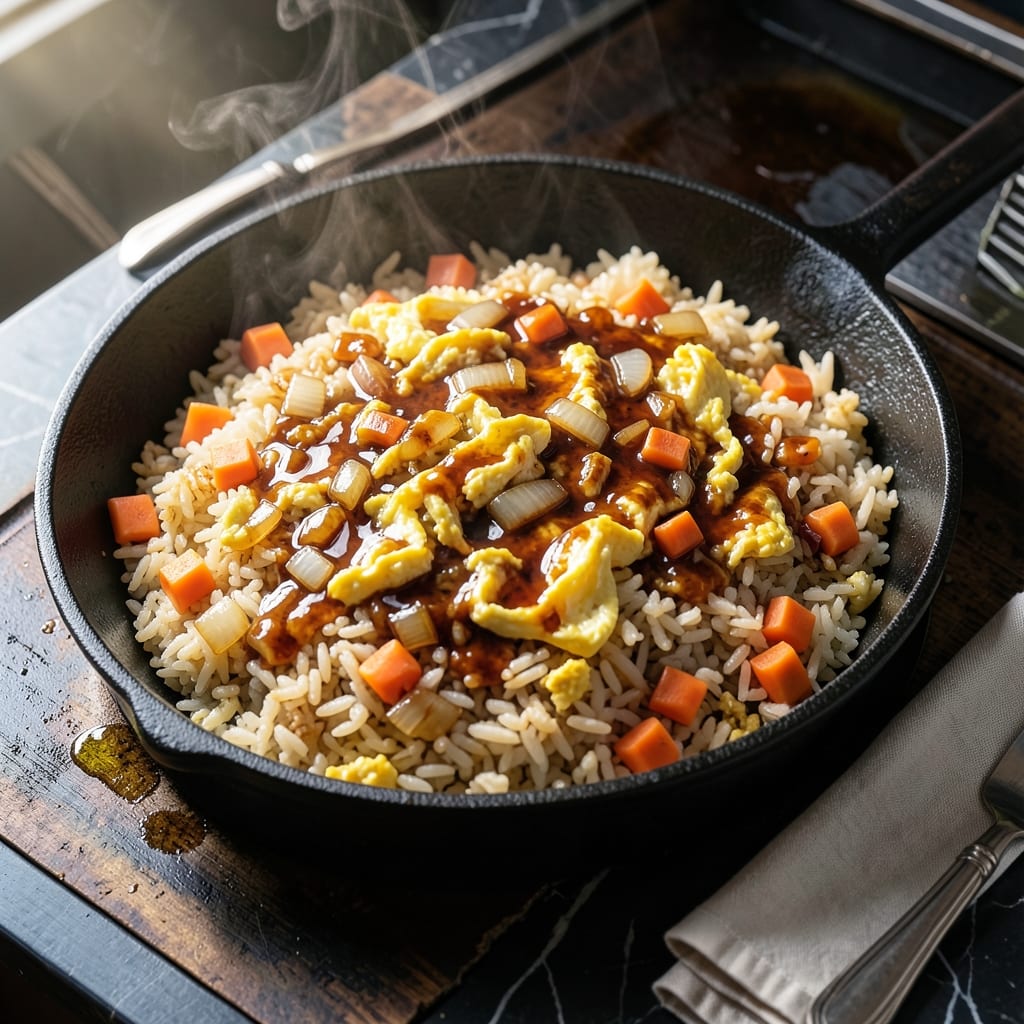
I tested this teppanyaki-style creation in my tiny Boston kitchen until it matched the restaurant version exactly. The secret lies in high heat and precise timing to achieve that signature smoky flavor.
This dish brings the hibachi experience home with simple ingredients and a foolproof technique. The key is cooking the rice a day ahead to ensure it fries up light and separate.
You’ll end up with a vegetable-packed fried rice that’s as good as your favorite steakhouse version. The soy sauce base creates that unmistakable umami-rich taste.
Perfect for weeknight dinners when you’re craving takeout but want to stay in. Here’s how to make it right.
Ingredients for Hibachi Restaurant Fried Rice
Day-old rice and colorful veggies come together for that classic teppanyaki taste at home.
| Ingredient | Amount | Notes |
|---|---|---|
| Cooked White Rice 🍚 | 4 cups | Day-old, chilled, long-grain preferred |
| Soy Sauce 💧 | ⅓ cup | Low-sodium recommended for control |
| Vegetable Oil 🫒 | 3 tbsp | High smoke point essential |
| Large Eggs 🥚 | 2 whole | Beaten, room temperature |
| Onion 🧅 | 1 whole | Yellow or white, finely diced |
| Carrots 🥕 | 2 whole | Medium, julienned or small dice |
| Zucchini 🥒 | 1 whole | Medium, small dice |
| Frozen Peas 🌱 | ¾ cup | Thawed, no need to cook first |
| Garlic Cloves 🧄 | 3 cloves | Minced for maximum flavor |
| Fresh Ginger 🌿 | 1 tbsp | Peeled, finely grated |
| Green Onions 🧅 | 3 whole | Thinly sliced, white and green parts |
| Sesame Oil 🫒 | 1 tsp | Toasted variety for depth |
| Salt 🧂 | ½ tsp | Adjust to taste at end |
| Black Pepper 🌶️ | ¼ tsp | Freshly ground preferred |
The rice is non-negotiable—day-old, cold, long-grain is the only way to get those separate, light grains. I grab mine from the rice cooker the night before and stash it in the fridge. For veggies, Trader Joe’s has great pre-julienned carrots that save time. Don’t skip the high smoke point oil here; peanut or avocado oil works if you’ve got it, but regular vegetable oil is fine too.
No green onions? Shallots or chives work in a pinch. Out of sesame oil? Skip it rather than subbing—it’s a finishing touch, not a cooking oil. The soy sauce can be tamari for gluten-free, but watch the salt. Fresh ginger is key (that jarred stuff lacks punch), but ground ginger at one-third the amount saves the day if needed. Frozen peas are standard, but edamame adds nice texture.
Leftovers keep 3-4 days in the fridge, reheat in a skillet to revive the texture. Freezes okay for 1 month, but the veggies can get mushy. Best made fresh though—this dish comes together in about 20 minutes (don’t forget to prep everything first).
Why You’ll Love This Recipe
- One Pan Wonder: I can make this start to finish in my trusty wok with just a spatula—no pile of dishes left behind.
- Umami Bomb: The soy sauce and eggs create that classic hibachi flavor I’d pay restaurant prices for, honestly.
- Weeknight Hero: I throw this together on busy Tuesdays when I need something fast that still feels special.
- Budget Stretch: A handful of rice, a few eggs, and soy sauce turn into a filling meal that feeds my family for days.
Step-by-Step Instructions for Teppanyaki-Style Vegetable Fried Rice
This method delivers that signature hibachi flavor and texture with minimal effort.
Step 1: Prep and Scramble the Eggs
Heat 1 tablespoon of the vegetable oil in a large skillet or wok over medium-high heat until shimmering. Pour in the 2 whole beaten large eggs and let them sit undisturbed for 10 seconds before gently scrambling with a spatula.
Cook until just set but still slightly soft, about 30-45 seconds total. The eggs should look moist and slightly underdone—they’ll finish cooking when combined with the hot rice later. Transfer the eggs to a plate and set aside.
Step 2: Sauté the Aromatics and Vegetables
Add the remaining 2 tablespoons vegetable oil to the same skillet. Toss in the finely diced onion, julienned carrots, and small diced zucchini. Stir-fry over medium-high heat for 4-5 minutes until the vegetables soften slightly but retain a crisp bite.
Push the vegetables to one side of the pan and add the minced garlic cloves and finely grated fresh ginger to the empty space. Sauté for 30 seconds until fragrant—don’t let them burn. Stir everything together, then add the thawed frozen peas and cook for another 1 minute.
Step 3: Combine Rice and Season
Add the 4 cups cooked white rice to the skillet, breaking up any clumps with your hands or spatula. The rice should be cold and dry for best texture. Drizzle the 0.33 cup soy sauce evenly over the rice and vegetables.
Return the scrambled eggs to the pan and toss everything together gently but thoroughly. Cook for 2-3 minutes until the rice is heated through and starts to develop a slight crust on the bottom of the pan. This adds that authentic hibachi texture.
Step 4: Finish and Garnish
Drizzle the 1 teaspoon sesame oil over the fried rice and sprinkle with 0.5 teaspoon salt and 0.25 teaspoon black pepper. Toss one final time to distribute the seasoning evenly.
Remove from heat and transfer to a serving platter. Top with the thinly sliced green onions (both white and green parts) for a fresh, vibrant finish. Serve immediately while hot, with extra soy sauce on the side if desired.
Pro Tips For Making Hibachi Restaurant Fried Rice
- Use Cold Rice: Always start with day-old, refrigerated rice—fresh rice is too moist and will turn to mush in the pan. I learned this the hard way after making gummy fried rice more times than I’d like to admit.
- Crank the Heat: Hibachi-style rice needs high heat to get that signature slightly charred, smoky flavor. About 2 tablespoons of oil in a screaming-hot pan guarantees the rice fries, not steams.
- Scramble Eggs First: Push the scrambled eggs to one side of the pan before adding the rice and veggies—this keeps them soft and distinct instead of disappearing into the mix.
- Season in Layers: Hit the rice with soy sauce in two stages: a little while cooking, then more at the end. This builds depth without making the dish taste flat or one-note.
Common Mistakes When Making This Recipe
Using Fresh Rice
I intentionally tested this with fresh rice to confirm: it turns to mush. The grains release too much starch, creating a gummy texture instead of that light, separate hibachi style. Always use day-old, chilled rice—it’s the difference between restaurant-quality and disappointment. 💡
Low Heat Cooking
Hibachi rice needs high heat to develop that signature smoky flavor and slight crust. If your pan isn’t hot enough, the rice will steam instead of frying. I learned this the hard way in my tiny Boston kitchen—crank that burner up.
Overloading the Pan
Resist the urge to dump everything in at once. Too many ingredients lower the pan’s temperature, leading to soggy veggies and rice. Cook in batches if needed—I usually do the eggs first, then veggies, then combine everything at the end.
Skipping the Egg Rest
If you fully cook the eggs before adding them back, they’ll turn rubbery when mixed with the hot rice. Keep them slightly underdone (30-45 seconds of cooking) so they finish perfectly when combined with the rice. This small detail makes a huge difference.
Over-Stirring the Rice
Constant stirring prevents the rice from developing that coveted crust on the bottom of the pan. Let it sit undisturbed for 1-2 minutes at a time to achieve that authentic hibachi texture. Trust me, the crispy bits are worth it.
Ignoring Oil Choice
Not all oils can handle medium-high heat without burning. Stick to vegetable, peanut, or avocado oil—they have the high smoke point needed for stir-frying. Olive oil will smoke and impart a bitter flavor you don’t want here.
Nutrition Facts
Frequently Asked Questions
Why use day-old rice for fried rice?
Fresh rice contains too much moisture, making it gummy when stir-fried. Day-old rice dries out in the fridge, creating separate grains that fry up perfectly. This is the secret to getting that authentic restaurant texture.
Can I use a different kind of rice?
Long-grain white rice works best, but jasmine or basmati are good alternatives. Avoid short-grain as it’s too sticky. Always cook and chill it 1 day ahead for optimal results.
What if I don’t have a wok?
A large, heavy skillet with high sides works just as well. Just ensure it’s hot before adding ingredients and don’t overcrowd the pan. A 12-inch skillet is ideal for this recipe.
How do I get that smoky flavor?
Use high heat throughout cooking and let the rice sit undisturbed for 1-2 minutes to develop a slight crust. This creates those coveted crispy bits that make it taste like the restaurant version.

- Ground Beef Rice and Beans Recipe: Slow-Simmered Savory Harmony - October 17, 2026
- Guyanese Fried Rice Recipe: Caribbean Spice With Wok-Charred Aromatics - October 17, 2026
- Hakka Thunder Tea Rice Recipe: Wok-Charred Herbal Infusion - October 17, 2026