
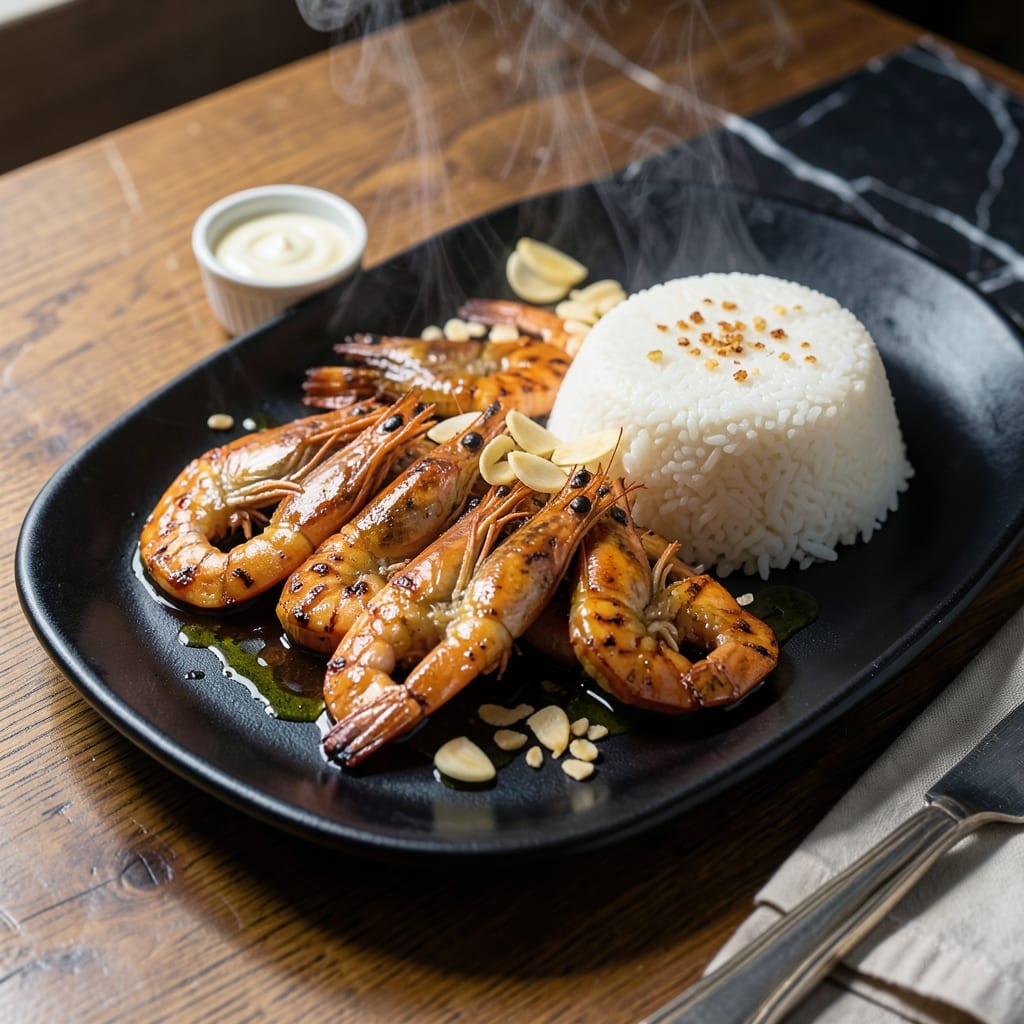
Teppanyaki-style cooking brings the restaurant experience home with minimal equipment. This dish transforms simple shrimp and rice into something extraordinary through precise technique and bold seasoning.
I developed this method after testing multiple approaches in my small kitchen, focusing on the garlic butter glaze that defines hibachi flavor. The shrimp cook quickly at high heat, while the rice absorbs all the savory, buttery goodness.
The result is tender shrimp with a caramelized crust, served over rice that’s infused with rich, garlicky depth. Each bite delivers the smoky, umami-packed taste you expect from a professional teppanyaki grill.
Perfect for weeknight dinners or impressing guests with restaurant-quality results. Here’s how to master this at home.
Ingredients for Hibachi Shrimp and Rice
Pantry staples meet fresh seafood for teppanyaki-style magic at home.
| Ingredient | Amount | Notes |
|---|---|---|
| Large Shrimp 🦐 | 1 ½ lb | Peeled, deveined, tails on |
| White Rice 🍚 | 2 cups | Uncooked, long-grain preferred |
| Unsalted Butter 🧈 | ½ cup | For garlic butter glaze |
| Garlic Cloves 🧄 | 6 cloves | Minced for maximum flavor |
| Soy Sauce 🫕 | ¼ cup | Low-sodium recommended |
| Olive Oil 🫒 | 2 tbsp | Divided for cooking |
| Green Onions 🧅 | ½ cup | Thinly sliced for garnish |
| Sesame Seeds 🌿 | 1 tbsp | Toasted for crunch |
| Ground Black Pepper 🌶️ | ½ tsp | Freshly cracked preferred |
| Kosher Salt 🧂 | 1 tsp | Diamond Crystal preferred |
| Sesame Oil 🫒 | 1 tsp | For finishing aroma |
| Lemon 🍋 | 1 whole | Cut into wedges for serving |
The shrimp are the star—wild-caught from Whole Foods or Costco gives the best texture (firm but tender). I always buy mine frozen (thawed overnight in the fridge) since it’s often fresher than what’s labeled ‘fresh’ at the counter. The rice should be basic long-grain white—jasmine or short-grain will clump. For the soy sauce, Kikkoman low-sodium is my go-to, but any brand works as long as it’s not that weirdly sweet stuff.
No shrimp? Scallops or firm white fish like cod hold up well to the high heat. Short on garlic? Garlic powder at one-fourth the amount in a pinch, but fresh really shines here. If you’re avoiding dairy, vegan butter works—just don’t skimp on the amount. For the sesame seeds, black ones add drama (find them at Asian markets), but regular toasted are fine too.
Leftover rice keeps 4-5 days in the fridge—great for fried rice later. The cooked shrimp? Best eaten fresh but hold 2 days max. The garlic butter can be made ahead and reheated gently. Always store seafood in the coldest part of your fridge (usually the bottom back).
Why You’ll Love This Recipe
- 20-Minute Meal: I can have this on the table faster than delivery arrives. Just sear the shrimp, toss with garlic butter, and serve over rice.
- Buttery Garlic Bomb: The shrimp soak up that garlic butter and soy sauce combo—honestly, I could eat them straight from the pan.
- Feeds the Crew: One batch serves my family of four with leftovers for lunch. Even my picky nephew cleans his plate.
- Budget-Friendly Luxe: Large shrimp feel fancy, but the rice stretches it into a filling meal without breaking the bank.
Step-by-Step Instructions for Hibachi Shrimp and Rice
Here’s the method I swear by for that classic teppanyaki flavor at home.
Step 1: Cook the White Rice to Perfection
Rinse the 2 cups White Rice under cold water until the water runs clear. This removes excess starch and prevents gummy rice. I use a fine-mesh strainer for this step—it’s more efficient than rinsing in the pot.
Combine the rinsed rice with 4 cups of water in a pot and bring to a boil. Once boiling, reduce heat to low, cover, and simmer for 15-18 minutes until the water is absorbed and the rice is tender. Remove from heat and let it sit covered for 5 minutes to steam.
Step 2: Sear the Large Shrimp with Garlic and Soy
Heat 1 tbsp Olive Oil in a large skillet or griddle over medium-high heat. Add the 1.5 lb Large Shrimp in a single layer, seasoning with 1 tsp Kosher Salt and 0.5 tsp Ground Black Pepper. Cook undisturbed for 2-3 minutes until the shrimp turn pink and opaque on one side.
Flip the shrimp and add the minced 6 cloves Garlic Cloves and remaining 1 tbsp Olive Oil. Sauté for another 1-2 minutes until the shrimp are fully cooked and the garlic is fragrant but not browned. Transfer the shrimp to a plate and set aside.
Step 3: Create the Garlic Butter Glaze
In the same skillet, melt the 0.5 cup Unsalted Butter over medium heat. Add the 0.25 cup Soy Sauce and stir to combine. Let the mixture simmer for 1-2 minutes until it thickens slightly and the flavors meld together.
Return the cooked shrimp to the skillet and toss to coat evenly in the garlic butter glaze. Cook for an additional 1 minute to allow the shrimp to absorb the rich, savory flavors. The glaze should cling to the shrimp with a glossy sheen.
Step 4: Assemble and Garnish
Divide the cooked White Rice among serving plates and top with the garlic butter shrimp. Drizzle any remaining glaze from the skillet over the shrimp and rice.
Garnish with 0.5 cup Green Onions, 1 tbsp Sesame Seeds, and a drizzle of 1 tsp Sesame Oil for an extra layer of aroma. Serve immediately with 1 whole Lemon cut into wedges on the side for a bright, citrusy finish.
Pro Tips For Making Hibachi Shrimp And Rice
- Dry the Shrimp: Pat the shrimp completely dry with paper towels before cooking—this prevents steaming and guarantees a proper sear in the butter.
- Hot Pan First: Heat the pan until it’s almost smoking before adding butter and shrimp. I learned this the hard way after too many batches of pale, soggy shrimp.
- Don’t Over-Salt: Skip extra salt on the shrimp since soy sauce will season the dish later—more than once I’ve ruined a batch by double-salting.
- Use Day-Old Rice: Cook the rice a day ahead and refrigerate it. Fresh rice turns mushy when stir-fried, but chilled grains stay separate and soak up the garlic-butter flavor beautifully.
Common Mistakes When Making Great hibachi shrimp and rice
Overcooking the Shrimp
Shrimp cook lightning fast—2-3 minutes per side max at medium-high heat. I learned this the hard way in my Boston kitchen, turning beautiful pink shrimp into rubbery disasters. Watch for the color change to opaque white with pink hues, then pull them immediately.
Skipping the Rice Rinse
Unrinsed rice releases excess starch, creating a gummy texture that ruins the dish. I rinse mine in a fine-mesh strainer until the water runs completely clear. This step takes 2-3 minutes but prevents clumpy, sticky rice that can’t absorb the garlic butter properly.
Crowding the Pan
Overloading your skillet steams rather than sears the shrimp, preventing that coveted caramelized crust. I cook 1.5 lb shrimp in batches if needed, giving each piece 2 inches of space to develop proper color and texture. 🔥
Burning the Garlic
Garlic burns in 30 seconds at high heat, turning bitter. After flipping the shrimp, I lower the heat to medium and add the minced 6 cloves garlic just long enough to become fragrant. Golden brown is perfect; dark brown means it’s too late.
Using Cold Butter
Cold butter won’t melt evenly into the sauce, creating greasy pockets. I let my 0.5 cup butter sit at room temperature for 15-20 minutes before starting. This ensures it incorporates smoothly with the soy sauce for a velvety glaze.
Neglecting the Rest
The shrimp continue cooking off the heat. I transfer them to a plate and let them rest while making the glaze. This 2-minute pause keeps them tender and juicy, ready to soak up that garlicky butter goodness when returned to the pan.
Nutrition Facts
Frequently Asked Questions
What type of skillet works best?
Use a large, heavy skillet like cast iron or stainless steel for even heat distribution. Avoid nonstick for the best sear on shrimp.
Can I use frozen shrimp?
Yes, thaw overnight in the fridge. Pat completely dry before cooking to prevent steaming instead of searing.
How do I store leftovers?
Keep shrimp and rice separate in airtight containers. Refrigerate for up to 2 days and reheat gently to avoid rubbery shrimp.
What can I substitute for soy sauce?
Try coconut aminos for gluten-free or tamari for a richer flavor. Reduce salt slightly as these can be saltier.

- Ground Beef Rice and Beans Recipe: Slow-Simmered Savory Harmony - October 17, 2026
- Guyanese Fried Rice Recipe: Caribbean Spice With Wok-Charred Aromatics - October 17, 2026
- Hakka Thunder Tea Rice Recipe: Wok-Charred Herbal Infusion - October 17, 2026