
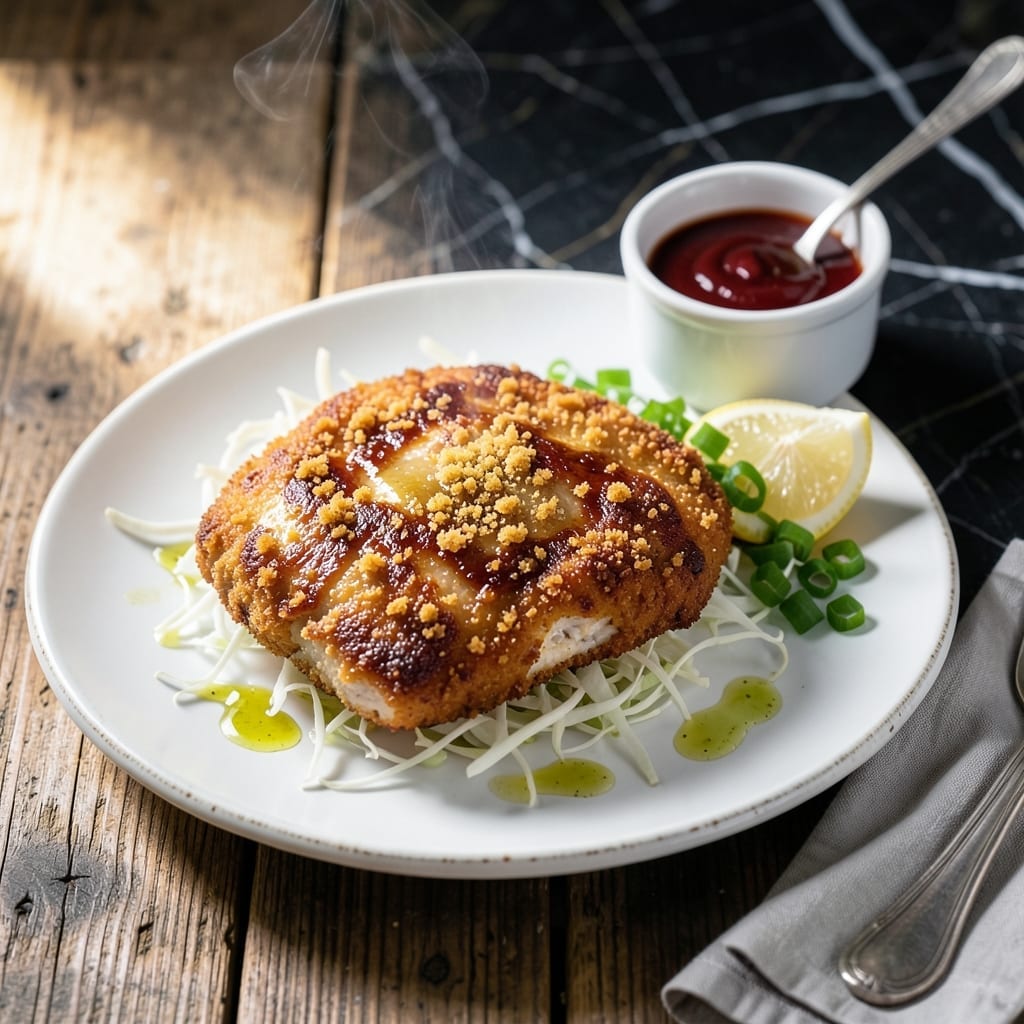
There’s nothing quite like the satisfaction of making crispy, golden chicken katsu at home. This Japanese-inspired dish delivers a shatteringly thin crust that stays perfectly crunchy, thanks to a simple panko breading technique.
I developed this method to ensure even cooking and maximum crispness without the need for specialized equipment. The key is using panko breadcrumbs, which create a lighter, airier texture than traditional breading.
Each bite offers tender chicken encased in a crispy shell, paired beautifully with tangy tonkatsu sauce. It’s a foolproof way to bring restaurant-quality results to your kitchen.
Serve with steamed rice and shredded cabbage for a complete meal. Here’s how to make it perfectly every time.
Ingredients for Homemade Chicken Katsu
Panko breadcrumbs and tender chicken create that signature crispy, golden crust everyone loves at home.
| Ingredient | Amount | Notes |
|---|---|---|
| Chicken Breast Cutlets 🍗 | 1 ½ lb | Boneless, skinless, pounded to 1/4-inch thickness |
| Panko Breadcrumbs 🍞 | 2 cups | Japanese-style for crispy texture |
| All-Purpose Flour 🌾 | ½ cup | For initial dredging |
| Large Eggs 🥚 | 2 whole | Beaten for breading adhesion |
| Neutral-Flavored Oil 💧 | 1 ½ cups | Vegetable, canola, or peanut oil for frying |
| Tonkatsu Sauce 🍯 | ½ cup | Store-bought or homemade |
| Green Cabbage 🥬 | 4 cups | Thinly shredded for serving |
| Steamed White Rice 🍚 | 2 cups | Uncooked, or 6 cups cooked |
| Kosher Salt 🧂 | 1 ½ tsp | Divided for seasoning |
| Ground Black Pepper 🌶️ | ½ tsp | Freshly ground preferred |
| Garlic Powder 🧄 | ½ tsp | For seasoning flour |
| Onion Powder 🧅 | ½ tsp | For seasoning flour |
The panko is non-negotiable here—look for Japanese-style panko at an Asian market or the international aisle at Whole Foods or Kroger. It’s coarser and lighter than regular breadcrumbs, creating that airy crunch. For the chicken, thin-cut breast cutlets save time, but you can pound regular breasts to ¼-inch thickness yourself. Buy 1.5 pounds to account for trimming and even portions.
No panko? Crush cornflakes or puffed rice cereal for a similar texture. Out of tonkatsu sauce? Worcestershire plus ketchup gets you close (skip the Worcestershire for gluten-free). The eggs can be swapped for aquafaba (3 tbsp per egg) if needed. For oil, peanut oil gives the most authentic flavor, but any neutral oil with a high smoke point works just fine.
Fry in batches to avoid crowding—this keeps the oil hot and the crust crisp. Leftovers? Reheat in a 350°F oven for 10-12 minutes to revive the crunch. Best eaten fresh, but will keep in the fridge for 2-3 days (though the crust softens).
Why You’ll Love This Recipe
- Weeknight Hero: I can bread and fry these cutlets faster than ordering takeout, and the panko gives that restaurant-quality crunch.
- Pure Crunch Joy: That golden panko crust shatters with every bite, while the chicken stays juicy—honestly, it’s the little things.
- Crowd Pleaser: From kids’ birthdays to my solo dinner cravings, these cutlets disappear no matter who’s at the table.
- Budget Stretch: One pound of chicken breast turns into four generous servings, and leftovers make killer sandwiches the next day.
Step-by-Step Instructions for Crispy Panko-Coated Chicken Cutlets
Master the technique for perfectly golden, crunchy cutlets with this professional approach.
Step 1: Season and Bread the Chicken Cutlets
Combine the 0.5 cup all-purpose flour with 0.5 tsp garlic powder, 0.5 tsp onion powder, 1 tsp kosher salt, and 0.5 tsp ground black pepper in a shallow dish. This seasoned flour creates the first flavorful layer of your breading.
Beat the 2 whole large eggs in a second shallow dish until uniform. Place the 2 cups panko breadcrumbs in a third dish. Pat the 1.5 lb chicken breast cutlets dry, then dredge each piece in the flour mixture, shaking off excess. Dip into the beaten eggs, allowing any excess to drip off, then press firmly into the panko until fully coated on both sides.
Step 2: Heat the Oil to the Perfect Frying Temperature
Pour the 1.5 cups neutral-flavored oil into a large, heavy-bottomed skillet. Heat over medium-high heat until the oil reaches 350°F on a deep-fry thermometer. If you don’t have a thermometer, test by dropping a pinch of panko into the oil—it should sizzle immediately and turn golden within 30 seconds.
Maintaining the proper oil temperature is crucial. If the oil isn’t hot enough, the breading will absorb oil and become greasy rather than crispy. If it’s too hot, the outside will burn before the chicken cooks through. Use a thermometer for precision.
Step 3: Fry the Cutlets to Golden Perfection
Carefully place two cutlets in the hot oil, being careful not to overcrowd the pan. Fry for 3-4 minutes per side or until the coating is deep golden brown and the internal temperature reaches 165°F. The panko should create an audible sizzle when it hits the oil.
Transfer the fried cutlets to a wire rack set over a baking sheet to drain excess oil. This prevents the bottoms from becoming soggy. Keep the cutlets warm in a 200°F oven while you fry the remaining batches, if needed.
Step 4: Serve with Traditional Accompaniments
Thinly shred the 4 cups green cabbage and divide it among four plates. Place one cutlet on each bed of cabbage. Cook the 2 cups steamed white rice according to package instructions and portion it onto the plates alongside the cutlets.
Drizzle each cutlet with 2 tablespoons tonkatsu sauce or serve it on the side for dipping. The slightly sweet, tangy sauce complements the crispy, savory cutlets perfectly. Serve immediately while the breading is at its crispiest.
Pro Tips For Making Homemade Chicken Katsu
- Pound the Chicken: Use the flat side of a meat mallet or rolling pin to pound the chicken breast cutlets to an even ½-inch thickness. I learned this the hard way—uneven pieces cook unevenly, leaving you with dry edges and raw centers.
- Double-Coat the Crust: Dip the chicken in flour, egg, then panko, but repeat the egg and panko step for a thicker, crunchier crust. Sounds like overkill, but it actually changes the outcome—every time.
- Skip Cold Oil: Heat your neutral-flavored oil to 350°F before frying. After burning three batches, I finally figured out that cold oil makes the katsu greasy instead of golden and crisp.
- Rest Before Serving: Give the fried cutlets 5 minutes on a wire rack before slicing. My grandmother swore by this, and she was right—it keeps the crust from turning soggy under the juices.
Essential Equipment for Great homemade chicken katsu
Skillet Selection
Use a heavy-bottomed skillet like my Lodge 12-inch cast iron for even heat distribution. The weight helps maintain steady 350°F oil temperature. Avoid nonstick pans—they can’t handle the high heat needed for proper frying.
Oil Thermometer
A deep-fry thermometer is essential for precision. I use the Taylor Classic model for 350°F accuracy. Without it, you risk greasy or burnt breading. Clip it to the pan side for continuous monitoring.
Wire Rack Setup
Drain fried cutlets on a wire rack over a baking sheet, not paper towels. This allows air circulation to maintain crispness. I set mine over a sheet pan lined with parchment paper for easy cleanup.
Breading Stations
Use three shallow dishes for flour, egg, and panko. I prefer stainless steel for durability. The wide surface makes dredging easier. Place them in order: flour first, then egg, then panko for smooth workflow.
Tongs for Frying
Invest in 12-inch locking tongs for safe cutlet flipping. The length keeps your hands away from hot oil. I use OXO Good Grips for their comfortable handle and secure grip on slippery breaded chicken.
Paper Towel Backup
Keep paper towels nearby for quick oil spills. I also use them to pat chicken dry before breading. The drier the surface, the better the panko adheres. This small step makes a big difference in final crispness. 💡
Nutrition Facts
Frequently Asked Questions
Can I use chicken thighs instead of breast?
Yes, boneless thighs work well and stay juicier. Pound them to 1/4-inch thickness for even cooking. The breading process remains the same, but thighs may need 1-2 extra minutes to reach 165°F.
How do I keep the breading from falling off?
Press the panko firmly onto the chicken and let the breaded cutlets rest for 5 minutes before frying. This helps the coating adhere better during cooking.
What’s the best oil for frying?
Use a neutral oil with a high smoke point like peanut, vegetable, or canola. Peanut oil gives the most authentic flavor, but any will work at 350°F. Avoid olive oil as it can impart unwanted flavor.
Can I bake instead of fry?
For a lighter version, bake at 400°F for 15-20 minutes, flipping halfway. Spray with oil first for crispiness. The texture won’t be identical to frying, but still delicious.

- Jollof Rice Sauce Recipe: West African Tomato and Spice Infusion - September 25, 2026
- Japanese Rice Soup Recipe: Umami-Rich Comfort in a Bowl - September 25, 2026
- Homemade Cream Of Rice Recipe: Silk-Smooth Breakfast in Minutes - September 25, 2026