
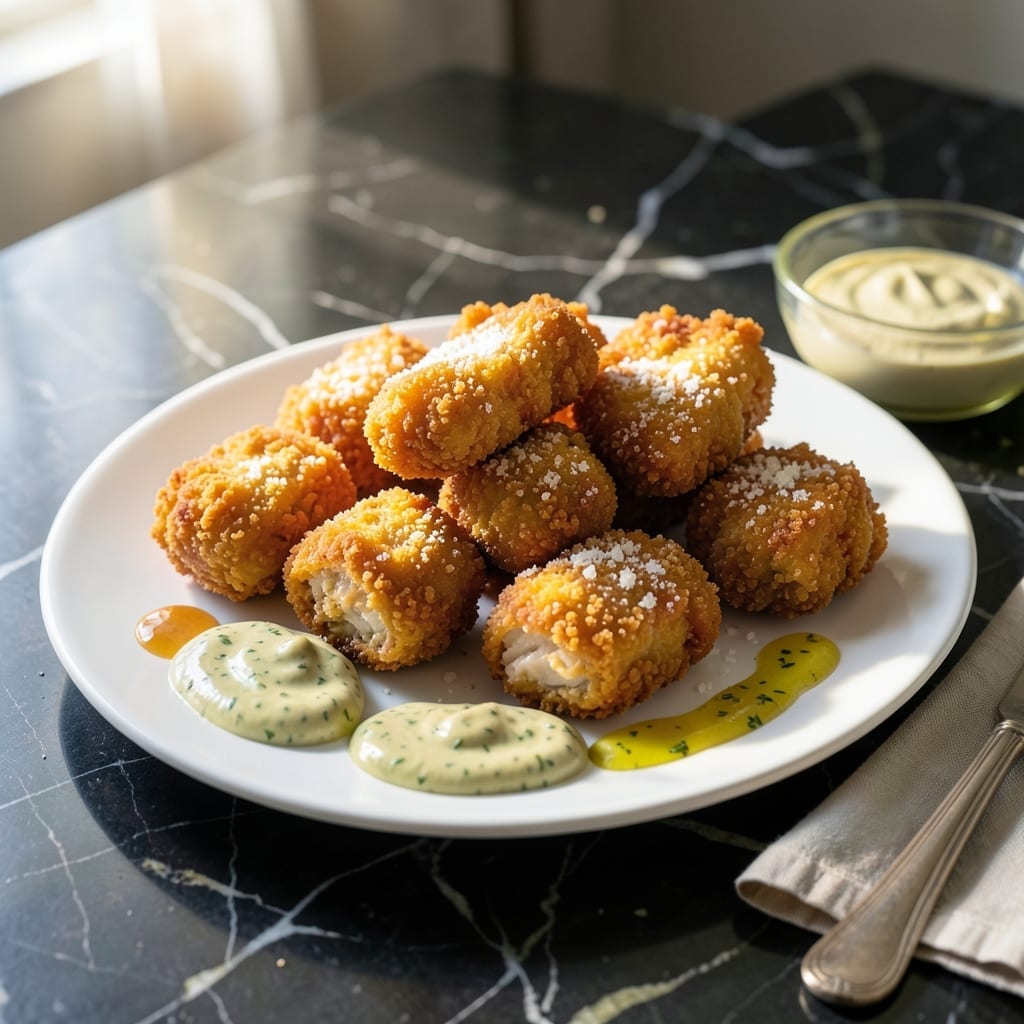
This homemade method delivers crispy chicken nuggets with tender centers that outshine any fast food version. The secret is a double-breading technique that locks in moisture while creating an ultra-crunchy exterior.
I developed this recipe to give families a healthier alternative without sacrificing texture or flavor. Using simple ingredients and standard kitchen tools, you can achieve professional results with minimal effort.
What sets this version apart is the perfect balance between the shatteringly crispy coating and juicy interior. Each bite maintains its structure while delivering that satisfying crunch kids and adults love.
Bake or air-fry for a lighter option, or pan-fry for maximum crispiness. Serve with your favorite dipping sauces for a meal everyone will request again.
Ingredients for Homemade Chicken Nuggets
Simple pantry staples plus chicken transform into these crispy, tender bites everyone loves.
| Ingredient | Amount | Notes |
|---|---|---|
| Boneless Skinless Chicken Breasts 🍗 | 1 ½ lb | Cut into 1-inch pieces |
| All-Purpose Flour 🌾 | 1 cup | Divided for double coating |
| Large Eggs 🥚 | 2 whole | Beaten for egg wash |
| Buttermilk 🥛 | ½ cup | For extra tenderness |
| Panko Breadcrumbs 🍞 | 2 cups | For maximum crispiness |
| Grated Parmesan Cheese 🧀 | ½ cup | Freshly grated preferred |
| Garlic Powder 🧄 | 1 tsp | For savory depth |
| Onion Powder 🧅 | 1 tsp | Enhances flavor profile |
| Paprika 🌶️ | 1 tsp | Sweet or smoked variety |
| Salt 🧂 | 1 tsp | Diamond Crystal preferred |
| Black Pepper 🌶️ | ½ tsp | Freshly ground |
| Vegetable Oil 🫒 | ½ cup | For frying or baking |
The chicken matters most here. Boneless, skinless breasts stay tender—thighs work but have a different texture. I grab mine from Costco for bulk savings. For the breading, Panko is non-negotiable for that shatteringly crisp coating (regular breadcrumbs just won’t cut it). The buttermilk? Don’t skip it—it’s what keeps the centers juicy even after baking.
No buttermilk? Whole milk with a tablespoon of vinegar works in a pinch. Swap Panko for crushed cornflakes if that’s what you’ve got (adds a nice crunch). For the seasoning, dried herbs at half the amount can replace fresh, but fresh Parm is worth the extra minute to grate. Want it spicier? Add half a teaspoon of cayenne to the flour mix.
Uncooked nuggets keep in the fridge for 24 hours before cooking. Leftovers? 3-4 days in the fridge or freeze for 3 months. Reheat in the air fryer for maximum crispiness (the microwave makes them soggy).
Why You’ll Love This Recipe
- One Pan Wonder: I toss everything together on a single sheet pan—chicken in buttermilk, then dredge and bake. So easy.
- That Crunch Though: Panko breadcrumbs give it a satisfying crisp that store-bought just can’t match.
- Freezer Friendly: I double the batch and freeze half for those “I can’t even” nights.
- Budget Stretch: Boneless chicken breasts go further than takeout, and honestly, it tastes better too.
Step-by-Step Instructions for Chicken Nuggets
Real talk: this method guarantees crispy outsides and juicy centers every single time.
Step 1: Prep the Chicken and Season the Flour
Cut the 1.5 lb Boneless Skinless Chicken Breasts into 1-inch pieces. Consistency in size ensures even cooking—no one wants a dry nugget. Pat the pieces dry with paper towels; moisture is the enemy of crispiness.
In a shallow dish, combine the 1 cup All-Purpose Flour with 1 tsp Garlic Powder, 1 tsp Onion Powder, 1 tsp Paprika, 1 tsp Salt, and 0.5 tsp Black Pepper. Whisk until evenly distributed. This seasoned flour is your first layer of flavor.
Step 2: Create the Wet and Dry Coating Stations
In a second shallow dish, whisk together the 2 whole Large Eggs and 0.5 cup Buttermilk until smooth. The buttermilk adds a subtle tang and keeps the chicken tender. In a third dish, mix the 2 cups Panko Breadcrumbs with the 0.5 cup Grated Parmesan Cheese—this combo delivers maximum crunch and savory depth.
Here’s the thing—don’t skip the Parmesan. It melts slightly during cooking, creating little pockets of umami goodness in every bite. Set up these three dishes in assembly-line order: flour, egg wash, breadcrumb mixture.
Step 3: Double-Coat the Chicken for Extra Crispiness
Working in batches, dredge each piece of chicken in the seasoned flour, shaking off the excess. Then dip it into the egg wash, letting any excess drip off. Finally, roll it in the Panko-Parmesan mixture, pressing gently to ensure the crumbs adhere. Place the coated pieces on a wire rack set over a baking sheet.
For the crispiest results, I double-dip the chicken in the egg wash and Panko mixture. Yes, it’s an extra step, but it creates a thicker, more textured crust that stays crunchy even after baking. Let the coated nuggets rest for 10 minutes—this helps the coating set.
Step 4: Cook to Golden Perfection
Heat the 0.5 cup Vegetable Oil in a large skillet over medium-high heat until shimmering. Working in batches to avoid crowding, fry the nuggets for 3-4 minutes per side until deep golden brown and the internal temperature reaches 165°F.
Alternatively, bake on the wire rack at 400°F for 15-20 minutes, flipping halfway through, until golden and crispy. Baking is less messy but frying gives that classic, deep-fried crunch. Either way, resist the urge to move them around too much—let that crust develop.
Drain on a paper towel-lined plate if frying, or let cool slightly on the rack if baking. Serve immediately while they’re at peak crispiness.
Pro Tips For Making Homemade Chicken Nuggets
- Cut Evenly: Slice chicken breasts into 1-inch pieces so they cook at the same rate—no more dry nuggets from uneven sizes. I learned this the hard way after pulling out half raw, half overdone batches.
- Chill the Coated: After dredging in flour, egg, and panko, let the nuggets rest in the fridge for 15 minutes. This keeps the coating from sliding off when you fry or bake.
- Skip the Overcrowding: Cook in batches with space between each piece—about 2 inches apart. Steaming from crowded pans turns crispy panko into a soggy mess.
- Buttermilk Boost: Swap regular milk for buttermilk in the egg wash. The tang actually changes the outcome, giving the crust a golden color and richer flavor.
Common Mistakes When Making Great homemade chicken nuggets
Skipping the Rest
Never skip the 10-minute rest after breading. This lets the coating set properly, preventing it from sliding off during cooking. I learned this the hard way—my first batch looked like breadcrumb soup in the pan. 💡
Overcrowding the Pan
Frying too many nuggets at once lowers the oil temperature, leading to soggy, greasy results. Work in batches with 1 inch of space between pieces. For baking, use a wire rack to allow air circulation on all sides.
Uneven Sizes
Cut your 1.5 lb chicken into uniform 1-inch pieces for consistent cooking. Larger pieces stay raw inside while smaller ones dry out. A ruler helps if you’re unsure—precision matters for texture.
Skipping the Drying
Pat the chicken completely dry before breading. Moisture creates steam, which lifts the coating right off the meat. I use paper towels and press firmly to remove all surface liquid.
Low Oil Temperature
Test your oil with a breadcrumb—if it sizzles immediately, it’s ready. Oil that’s not hot enough absorbs into the nuggets instead of frying them. Maintain 350-375°F for that perfect golden crust.
Neglecting Internal Temp
Always check that nuggets reach 165°F internally. Undercooked chicken is dangerous, while overcooked becomes dry. Use a meat thermometer for accuracy—guessing leads to inconsistency. 🌡️
Nutrition Facts
Frequently Asked Questions
Can I use chicken thighs instead of breasts?
Yes, but they’ll have a richer flavor and slightly different texture. Thighs stay juicier but may need 1-2 extra minutes of cooking. Adjust seasoning to taste, as dark meat has a stronger flavor.
How do I keep them crispy when reheating?
Use an air fryer at 375°F for 3-4 minutes or oven at 400°F for 5-7 minutes. Avoid microwaving – it makes them soggy. Place on a wire rack to maintain airflow.
Can I make these ahead of time?
Breaded nuggets keep in the fridge for up to 24 hours before cooking. For longer storage, freeze uncooked nuggets on a tray first, then transfer to a bag for up to 3 months.
What’s the secret to extra crispiness?
Double-dip in egg wash and Panko, then rest for 10 minutes before cooking. Use fresh Panko and maintain oil at 350-375°F. Don’t overcrowd the pan.

- Jollof Rice Sauce Recipe: West African Tomato and Spice Infusion - September 25, 2026
- Japanese Rice Soup Recipe: Umami-Rich Comfort in a Bowl - September 25, 2026
- Homemade Cream Of Rice Recipe: Silk-Smooth Breakfast in Minutes - September 25, 2026