
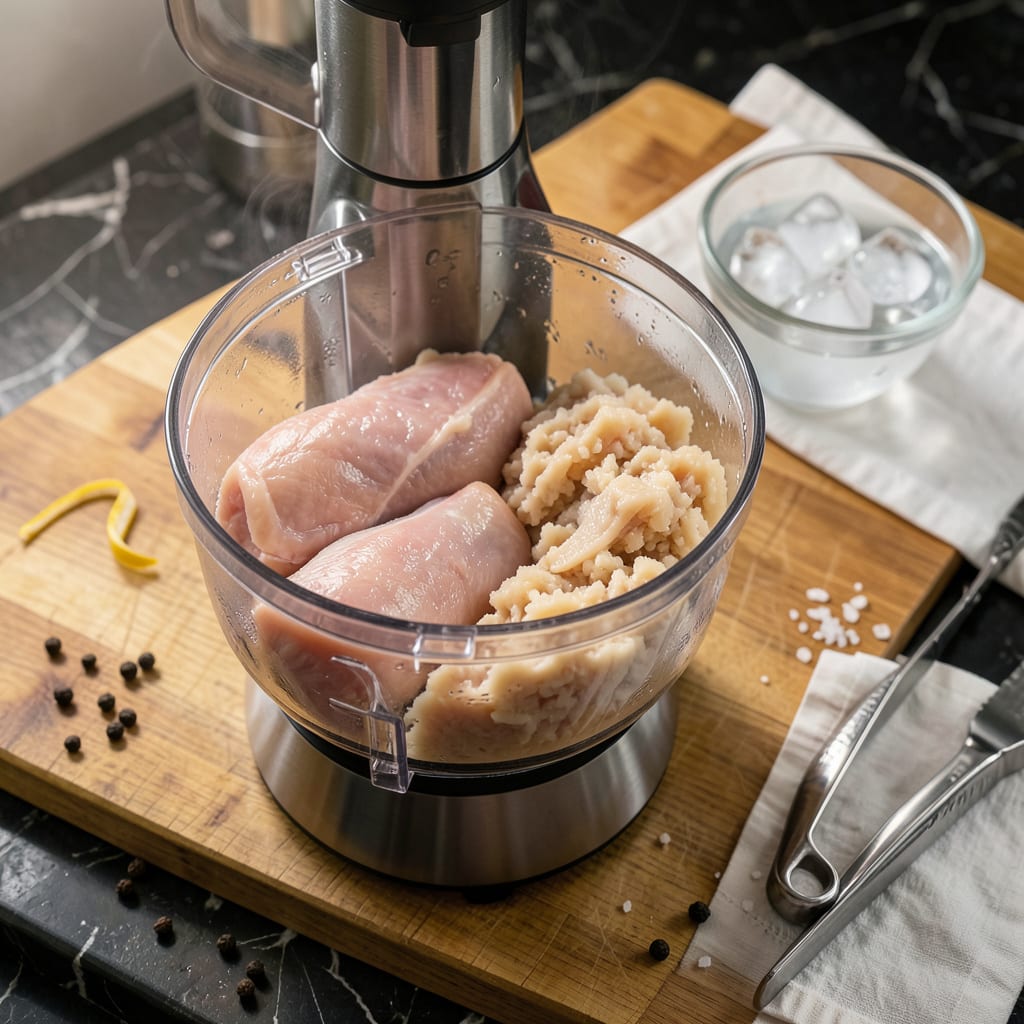
Preparing ground chicken at home gives you complete control over texture, freshness, and quality—without the additives found in store-bought versions. This food processor method produces consistently even results, whether you’re making burgers, meatballs, or tacos. The process is simpler than you might expect, requiring just a few minutes and basic equipment.
The key to success lies in proper preparation: chilling the chicken and equipment beforehand prevents the meat from turning to paste. I’ve tested this technique with both boneless thighs and breasts, and the results are always superior to pre-ground options. You’ll achieve the perfect balance of lean protein and fat for juicy, flavorful dishes every time.
Safety is paramount when handling raw poultry. We’ll cover essential temperature guidelines, cross-contamination prevention, and proper storage methods to ensure your ground chicken stays fresh. These precautions make the process not just effective, but completely safe for home cooks at any skill level.
Once mastered, this technique opens up endless possibilities for quick weeknight meals. From Asian-inspired lettuce wraps to Italian-style meatballs, you’ll have a versatile protein base ready for any recipe. The difference in flavor and texture compared to store-bought is immediately noticeable.
📚 In This Guide
- What You’ll Need
- Instructions
- Tips and Common Mistakes
What Youll Need
- ● 1–2 lbs boneless, skinless chicken breasts or thighs (fresh or thawed if frozen 🍗). Note: Thighs yield juicier results!
- ● Food processor (minimum 3-cup capacity; 5–7 cups ideal for larger batches). Pro tip: A sharp blade ensures smooth grinding.
- ● Cutting board + chef’s knife (to trim fat/connective tissue before processing).
- ○ Kitchen scale (optional but helpful for precise portions).
- ● Plastic wrap or parchment paper (to line the processor bowl for easy cleanup).
- ● Air-tight containers or freezer bags (for storage; portion into 1-lb batches if freezing).
- ○ Rubber gloves (optional, for hygienic handling of raw chicken).
- ○ Ice pack or chilled bowl (optional, to keep chicken cold during prep for food safety).
- ○ Meat grinder attachment (optional alternative if using a stand mixer).
Instructions for Grinding Chicken at Home
This simple method delivers perfectly ground chicken with professional results—no special equipment needed.
Select and Prepare the Chicken
Start with boneless, skinless chicken thighs or breasts that are very cold—ideally, partially frozen for about 30 minutes in the freezer. The firmer texture prevents the meat from turning to paste during processing. I prefer thighs for their higher fat content, which keeps the ground chicken moist and flavorful.
Trim away any visible fat or connective tissue with a sharp knife, then cut the meat into 1-inch cubes. Uniform pieces ensure even grinding and prevent overworking some portions while others remain under-processed. Spread the cubes on a tray and return them to the freezer for 10 minutes while you prepare your equipment.
Set Up Your Food Processor
Choose a food processor with at least an 8-cup capacity—smaller models won’t handle the volume properly. Fit the machine with the standard metal blade (not the dough blade) and ensure it’s clean and dry. Cold equipment helps maintain the meat’s texture during processing.
Pulse the chicken cubes in 3-4 batches, filling the bowl no more than halfway each time. Overfilling causes uneven grinding and can strain the motor. Between batches, wipe any accumulated fat from the bowl’s sides with a paper towel to prevent greasy texture in your final product.
Process in Short Bursts
With the processor running, drop chicken cubes through the feed tube one at a time. Process in 1-second pulses rather than continuous operation—this creates distinct pieces rather than a smooth paste. After 8-10 pulses, check the consistency: you want pea-sized pieces with some variation in texture.
Stop processing before the meat becomes completely uniform. Slightly uneven texture actually improves the final dish’s mouthfeel in recipes like meatballs or burgers. If needed, transfer the ground chicken to a bowl and pulse any larger pieces separately rather than over-processing the entire batch.
Test and Store Properly
To verify proper texture, cook a small teaspoon portion in a hot skillet. The meat should hold together when pressed but still have visible texture—not mushy or rubbery. If it releases excessive liquid during cooking, your chicken was either too warm or over-processed.
Use the ground chicken immediately, or store in airtight containers for up to 2 days in the refrigerator or 3 months in the freezer. For best results, portion into recipe-sized quantities before freezing. Label containers with the date and “ground chicken” for easy identification.
Tips and Common Mistakes
Perfecting ground chicken at home is all about technique—here’s what I’ve learned from years of trial and error.
The Chill Factor: Those 30 minutes of partial freezing in Step 1 aren’t just a suggestion—they’re critical. I once skipped this step and ended up with chicken paste instead of proper ground meat. The firmer texture from partial freezing creates clean cuts rather than mush. After cubing, the additional 10 minutes in the freezer ensures the meat stays cold throughout processing, which prevents the fat from smearing.
Batch Processing Wisdom: When the instructions mention processing in 3-4 batches in Step 2, there’s a reason. I learned the hard way that overfilling the food processor creates uneven texture and can actually burn out your motor. Fill the bowl no more than halfway, and don’t rush—patience here means better texture in your final product. Between batches, take the extra moment to wipe down the bowl; accumulated fat can make your ground chicken greasy rather than properly textured.
Pulse Control Technique: The 1-second pulses and 8-10 pulse limit in Step 3 exist for good reason. Continuous processing turns chicken into a smooth paste rather than proper ground meat. I count my pulses out loud to stay precise. Watch for pea-sized pieces with some variation—that uneven texture actually improves the mouthfeel in dishes like meatballs or burgers. If you see larger pieces, remove them and pulse separately rather than over-processing the entire batch.
Texture Verification: That teaspoon test in Step 4 is your quality control moment. Cook a small portion and press it—it should hold together but still show visible texture. If it releases excessive liquid, your chicken was either too warm when processed or you over-pulsed. This test has saved me from ruining entire batches by catching texture issues early.
Pro Tips for Ground Chicken
- Perfecting ground chicken at home is all about technique—here’s what I’ve learned from years of trial and error.
- The Chill Factor: Those 30 minutes of partial freezing in Step 1 aren’t just a suggestion—they’re critical. I once sk…
- Batch Processing Wisdom: When the instructions mention processing in 3-4 batches in Step 2, there’s a reason. I learn…
Frequently Asked Questions
Got questions about grinding chicken at home? You’re not alone! Here are the most common queries—answered quickly so you can get back to cooking with confidence.
Can I grind chicken in a blender instead of a food processor?
Not recommended! Blenders lack the power and blade design for even grinding, often turning chicken into a paste. A food processor with an “S” blade or a meat grinder attachment (for stand mixers) works best. Stick to small batches if using a blender—pulse 3-4 times max!
How long does freshly ground chicken last in the fridge?
Use it within 1-2 days for peak freshness, or freeze for up to 3 months. Store in airtight containers or vacuum-sealed bags to prevent freezer burn. Label with the date—safety first!
Why is my ground chicken mushy or slimy?
Over-processing or warm chicken (above 40°F) causes this. Chill the chicken and equipment for 20 minutes pre-grind, and pulse in 1-second bursts. If it’s already mushy, mix with breadcrumbs for burgers or cook immediately in a hot pan to firm it up.
Can I grind chicken with skin or bones?
Never grind bones (risk of splinters!), but skin is fine—it adds fat for juicier patties. Trim excess skin first (aim for 10-15% fat max). For boneless thighs or breasts, add a tablespoon of olive oil per pound if lean.
What’s the best alternative if I don’t have a food processor?
Try a manual meat grinder (affordable and efficient) or ask your butcher to grind chicken fresh. In a pinch, finely chop chilled chicken with a sharp chef’s knife—it won’t be uniform but works for meatballs or stir-fries!
Now you’ve got the know-how to ground chicken like a pro—safely, quickly, and with perfect texture every time! 🎯 Whether you’re whipping up burgers, meatballs, or tacos, fresh-ground chicken takes your dishes to the next level. No store-bought pack can beat the flavor (or the satisfaction!) of doing it yourself.
Ready to put your skills to the test? Pick a recipe, grab your food processor, and get cooking! Don’t forget to share your creations—we’d love to see (and taste!) your results. 🍽️

- Jollof Rice Sauce Recipe: West African Tomato and Spice Infusion - September 25, 2026
- Japanese Rice Soup Recipe: Umami-Rich Comfort in a Bowl - September 25, 2026
- Homemade Cream Of Rice Recipe: Silk-Smooth Breakfast in Minutes - September 25, 2026