
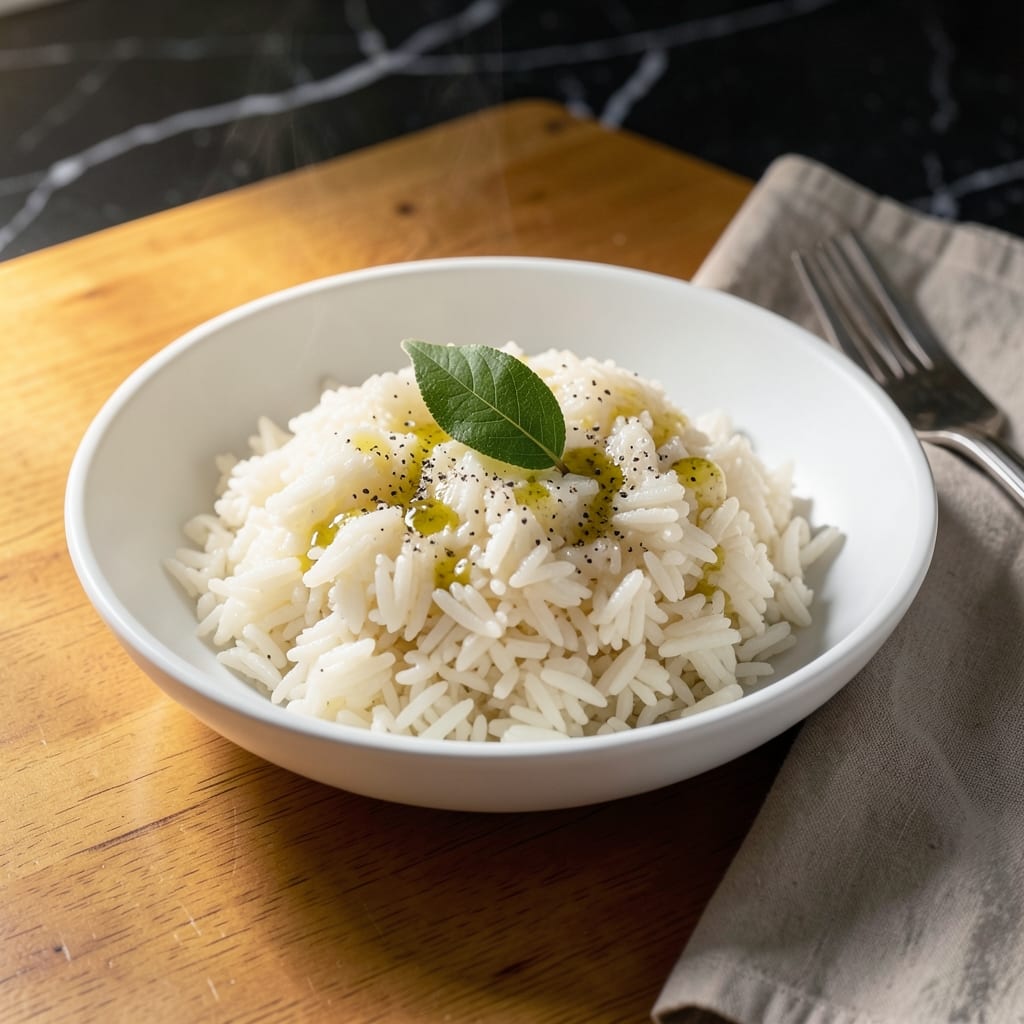
Perfect white rice is the foundation of countless meals, and this Instant Pot method delivers fluffy, separate grains without fail. The key lies in the precise water-to-rice ratio and controlled pressure cooking environment.
I’ve tested this technique extensively to ensure consistent results—no more sticky, undercooked, or burnt rice. The Instant Pot’s sealed environment traps steam, allowing the rice to absorb moisture evenly while developing ideal texture.
What you’ll achieve is rice with distinct grains that hold their shape, whether serving as a side dish or base for stir-fries. The process is nearly hands-off, with the appliance handling the timing and temperature automatically.
This reliable method works with any white rice variety and scales effortlessly to feed a crowd. Let’s begin with the essential ratio that guarantees success every time.
Ingredients for Insta Pot White Rice
Five simple ingredients deliver perfectly fluffy grains every single time without fail.
| Ingredient | Amount | Notes |
|---|---|---|
| White Long-Grain Rice 🍚 | 2 cups | Rinsed until water runs clear |
| Water 💧 | 2 ½ cups | Filtered or distilled preferred |
| Fine Sea Salt 🧂 | ½ tsp | Adjust to taste after cooking |
| Neutral Oil 🫒 | 1 tsp | Optional, prevents foaming |
| Bay Leaf 🍃 | 1 whole | Optional, for subtle aroma |
The rice quality matters most here. Jasmine or Basmati yield the fluffiest results, but any long-grain white rice works. I source mine from Whole Foods bulk bins for freshness—avoid any rice that smells stale or has visible moisture. Rinsing is non-negotiable: continue until the water runs completely clear to remove excess starch that causes gumminess.
No bay leaf? Skip it—the rice will still be perfect. Want extra flavor? A pinch of turmeric adds color without overpowering. The water ratio must stay precise at 1.25 cups per 1 cup rice (adjust for your pot size). Using tap water? Let it sit out for 30 minutes first to dechlorinate, or the rice may taste slightly metallic.
Cooked rice keeps 4-5 days in an airtight container in the fridge. Reheat with a splash of water and microwave covered. For longer storage, spread on a tray to cool completely, then freeze in portions for up to 3 months without texture loss.
Why You’ll Love This Recipe
- Set and Forget: Honestly, I just dump everything in, press a button, and walk away. No babysitting the pot or worrying about scorching.
- Subtle Depth: That bay leaf and pinch of salt make the rice taste way more interesting than plain steamed.
- Meal Prep Hero: I make a big batch on Sunday and it pairs with everything—stir-fries, burrito bowls, you name it.
- Budget Stretch: A pound of rice costs pennies and feeds us for days. Leftovers reheat like a dream.
Step-by-Step Instructions for Insta Pot White Rice
Master the technique for consistently perfect rice with minimal effort and maximum reliability.
Step 1: Rinse and Prepare the Rice
Place the 2 cups White Long-Grain Rice in a fine-mesh strainer and rinse under cold water until the water runs completely clear. This removes excess starch that can cause gummy or sticky rice. I find that three to four rinses usually suffice for long-grain varieties.
While the rice drains, add the 1 tsp Neutral Oil to the Insta Pot insert and swirl to coat the bottom. This optional step prevents foaming during cooking and makes cleanup easier. The rice should be only slightly damp, not wet, when added to the pot.
Step 2: Combine Ingredients in the Insta Pot
Transfer the rinsed 2 cups White Long-Grain Rice to the Insta Pot insert. Add the 2.5 cups Water, 0.5 tsp Fine Sea Salt, and 1 whole Bay Leaf if using. Stir gently to distribute the salt and ensure the rice is fully submerged in the water.
The water level should be about ½ inch above the rice. If it appears too low, double-check that you’ve added the full 2.5 cups Water. Avoid pressing down on the rice; it should remain loose for even cooking.
Step 3: Pressure Cook to Perfection
Secure the lid on the Insta Pot and set the valve to the sealing position. Select the “Pressure Cook” or “Manual” setting and set the timer for 3 minutes on high pressure. For white long-grain rice, this short cook time is ideal to achieve tender, separate grains.
Once the cooking cycle completes, allow the pressure to release naturally for 10 minutes, then quick-release any remaining pressure. Natural release prevents the rice from becoming mushy by allowing it to finish cooking gently in the residual steam.
Step 4: Fluff and Rest Before Serving
Carefully open the lid and remove the 1 whole Bay Leaf if used. Use a fork to gently fluff the rice from the bottom up, breaking apart any clumps. This step aerates the grains and prevents them from compacting as they sit.
Let the rice rest in the pot, uncovered, for 5 minutes to allow excess moisture to evaporate. Taste and adjust seasoning with additional Fine Sea Salt if needed. The grains should be tender, distinct, and free of any hard or crunchy bits, ready to serve as a perfect side for any meal.
Pro Tips For Making Insta Pot White Rice
- Rinse the Rice: Always rinse your long-grain rice until the water runs clear—it removes excess starch and prevents gummy, clumpy rice. I learned this the hard way after serving gluey rice at a dinner party.
- Use the Right Ratio: Stick to a 1:1.25 rice-to-water ratio for perfect texture in the Instant Pot. Sounds weird, but it works: 1 cup rice to 1.25 cups water, no more, no less.
- Skip the Stirring: Resist the urge to stir the rice after adding water and oil—it can break the grains and make the texture uneven. Just secure the lid and let the pressure do its job.
- Add Bay Leaf Last: Toss in the bay leaf after the rice and water are in the pot but before sealing—it infuses subtle flavor without overpowering. My grandmother swore by this, and she was right.
Perfect Pairings for This Recipe
Protein Pairings
This fluffy rice makes an ideal bed for teriyaki chicken or honey garlic shrimp. I love serving it with 4 oz grilled salmon per person—the mild flavor lets the fish shine. For a quick weeknight option, pan-seared tofu with soy sauce works beautifully. 💪
Vegetable Sides
Balance the meal with steamed broccoli or roasted carrots—both pair perfectly with the subtle rice flavor. I toss 2 cups baby spinach with garlic in the last minute for a simple, nutrient-packed side. The rice also holds up well under stir-fried mixed veggies.
Sauce Enhancements
Drizzle with sriracha mayo (mix 2 tbsp mayo with 1 tsp sriracha) for a spicy kick. A simple soy-ginger dressing adds depth—I combine 3 tbsp soy sauce, 1 tbsp rice vinegar, and 1 tsp grated ginger. 🌟
Global Flavors
Transform it into Spanish rice by stirring in ½ cup tomato sauce and 1 tsp cumin after cooking. For Mexican night, mix in black beans and corn. The neutral base absorbs any seasoning you add.
Breakfast Twist
Use leftovers for fried rice—sauté 2 cups cooked rice with 1 beaten egg and ¼ cup diced veggies. Add 2 tsp soy sauce at the end. This works best with rice that’s been refrigerated overnight.
Nutrition Facts
Frequently Asked Questions
What’s the ideal water-to-rice ratio?
Use a 1.25:1 ratio—2.5 cups water per 2 cups rice. This ensures perfect absorption without mushiness or dryness.
Can I double the recipe?
Yes, but never exceed the ½-full mark in your pot. For 4 cups rice, use 5 cups water and keep cook time at 3 minutes.
Why did my rice turn out sticky?
Sticky rice usually means too much water or skipping the rinse. Always rinse until water runs clear and measure liquids precisely.
How long does it keep in the fridge?
Store in an airtight container for 4-5 days. Reheat with a splash of water to restore fluffiness.

- Mujadara Rice and Lentils Recipe: Earthy Spiced Lentils With Caramelized Onions - November 1, 2026
- Naija Fried Rice Recipe: Street-Style Spice With Veggie Crunch - November 1, 2026
- Mushy Rice Recipe: Fluffy Grains Transformed in Minutes - November 1, 2026