
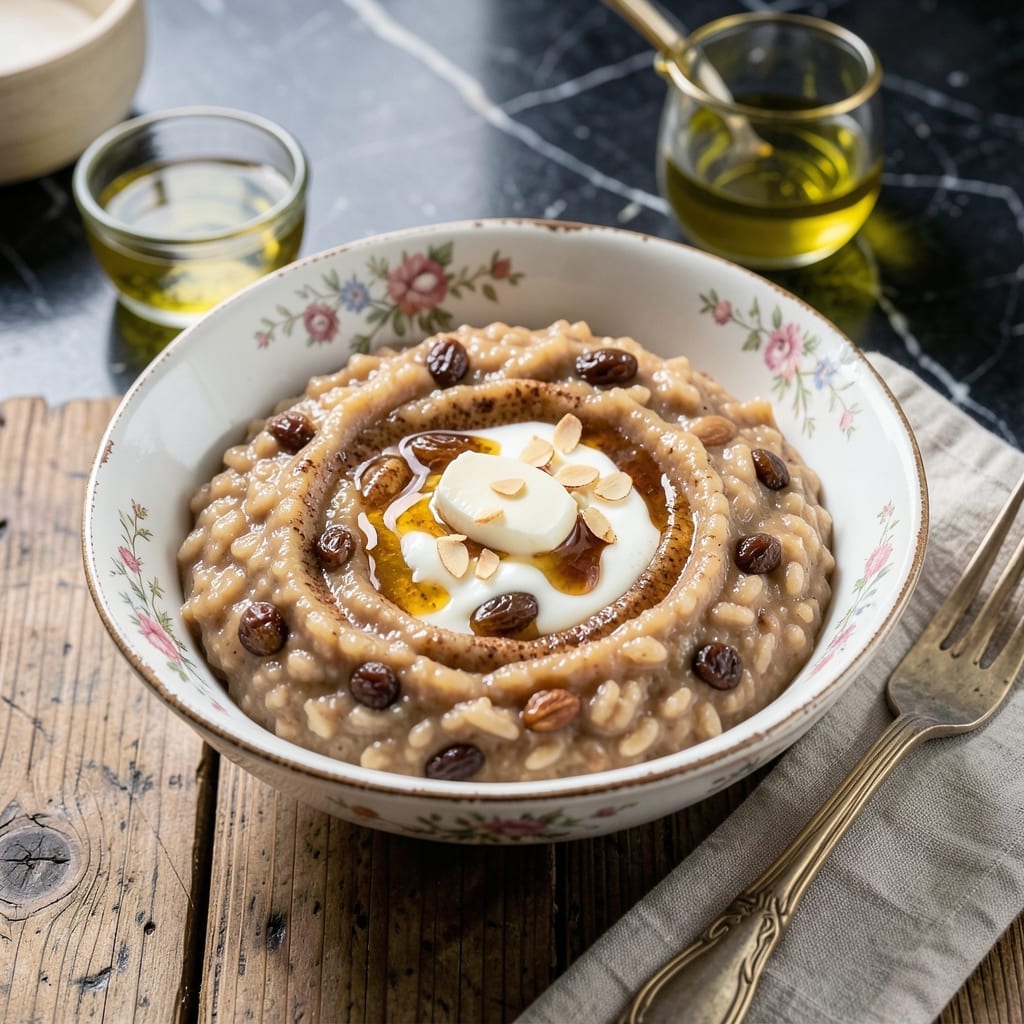
This brown rice pudding delivers creamy results with minimal effort using your Instant Pot. The pressure cooker transforms simple ingredients into a rich, custard-like dessert.
Brown rice provides a nuttier flavor and firmer texture compared to white rice, while maintaining that signature pudding consistency. The Instant Pot ensures even cooking without constant stirring.
What emerges is a perfectly balanced dessert—sweet, creamy, and comforting. The rice absorbs the liquid completely, creating a thick, pudding-like texture.
Ideal for a hands-off treat that feels indulgent yet wholesome. Here’s how to make this dessert with ease.
Ingredients for Instant Pot Brown Rice Pudding
Transform simple pantry items into this luxurious custard-like dessert with ease.
| Ingredient | Amount | Notes |
|---|---|---|
| Long-Grain Brown Rice 🌾 | 1 cup | Rinsed thoroughly before cooking |
| Whole Milk 🥛 | 4 cups | Full-fat for creaminess |
| Heavy Cream 🥛 | ½ cup | Cold and fresh |
| Granulated Sugar 🍚 | ½ cup | Adjust to taste preference |
| Unsalted Butter 🧈 | 2 tbsp | Melted for richness |
| Vanilla Extract 🌿 | 1 tsp | Pure vanilla recommended |
| Ground Cinnamon 🌶️ | 1 tsp | Freshly ground for best flavor |
| Salt 🧂 | ¼ tsp | Fine sea salt preferred |
| Large Eggs 🥚 | 2 whole | Beaten lightly |
| Raisins 🍇 | ½ cup | Optional for texture |
| Pure Maple Syrup 🍁 | 2 tbsp | For natural sweetness |
| Vanilla Bean 🌿 | 1 whole | Scraped seeds only |
The brown rice is key here. Short-grain works too but long-grain holds its shape better after pressure cooking. Whole Foods or Trader Joe’s have good organic options. For the dairy, full-fat everything—this isn’t the time for low-fat substitutions. The eggs add body, so use fresh, high-quality ones. If you’re at the store, grab an extra vanilla bean—it freezes beautifully.
No raisins? Dried cranberries or chopped dates work just as well. Swap maple syrup for honey or agave if you prefer. The cinnamon can be replaced with cardamom or nutmeg for a different flavor profile. If you don’t have heavy cream, half-and-half works in a pinch, but the texture won’t be quite as rich.
This pudding keeps well in the fridge for 4-5 days. Store it in an airtight container with plastic wrap directly on the surface to prevent a skin from forming. It also freezes beautifully for up to 3 months—just thaw overnight in the fridge.
Why You’ll Love This Recipe
- Hands-Off Cooking: I just dump everything in the Instant Pot, press a button, and walk away—no stirring, no watching the pot.
- Creamy Dreamy: The whole milk and heavy cream make it so rich, and the brown rice gives it that perfect chewy texture I crave.
- Feeds a Crowd: I make a big batch on Sunday and we snack on it all week—breakfast, dessert, or even a midnight treat.
- Budget Stretcher: Honestly, a little rice and milk turn into something luxurious without breaking the bank.
Step-by-Step Instructions for Instant Pot Brown Rice Pudding
This method ensures a velvety texture with minimal effort and maximum flavor development.
Step 1: Rinse and Par-Cook the Brown Rice
Place the 1 cup long-grain brown rice in a fine-mesh strainer and rinse thoroughly under cold water until the water runs clear. This removes excess starch that could make your pudding gummy rather than creamy.
Add the rinsed rice to your Instant Pot with 4 cups whole milk and 0.25 tsp salt. Secure the lid and cook on high pressure for 22 minutes. The rice should be tender but still have a slight bite—this prevents it from becoming mushy during the custard phase.
Step 2: Prepare the Custard Base
While the rice cooks, whisk together the 2 whole large eggs, 0.5 cup granulated sugar, 1 tsp ground cinnamon, and 1 tsp vanilla extract in a medium bowl until smooth and slightly pale. This builds the structural foundation for your custard.
Slowly whisk in the 0.5 cup heavy cream and 2 tbsp pure maple syrup until fully incorporated. The mixture should be silky with no visible streaks. If your vanilla bean seeds are ready, add them now for an extra layer of aromatic complexity.
Step 3: Combine and finish the Pudding
Once the rice is done, release the pressure naturally for 10 minutes, then quick-release any remaining pressure. Open the lid and stir in the 2 tbsp unsalted butter until melted. The mixture will look soupy at this stage—this is normal.
Gradually temper the egg mixture by slowly adding 1 cup of the hot rice mixture while whisking constantly. Pour this back into the Instant Pot and stir in the 0.5 cup raisins if using. Cook on the “Sauté” function for 5-7 minutes, stirring constantly, until the pudding thickens to a custard-like consistency.
Step 4: Chill and Serve
Transfer the pudding to a large bowl or individual serving dishes. Press plastic wrap directly onto the surface to prevent a skin from forming. Refrigerate for at least 2 hours or until completely chilled and set.
The texture should be rich and creamy with visible rice grains suspended throughout. Serve cold with a dusting of additional ground cinnamon if desired. The pudding will continue to thicken as it chills, reaching its ideal consistency after 4 hours.
Pro Tips For Making Instant Pot Brown Rice Pudding
- Rinse the Rice: I learned this the hard way—unrinsed brown rice leaves a bitter, starchy film that ruins the pudding’s creamy texture. Give it a good rinse until the water runs clear.
- Use High Pressure: Brown rice needs 22 minutes at high pressure to soften enough for pudding—any less and you’ll be chewing grains instead of creamy goodness.
- Skip the Lid Peek: After burning two batches, I finally figured out that opening the Instant Pot mid-cook releases pressure and can scorch the milk. Let it do its thing undisturbed.
- Toast the Rice First: Sounds weird, but it works: Sauté the rice in butter for 2-3 minutes before adding liquids to deepen the nutty flavor. I was skeptical until I tried it.
Troubleshooting instant pot brown rice pudding
Rice Not Fully Cooked
If your rice is still firm after pressure cooking, the pudding will have a gritty texture. Ensure you used 22 minutes on high pressure with 4 cups whole milk. For older rice, add 2-3 extra minutes to the cook time. 🌡️
Pudding Too Thin
This usually happens if the custard didn’t thicken properly. After tempering the eggs, cook on Sauté mode for 5-7 minutes, stirring constantly. If it’s still loose, mix 1 tbsp cornstarch with 2 tbsp cold milk and stir in while heating.
Eggs Curdled
Curdling occurs when eggs are added too quickly to hot liquid. Always temper by slowly adding 1 cup of the hot rice mixture to the eggs while whisking. If it happens, strain the pudding through a fine-mesh sieve to remove lumps.
Skin Forming
Press plastic wrap directly onto the surface before refrigerating. This blocks air contact, preventing that unappetizing layer. If a skin forms, simply whisk it back into the pudding before serving.
Burn Notice
If you see the “Burn” error, degrease the pot immediately. Ensure the rice is fully submerged in liquid and no ingredients are stuck to the bottom. Use whole milk instead of low-fat, as higher fat content prevents sticking.
Overly Sweet
Balance the sweetness by adding a pinch of salt or a splash of lemon juice. You can also stir in plain Greek yogurt to mellow the flavor while adding creaminess. 💡
Nutrition Facts
Frequently Asked Questions
Can I use white rice instead?
Yes, but reduce the pressure cook time to 10 minutes. White rice cooks faster and may turn mushy with the full 22 minutes. The texture will be softer than with brown rice.
Why does my pudding look grainy?
This usually means the rice wasn’t fully cooked. Ensure you use 22 minutes on high pressure for brown rice. Older rice may need 2-3 extra minutes.
Can I make this dairy-free?
Swap the milk for coconut milk or almond milk. Use coconut cream instead of heavy cream. The texture will be slightly different but still delicious.
How long does it keep in the fridge?
Store in an airtight container with plastic wrap on the surface. It stays fresh for 4-5 days. For longer storage, freeze for up to 3 months.

- Mujadara Rice and Lentils Recipe: Earthy Spiced Lentils With Caramelized Onions - November 1, 2026
- Naija Fried Rice Recipe: Street-Style Spice With Veggie Crunch - November 1, 2026
- Mushy Rice Recipe: Fluffy Grains Transformed in Minutes - November 1, 2026