
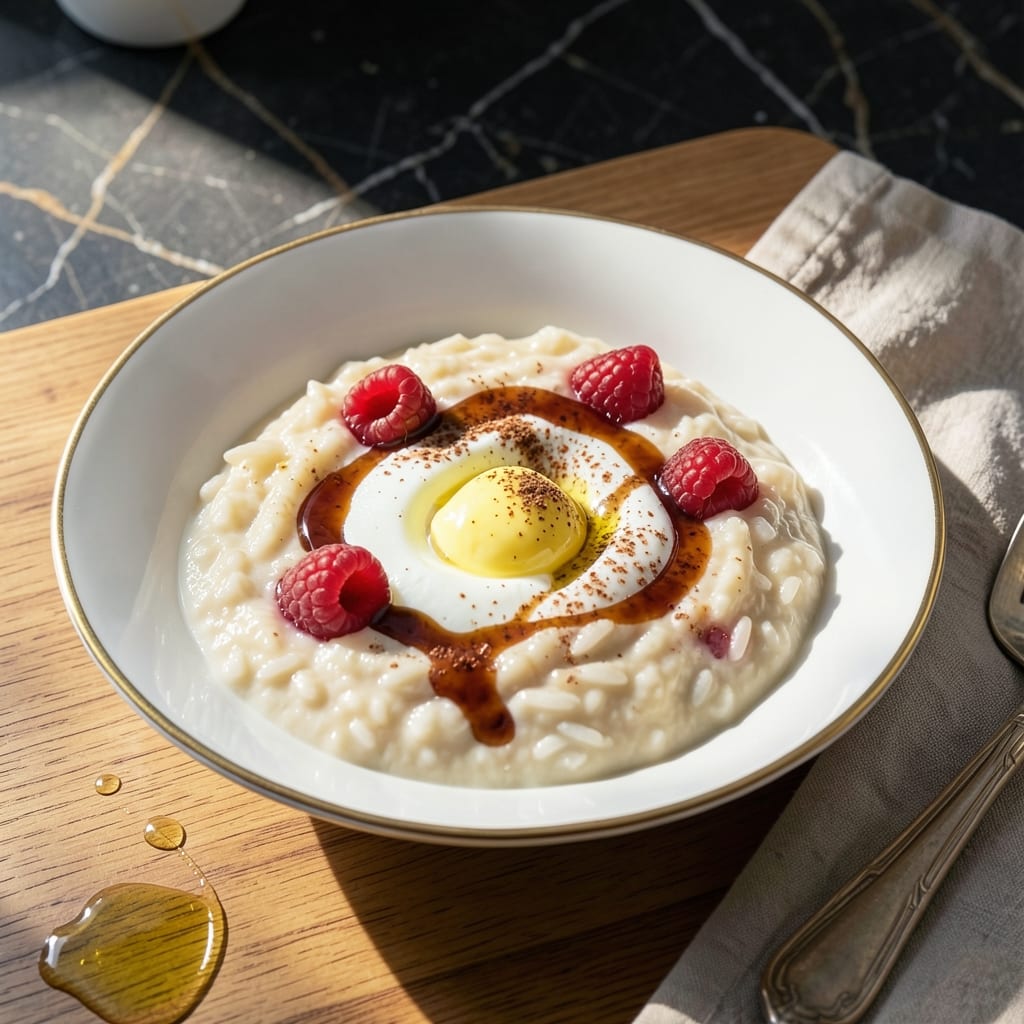
There’s a reason rice pudding remains a beloved classic—its creamy texture and comforting warmth bring nostalgia to every spoonful. This method delivers that same indulgence with a modern twist, using an Instant Pot to cut preparation time in half while maintaining that signature richness.
The secret lies in the evaporated milk, which lends a velvety smoothness that whole milk simply can’t match. Combined with long-grain rice and a touch of vanilla, it creates a custard-like consistency that feels both luxurious and effortless.
No constant stirring, no risk of scorching—just a hands-off process that yields consistently silky results every time. The Instant Pot’s controlled heat ensures the rice cooks evenly, absorbing the sweetened milk mixture without forming a skin on top.
Perfect for chilly evenings or when you need a no-fuss dessert that feels special. Here’s how to make it.
Ingredients for Instant Pot Rice Pudding Recipe with Evaporated Milk
Simple pantry staples transform into silky, custard-like perfection with minimal effort.
| Ingredient | Amount | Notes |
|---|---|---|
| Long-Grain White Rice 🌾 | ¾ cup | Rinsed until water runs clear |
| Evaporated Milk 🥛 | 2 cups | Canned, undiluted, full-fat |
| Whole Milk 🥛 | 1 ½ cups | For balanced creaminess |
| Granulated Sugar 🍬 | ½ cup | Adjust to taste preference |
| Unsalted Butter 🧈 | 2 tbsp | Melted for richness |
| Pure Vanilla Extract 🌿 | 1 tsp | High-quality for depth |
| Ground Cinnamon 🌶️ | ½ tsp | Freshly ground preferred |
| Salt 🧂 | ¼ tsp | Fine sea salt recommended |
| Raisins 🍇 | ½ cup | Optional, soaked in warm water |
| Water 💧 | 1 cup | For initial rice cooking |
The evaporated milk is non-negotiable here—Carnation or Pet brands work best for that signature velvety texture. Look for full-fat cans (not skim) in the baking aisle. The rice should be long-grain white for even cooking; avoid instant rice as it turns mushy. Costco or Sam’s Club offer great bulk prices on evaporated milk if you plan to make this often.
No evaporated milk? Simmer whole milk until reduced by half—takes about 20 minutes. For a dairy-free version, use full-fat coconut milk at a 1:1 ratio. The raisins are traditional but can be swapped for chopped dates or dried cranberries. If using cinnamon sticks instead of ground, steep them in the warm milk mixture before cooking.
Rice pudding thickens as it cools. Store in an airtight container in the fridge for up to 5 days—the flavors deepen overnight. Reheat with a splash of milk to restore creaminess. Freezing isn’t recommended as it alters the texture significantly.
Why You’ll Love This Recipe
- Set and Forget: I toss everything in the Instant Pot, press a button, and walk away—no stirring, no watching, no fuss.
- Creamy Dream: The evaporated milk and butter make it so rich and velvety, it’s like dessert in a bowl without the guilt.
- Feeds the Freezer: I double the batch and freeze portions for those days when I need comfort food in a hurry.
- Pennywise Comfort: Honestly, long-grain rice and evaporated milk are budget staples, and this feels like a fancy treat.
Step-by-Step Instructions for Instant Pot Rice Pudding
This method ensures creamy, custard-like results with minimal hands-on time.
Step 1: Rinse and Toast the Long-Grain White Rice
Rinse the 0.75 cup long-grain white rice under cold water until the water runs completely clear. This removes excess starch that could make the pudding gummy. I like to swirl the rice in the water with my hand and drain it in a fine-mesh sieve.
Set your Instant Pot to the sauté function. Add the drained rice and toast for 2-3 minutes, stirring constantly, until the grains become slightly translucent and smell nutty. This step enhances the rice’s natural flavor and prevents a raw, starchy taste in the finished pudding.
Step 2: Combine All Liquids and Sugar
Add the 1 cup water, 2 cups evaporated milk, 1.5 cups whole milk, and 0.5 cup granulated sugar to the Instant Pot with the toasted rice. Stir well to ensure the sugar begins to dissolve. The combination of evaporated and whole milk creates a rich, velvety texture without being overly heavy.
Scrape the bottom of the pot with a wooden spoon to release any browned bits from the rice. This prevents burning during pressure cooking. Make sure all the rice is submerged in the liquid—this ensures even cooking and a consistent texture throughout the pudding.
Step 3: Pressure Cook to Creamy Perfection
Secure the Instant Pot lid and set the valve to sealing. Cook on high pressure for 12 minutes. The rice will absorb the liquids and soften, while the sugars caramelize slightly, deepening the flavor. After cooking, let the pressure release naturally for 10 minutes, then quick-release any remaining pressure.
Open the lid carefully—the pudding will be very hot. Stir gently to assess the consistency. The rice should be tender and the mixture should have thickened to a pudding-like texture. If it seems too thin, don’t worry; it will continue to thicken as it cools.
Step 4: Finish with Butter, Vanilla, and Spices
Stir in the 2 tbsp unsalted butter, 1 tsp pure vanilla extract, 0.5 tsp ground cinnamon, and 0.25 tsp salt. The butter adds richness, while the vanilla and cinnamon provide warmth and depth. Taste and adjust sweetness if needed, though the pudding will taste sweeter as it cools.
If using, fold in the 0.5 cup raisins at this stage. I recommend soaking them in warm water for 10 minutes beforehand to plump them up and prevent them from becoming tough during cooking. Their chewy texture contrasts nicely with the creamy pudding.
Step 5: Cool and Serve
Transfer the pudding to a heatproof bowl or individual serving dishes. Let it cool at room temperature for 15-20 minutes, then cover and refrigerate for at least 2 hours to chill completely. This resting time allows the flavors to meld and the pudding to reach its ideal creamy consistency.
Serve cold or at room temperature, topped with an extra sprinkle of ground cinnamon if desired. The pudding will keep in the refrigerator for up to 5 days, though it’s best enjoyed within the first 2-3 days when the texture is at its peak.
Pro Tips For Making Instant Pot Rice Pudding Recipe With Evaporated Milk
- Rinse the Rice: Give the long-grain white rice a quick rinse before cooking—it removes excess starch so your pudding ends up creamy, not gummy. I learned this the hard way after my first batch turned into a thick, pasty mess.
- Use Full-Fat Evaporated Milk: Skip the low-fat version; the full-fat evaporated milk is what gives this pudding its rich, velvety texture. Sounds obvious, but I tried cutting corners once and the difference was noticeable.
- Stir Before Sealing: After adding all the ingredients to the Instant Pot, stir well to combine—this prevents the rice from clumping together at the bottom and burning. I burned two batches before I figured this out.
- Natural Release Only: Let the pressure release naturally for at least 10 minutes before opening the lid. This gives the rice time to fully absorb the milks and soften. I was skeptical until I tried it, but it actually changes the outcome.
Make-Ahead Tips for instant pot rice pudding recipe with evaporated milk
Prep Ahead Strategy
Measure all your dry ingredients—0.75 cup long-grain white rice, 0.5 cup granulated sugar, 0.5 tsp ground cinnamon, and 0.25 tsp salt—the night before. Store them in a sealed container. This saves 5-10 minutes of prep time the next day. 💡
Rice Soaking Tip
Rinse your rice in the morning and let it soak in 1 cup water for up to 4 hours before cooking. This jumpstarts the cooking process in the Instant Pot, ensuring even softer grains in the finished pudding.
Evaporated Milk Prep
If using optional 0.5 cup raisins, soak them in warm water for 10 minutes while you prep other ingredients. This plumps them up and prevents them from toughness. I like to use Carnation evaporated milk for consistent results.
Instant Pot Prep
Before starting, ensure your Instant Pot is clean and the sealing ring is properly seated. Add all liquids—2 cups evaporated milk and 1.5 cups whole milk—to the pot first, then stir in the rice. This prevents burning.
Chill Time Hack
Transfer the pudding to shallow containers to cool faster in the fridge. It’ll reach serving temperature in about 1.5 hours instead of 2-3 hours in a deep bowl. The pudding thickens as it chills, so plan accordingly. ❄️
Make-Ahead Service
This dish actually tastes better the next day as flavors meld. Prepare it up to 2 days in advance for gatherings. Just give it a good stir and add a splash of milk if needed before serving.
Nutrition Facts
Frequently Asked Questions
Can I use regular milk instead of evaporated?
Evaporated milk is key for that ultra-creamy texture, but in a pinch, you can substitute by simmering 3 cups whole milk until reduced to 2 cups. This takes about 20 minutes.
Why does my pudding come out runny?
It thickens significantly as it cools. If still too thin after chilling, cook uncovered on sauté mode for 5-10 minutes, stirring frequently. Be patient—it will set.
How do I prevent a burnt warning?
Always deglaze the pot after toasting rice and scrape the bottom well. Use at least 1 cup water in your liquid mixture to prevent scorching during pressure cooking.
Can I make this with brown rice?
Yes, but increase pressure cooking time to 22 minutes and use 1.25 cups water. The texture will be slightly chewier but still creamy.

- Mujadara Rice and Lentils Recipe: Earthy Spiced Lentils With Caramelized Onions - November 1, 2026
- Naija Fried Rice Recipe: Street-Style Spice With Veggie Crunch - November 1, 2026
- Mushy Rice Recipe: Fluffy Grains Transformed in Minutes - November 1, 2026