
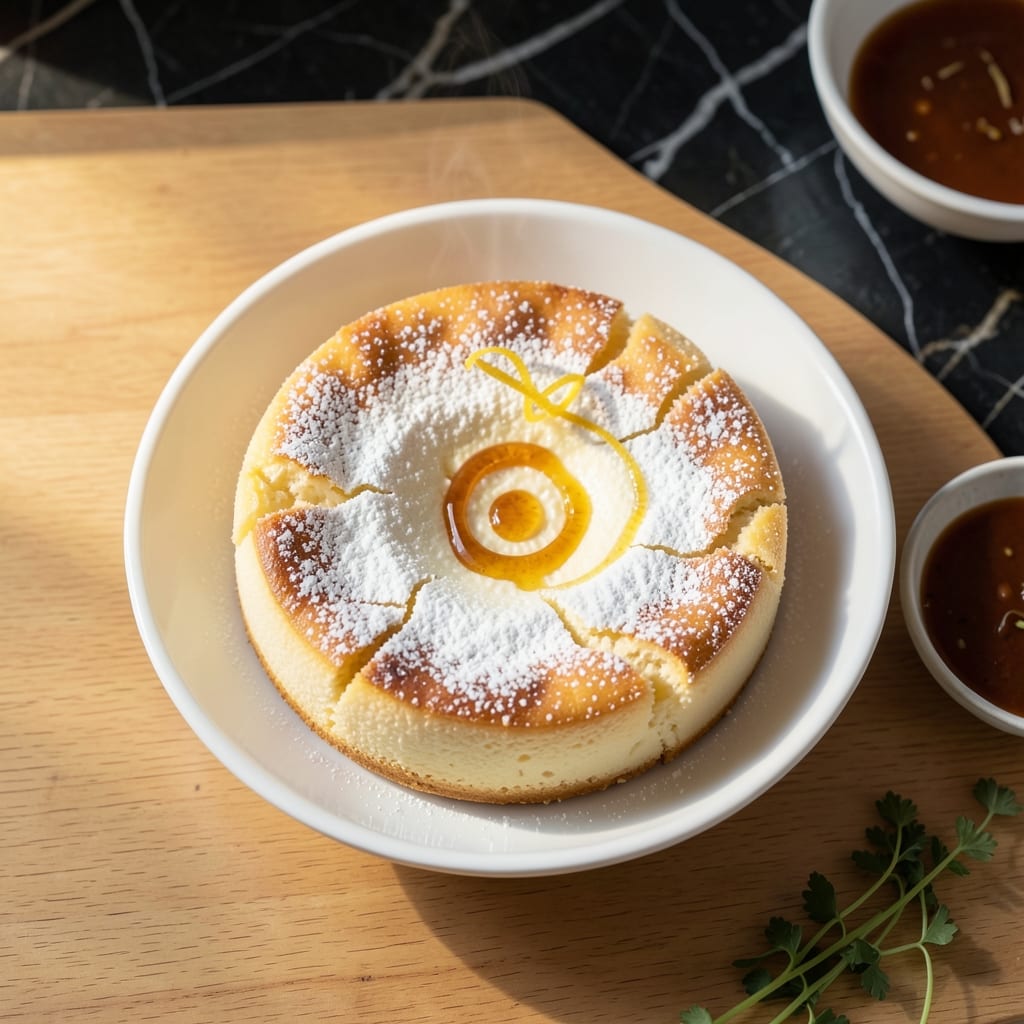
I discovered the magic of making Japanese cheesecake in a rice cooker after years of struggling with water baths and uneven baking. This method delivers cloud-like fluff with zero special equipment, using just your standard rice cooker.
The secret lies in gentle, even heat that creates that signature jiggly texture without cracking. By carefully timing the cooking and resting periods, you’ll achieve a light, airy cake that rises beautifully every time.
This approach eliminates the guesswork of oven temperatures and water baths. The rice cooker’s consistent heat ensures even baking, while a few simple techniques guarantee a perfectly smooth surface.
Expect a delicate, slightly sweet cake with a melt-in-your-mouth texture that rivals any bakery version. Here’s how to make it.
Ingredients for Japanese Cheesecake Rice Cooker
A handful of pantry staples plus cream cheese transform into pillowy perfection.
| Ingredient | Amount | Notes |
|---|---|---|
| Cream Cheese 🧀 | 8 oz | Full-fat, room temperature |
| Unsalted Butter 🧈 | 4 tbsp | Room temperature, cubed |
| Whole Milk 🥛 | ⅓ cup | Warm, about 110°F |
| Cake Flour 🌾 | ¾ cup | Sifted for smoothness |
| Granulated Sugar 🍚 | ½ cup | Divided for cheesecake and meringue |
| Large Eggs 🥚 | 4 whole | Separated, room temperature |
| Lemon Juice 🍋 | 1 tsp | Freshly squeezed for brightness |
| Vanilla Extract 🌿 | 1 tsp | Pure extract preferred |
| Cornstarch 🌾 | 1 tbsp | For stability and texture |
| Salt 🧂 | ¼ tsp | Fine sea salt |
| Warm Water 💧 | ½ cup | For rice cooker steaming |
The cream cheese is non-negotiable here—Philadelphia brand gives the smoothest texture. Full-fat only (trust me on this). Whole Foods or Costco have the best prices for bulk blocks. Butter needs to be unsalted so you control the seasoning. For the milk, any whole milk works, but avoid skim—it lacks the richness this needs.
No cream cheese? Mascarpone at equal amounts works in a pinch (but it’s pricier). Cake flour is key for that tender crumb—swap all-purpose plus 2 tbsp cornstarch per cup if needed. Eggs must be room temp—cold ones won’t whip properly. The lemon juice brightens everything up; bottled works, but fresh is better.
This keeps beautifully in the fridge for 4-5 days or frozen for 2 months. Store wrapped tightly in plastic (the good stuff, not the flimsy kind). Best served at room temp—pull it out an hour before eating for that melt-in-your-mouth texture.
Why You’ll Love This Recipe
- One-Bowl Wonder: I just dump cream cheese, butter, and the rest into my rice cooker—no mixer, no fuss, and it still turns out fluffy every time.
- Melt-in-Mouth Magic: That first bite of warm, jiggly cake with the rich cream cheese and subtle sweetness? Honestly, it’s like a cloud decided to taste like dessert.
- Dinner Party Hero: I’ve served this at potlucks and brunch, and it’s the one thing everyone asks for the recipe—looks fancy, but my rice cooker does all the work.
- Leftovers? Ha.: Between us, there’s never any. But if there were, it keeps beautifully for three days (though it’s usually gone in hours).
Step-by-Step Instructions for Japanese Cheesecake in a Rice Cooker
This one-pot method delivers that signature jiggly texture with minimal effort and maximum fluff.
Step 1: Prepare the Cream Cheese Base
In a large bowl, beat the 8 oz Cream Cheese and 4 tbsp Unsalted Butter together until completely smooth and creamy. I use a stand mixer with the paddle attachment for this—it ensures no lumps remain, which is critical for that silky final texture.
Next, gradually add the 0.5 cup Granulated Sugar and continue mixing until fully incorporated. Then add the 4 whole Large Eggs one at a time, mixing well after each addition. This slow incorporation prevents curdling and builds a stable emulsion.
Finally, mix in the 0.33 cup Whole Milk, 1 tsp Vanilla Extract, and 1 tsp Lemon Juice. The mixture should be pale and slightly thickened, with a glossy sheen. This is your cheesecake base.
Step 2: Fold in the Dry Ingredients
Sift the 0.75 cup Cake Flour, 1 tbsp Cornstarch, and 0.25 tsp Salt directly into the wet mixture. I sift because cake flour can be lumpy, and we want the lightest possible texture in the finished cake.
Using a silicone spatula, gently fold the dry ingredients into the wet mixture until just combined. Be careful not to overmix—stop as soon as you no longer see streaks of flour. Overmixing develops gluten, which would make the cake dense instead of airy.
The batter should be smooth and pourable, with a consistency similar to thick pancake batter. This is the foundation of your cloud-like fluff.
Step 3: Prepare the Rice Cooker for Steaming
Pour the 0.5 cup Warm Water into the rice cooker insert. This creates the steam environment needed for gentle, even cooking. Place a wire rack or steamer basket inside to elevate the cake pan above the water level.
Line a 7-inch round cake pan with parchment paper, leaving an overhang on the sides for easy removal. Pour the batter into the prepared pan and smooth the top with your spatula. Tap the pan gently on the counter a few times to release any large air bubbles—this prevents unsightly tunnels in your finished cake.
Step 4: Steam-Bake to Perfection
Carefully place the cake pan onto the rack in the rice cooker. Close the lid and set the rice cooker to the “steam” or “bake” function (if your model has these options). If not, use the standard cook setting. Steam-bake for 1 hour.
After 1 hour, check for doneness by inserting a toothpick into the center. It should come out clean or with just a few moist crumbs. If it’s still wet, continue cooking in 10-minute increments until done. The top should be golden and slightly domed, with a gentle jiggle in the center when shaken.
Step 5: Cool and Serve
Once done, carefully remove the pan from the rice cooker and let it cool in the pan for 10 minutes. This brief rest allows the cake to set slightly before unmolding. Then, use the parchment overhang to lift the cake out of the pan and onto a wire rack.
Let it cool completely to room temperature, about 1 hour. I know it’s hard to wait, but cooling is crucial—it firms up the texture and prevents collapsing. Once cooled, chill in the refrigerator for at least 2 hours before slicing. Serve with fresh berries or a dusting of powdered sugar.
Pro Tips For Making Japanese Cheesecake Rice Cooker
- Room Temp Cream Cheese: Let your cream cheese sit out for at least 2 hours before mixing—cold blocks leave lumps no amount of whisking fixes.
- Sift the Cake Flour: I learned this the hard way: skipping the sift means dense cake. A quick pass through a mesh strainer makes all the difference in that jiggly texture.
- Line the Pot: Cut a circle of parchment for the rice cooker base and grease it well. Without this, you’ll be chiseling your cake out in sad chunks.
- Steam First, Bake Later: Start with 10 minutes of steaming (rice cooker’s steam setting) before switching to bake—this prevents the dreaded cracked top.
Creative Variations of These Flavors
Matcha Green Tea
Add 1 tbsp matcha powder to the dry ingredients for a subtle earthy flavor and beautiful green hue. I sift it with the cake flour to prevent clumping. The vibrant color makes this perfect for spring gatherings or St. Patrick’s Day. 💚
Chocolate Swirl
After pouring the batter into the pan, dollop ¼ cup melted dark chocolate on top. Use a skewer to gently swirl it through the batter. Ghirardelli 70% cacao gives the best rich chocolate flavor without overpowering the delicate cake.
Citrus Zest
Fold 1 tbsp lemon zest or 1 tbsp orange zest into the batter for a bright, fresh twist. I use a microplane to get fine zest without bitterness. This pairs beautifully with the existing lemon juice in the recipe.
Brown Butter Base
Brown the 4 tbsp Unsalted Butter before mixing with cream cheese for a nutty depth. Let it cool to room temperature first. This small change transforms the flavor profile completely, adding a toasty richness.
Ube Purple Version
Replace ¼ cup of the cake flour with ¼ cup ube halaya (purple yam jam) for a vibrant purple color and sweet, nutty flavor. I find Good Shepherd brand at Asian markets works perfectly. 💜
Coffee Infused
Dissolve 1 tsp instant espresso powder in the warm milk before adding to the batter. This creates a mocha-like depth that coffee lovers adore. Use Medaglia d’Oro for the best flavor without graininess.
Nutrition Facts
Frequently Asked Questions
What rice cooker size works best?
A standard 5-6 cup rice cooker fits a 7-inch pan perfectly. Larger models may require adjusting water levels.
Why did my cake collapse after cooling?
This usually means it wasn’t fully set in the center. Next time, cook for an extra 10-15 minutes and check with a toothpick.
Can I use all-purpose flour instead?
Yes, but replace 2 tbsp of it with 2 tbsp cornstarch per cup to mimic cake flour’s lightness.
How do I prevent cracks on top?
Don’t overmix the batter and ensure all ingredients are room temperature. A gentle tap on the counter before cooking helps too.

- Mujadara Rice and Lentils Recipe: Earthy Spiced Lentils With Caramelized Onions - November 1, 2026
- Naija Fried Rice Recipe: Street-Style Spice With Veggie Crunch - November 1, 2026
- Mushy Rice Recipe: Fluffy Grains Transformed in Minutes - November 1, 2026