
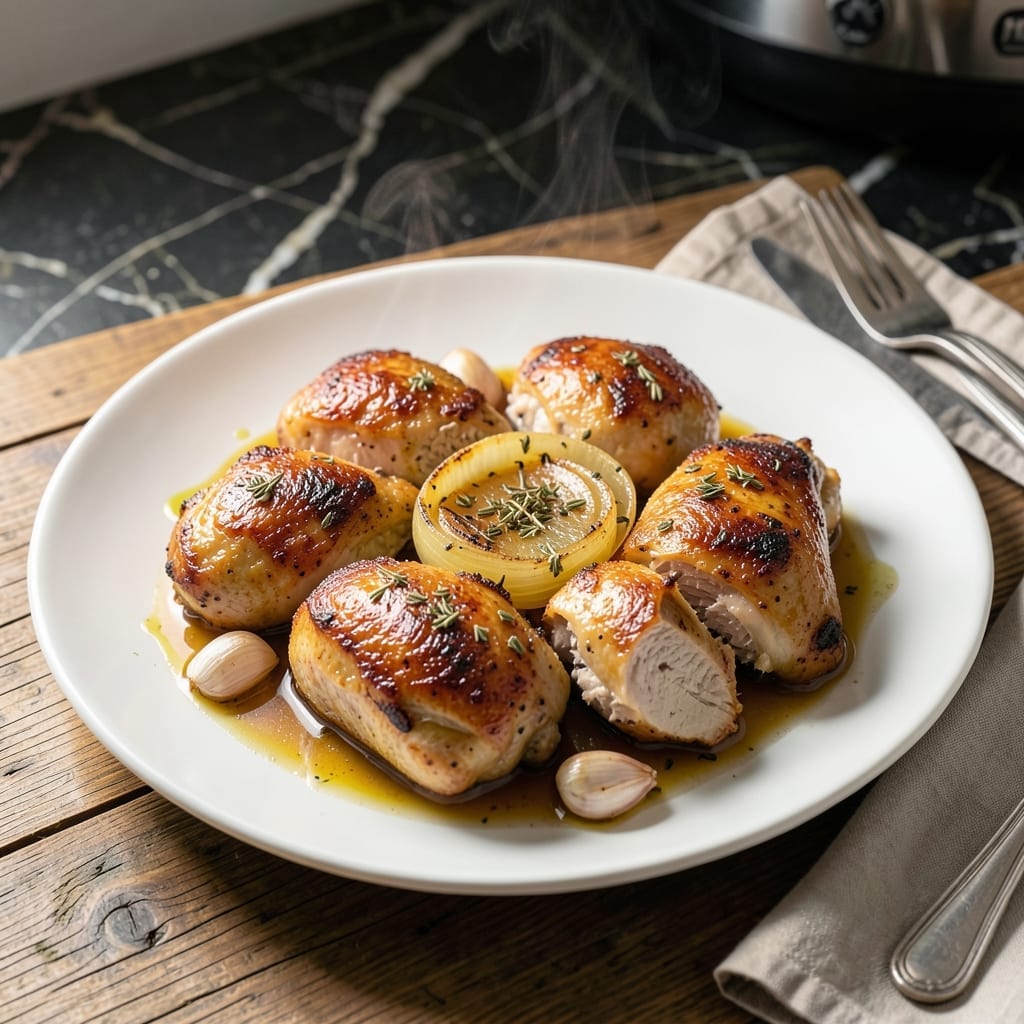
This pressure cooker method delivers juicy chicken every time without the fuss of traditional cooking.
By using the Instant Pot, I’ve streamlined the process to achieve tender meat with minimal effort. The sealed environment locks in moisture while infusing flavors deeply into the chicken.
What emerges is perfectly cooked chicken that’s ready for any meal, from quick weeknight dinners to Sunday roasts. The hands-off approach means you can focus on other tasks while it cooks.
This technique works for various cuts and can be adapted to countless recipes. The results speak for themselves.
Ingredients for Instapot Chicken
Simple ingredients transform into tender, juicy chicken with minimal effort in the pressure cooker.
| Ingredient | Amount | Notes |
|---|---|---|
| Chicken Thighs 🍗 | 2 lb | Boneless, skinless preferred |
| Chicken Broth 🍲 | 1 cup | Low-sodium for control |
| Olive Oil 🫒 | 2 tbsp | Extra-virgin for richness |
| Garlic Cloves 🧄 | 4 cloves | Peeled, minced |
| Yellow Onion 🧅 | 1 whole | Medium, diced |
| Dried Thyme 🌿 | 1 tsp | Crushed between fingers |
| Dried Rosemary 🌿 | 1 tsp | Crushed for better release |
| Smoked Paprika 🌶️ | 1 tsp | Adds depth of flavor |
| Kosher Salt 🧂 | 1 ½ tsp | Diamond Crystal preferred |
| Black Pepper 🌶️ | ½ tsp | Freshly ground |
| Bay Leaves 🍃 | 2 whole | Removed before serving |
| Lemon Juice 🍋 | 1 tbsp | Freshly squeezed |
The chicken itself is paramount. Boneless, skinless thighs yield the most consistent results due to their forgiving fat content and resistance to drying out. Costco offers excellent quality at bulk prices, while Whole Foods provides organic options with superior marbling. Source thighs with vibrant color and no off odors for optimal outcomes.
Need to swap thighs for breasts? Reduce cook time by 3-4 minutes to prevent dryness. No fresh garlic? Garlic powder at one-third the quantity works, but fresh delivers superior depth. For the broth, vegetable broth can substitute in a pinch, though the flavor profile will shift slightly. Dried herbs are non-negotiable—fresh won’t survive the pressure cooking process.
Cooked chicken keeps in the refrigerator for 4 days or freezes beautifully for 3 months. Portion before freezing for easy meal prep. The cooking liquid makes excellent stock—strain and store separately.
Why You’ll Love This Recipe
- Set and Forget: The Instant Pot does all the work—just dump the thighs, broth, and garlic in and walk away.
- Rich Garlic Depth: The onion and garlic cook down into the broth, making every bite ridiculously savory.
- Meal Prep MVP: I make a big batch on Sunday and it’s ready for salads, tacos, or pasta all week.
- Budget Stretcher: Chicken thighs stay juicy and cheap, and one package feeds us for two nights.
Step-by-Step Instructions for Pressure-Cooked Chicken
Here’s the method. Straightforward, tested, works every time.
Step 1: Sear the Chicken Thighs for Maximum Flavor
Set your Instant Pot to the sauté function on normal heat and add the 2 tbsp Olive Oil. While it heats, pat the 2 lb Chicken Thighs completely dry with paper towels—this ensures a proper sear instead of steaming.
Season both sides generously with the 1.5 tsp Kosher Salt, 0.5 tsp Black Pepper, 1 tsp Smoked Paprika, 1 tsp Dried Thyme, and 1 tsp Dried Rosemary. Sear the chicken in batches for 3-4 minutes per side until deep golden brown. Don’t overcrowd the pot—this lowers the temperature and prevents proper browning.
Remove the seared chicken to a plate and set aside. The fond left in the pot will add incredible depth to your finished dish.
Step 2: Build the Aromatic Base
In the same pot, add the 1 whole Yellow Onion and cook for 3 minutes until softened and just beginning to brown. Add the 4 cloves Garlic Cloves and cook for 30 seconds until fragrant—don’t let it burn.
Pour in ½ cup of the 1 cup Chicken Broth and deglaze the pot, scraping up all those browned bits with a wooden spoon. This step is crucial for flavor development and prevents the burn notice on your Instant Pot. Add the 2 whole Bay Leaves to the liquid.
Step 3: Pressure Cook to Perfection
Return all the chicken to the pot along with any accumulated juices. Pour in the remaining ½ cup Chicken Broth. Secure the lid, set the valve to sealing, and cook on high pressure for 10 minutes.
Once the cooking cycle completes, allow the pressure to release naturally for 5 minutes, then quick-release any remaining pressure. The chicken should be fall-off-the-bone tender with an internal temperature of at least 165°F.
Step 4: Finish and Serve
Carefully remove the chicken from the pot and set aside. Discard the 2 whole Bay Leaves. If you prefer a thicker sauce, set the Instant Pot to sauté and simmer the cooking liquid for 3-4 minutes until reduced by about half.
Stir in the 1 tbsp Lemon Juice to brighten the flavors. Return the chicken to the pot and coat with the sauce. Serve immediately while hot, ensuring each portion gets plenty of that flavorful cooking liquid.
Pro Tips For Making Instapot Chicken
- Sear the Thighs: Brown the chicken thighs in the Instant Pot first using the sauté function—about 3-4 minutes per side. I learned this the hard way: skipping this step leaves the meat pale and the flavor flat.
- Deglaze the Pot: After searing, pour in ½ cup broth and scrape the bottom with a wooden spoon to lift all those browned bits. Those little crunchy pieces are pure flavor, and they’ll burn if you don’t.
- Use Thighs with Skin: Skin-on, bone-in thighs stay juicier and add richness to the broth. I was skeptical until I tried it, but the skin renders down beautifully under pressure.
- Skip the Overcrowding: Don’t stack the thighs—arrange them in a single layer so they cook evenly. Sounds obvious, but I’ve ruined batches by cramming in too many, and some pieces came out dry.
Serving Suggestions for This Dish
Plating Ideas
I love serving this over fluffy white rice to soak up the rich pan sauce. For a low-carb option, try cauliflower rice instead. The golden-brown chicken looks stunning against the bright white backdrop. 💛
Vegetable Sides
Pair with steamed green beans or roasted asparagus for a pop of color and freshness. Toss the veggies with a drizzle of olive oil and a pinch of Kosher Salt to complement the chicken’s flavors.
Fresh Finishes
A sprinkle of fresh parsley or chopped cilantro adds a vibrant finish. I also like to add a squeeze of lemon wedges at the table for guests who want extra brightness.
Bread Options
Warm crusty bread or garlic naan is perfect for mopping up every last bit of sauce. Toast slices lightly and rub with a garlic clove for extra flavor.
Family-Style Service
For casual meals, arrange the chicken on a platter surrounded by roasted potatoes and sautéed onions. This lets everyone serve themselves and makes for a beautiful table presentation. 🔥
Sauce Enhancement
Thicken the sauce further by stirring in 1 tbsp butter or a cornstarch slurry. This creates a glossier finish that clings beautifully to the chicken and any sides.
Nutrition Facts
Frequently Asked Questions
Can I use chicken breasts instead of thighs?
Yes, but reduce pressure cook time to 6-7 minutes to prevent dryness. Thighs are more forgiving due to higher fat content.
What if my Instant Pot shows a burn notice?
Add ½ cup more liquid and deglaze the pot thoroughly. Ensure no food is stuck to the bottom.
How do I know when the chicken is done?
Check internal temperature with a meat thermometer—it should reach 165°F. The meat will pull apart easily.
Can I double the recipe?
Yes, but don’t exceed the pot’s ⅔ maximum fill line. Cook time remains the same.

- Jollof Rice Sauce Recipe: West African Tomato and Spice Infusion - September 25, 2026
- Japanese Rice Soup Recipe: Umami-Rich Comfort in a Bowl - September 25, 2026
- Homemade Cream Of Rice Recipe: Silk-Smooth Breakfast in Minutes - September 25, 2026