
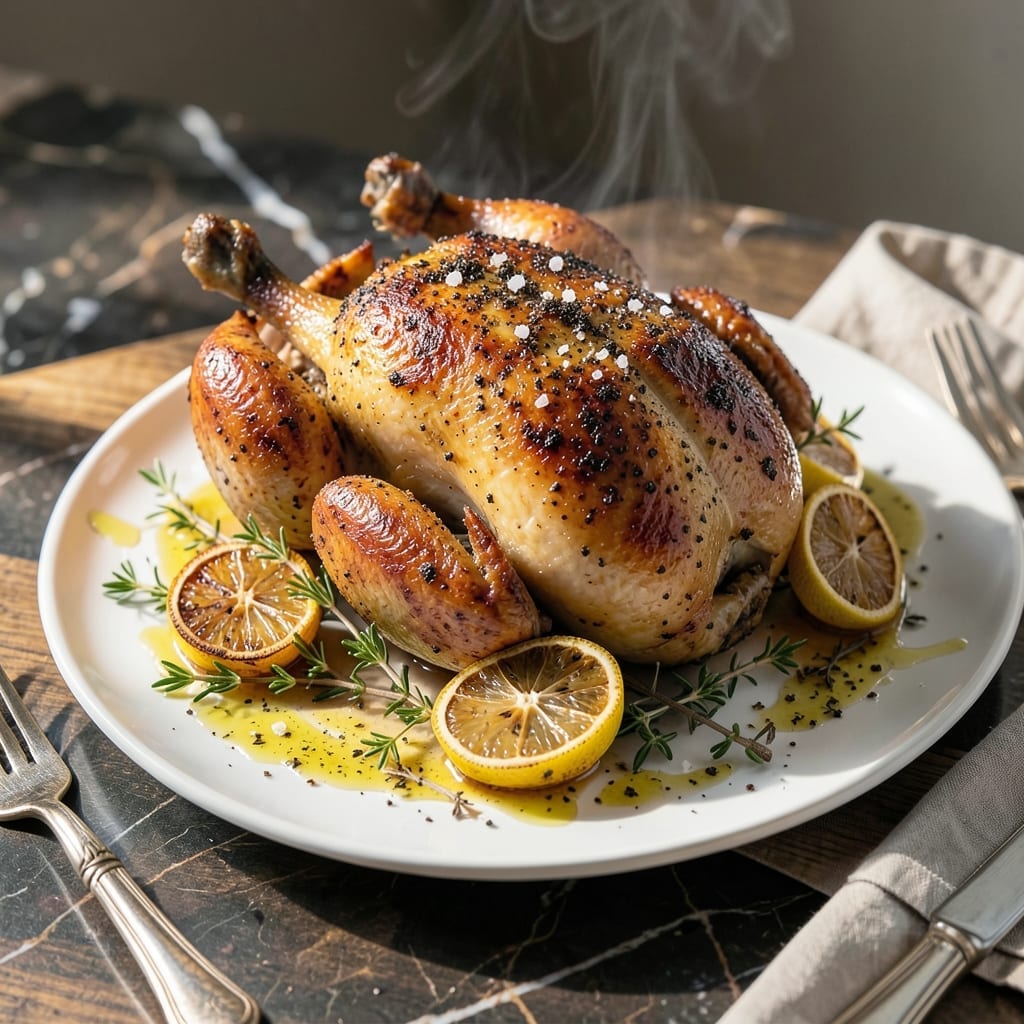
Achieving restaurant-quality whole chicken at home doesn’t require hours in the kitchen. This pressure cooker method delivers fall-off-the-bone tenderness with rich, herb-infused flavor in a fraction of the time.
The secret lies in building layers of flavor before cooking. A simple dry rub and fresh herb bundle transform basic chicken into something extraordinary. The Instant Pot locks in moisture while infusing the meat with aromatic complexity.
What emerges is perfectly cooked chicken with golden skin and juices that pool on your cutting board. The herbs create a subtle fragrance that fills your kitchen, signaling that something special is about to be served.
Serve with roasted vegetables or mashed potatoes to complete the meal. The results rival any rotisserie chicken, with far more control over seasoning and doneness.
Ingredients for Instapot Whole Chicken
Pantry staples plus fresh herbs. That’s all you need for this juicy, flavorful bird.
| Ingredient | Amount | Notes |
|---|---|---|
| Whole Chicken 🍗 | 4 lb | Giblets removed, patted dry |
| Kosher Salt 🧂 | 1 ½ tbsp | Diamond Crystal preferred |
| Black Pepper 🌶️ | 1 tsp | Freshly ground for best flavor |
| Garlic Powder 🧄 | 1 tbsp | Not garlic salt |
| Onion Powder 🧅 | 1 tbsp | Fresh ground preferred |
| Dried Thyme 🌿 | 1 tsp | Or use fresh sprigs |
| Dried Rosemary 🌿 | 1 tsp | Crushed between fingers |
| Fresh Sage Leaves 🍃 | 4 whole | Tied with kitchen twine |
| Fresh Thyme Sprigs 🌿 | 4 whole | Optional for herb bundle |
| Lemon 🍋 | 1 whole | Halved for cavity |
| Yellow Onion 🧅 | 1 whole | Quartered, skin on |
| Chicken Broth 💧 | 1 cup | Low-sodium preferred |
| Olive Oil 🫒 | 1 tbsp | For searing chicken |
| Butter 🧈 | 2 tbsp | Unsalted, for finishing |
The chicken itself is the star. Look for a 4-pound bird—any larger and it won’t fit in most Instant Pots. I grab mine from Whole Foods or Costco (their organic birds are solid). Pat it dry before seasoning—that’s how you get golden skin. For the dry rub, Diamond Crystal kosher salt is my go-to (lighter texture means it clings better). Don’t skip the fresh herbs for the cavity—they infuse the meat with aroma as it cooks.
No fresh herbs? Dried work at one-third the amount. Out of lemon? A splash of white wine or apple cider vinegar in the broth adds brightness. The onion in the cavity is mostly for flavor, so a shallot or even garlic cloves will do. Skip the butter if you’re avoiding dairy—just drizzle a little olive oil at the end instead. The broth can be swapped for water in a pinch, but the chicken won’t be as flavorful.
Leftovers keep for 4 days in the fridge, or freeze the meat for 3 months. I shred mine for sandwiches or tacos. The bones? Toss them in a freezer bag for homemade stock later. That herb bundle can be composted—no waste.
Why You’ll Love This Recipe
- Set and Forget: No babysitting required—just season the chicken, toss it in the Instant Pot, and walk away while the pressure cooker does the work.
- Juicy Every Time: The garlic and onion powder infuse the meat so deeply, and the pressure locks in moisture way better than my old roasting method ever did.
- Meal Prep Hero: I shred the leftovers for tacos, soup, or salads all week. Honestly, it’s like cooking once and eating four different meals.
- Budget Stretcher: A whole chicken costs less than takeout, and this turns it into multiple meals for my family of four. Between us, my wallet notices the difference.
Step-by-Step Instructions for Pressure-Cooked Whole Chicken
Here’s the method I use for fall-off-the-bone tenderness with herb-infused flavor every time.
Step 1: Season and Prepare the Chicken for Pressure Cooking
Pat the 4 lb Whole Chicken completely dry inside and out with paper towels. This ensures the skin crisps up properly during searing. Season the cavity and exterior generously with the 1.5 tbsp Kosher Salt, 1 tsp Black Pepper, 1 tbsp Garlic Powder, and 1 tbsp Onion Powder.
Rub the spices into every crevice—don’t be shy. The 1 tsp Dried Thyme and 1 tsp Dried Rosemary add depth, so sprinkle these evenly over the skin. Stuff the cavity with the 1 whole Lemon (halved), 1 whole Yellow Onion (quarter it, skin on), 4 whole Fresh Sage Leaves, and 4 whole Fresh Thyme Sprigs for aromatic infusion.
Step 2: Sear the Chicken for Maximum Flavor
Set your Instant Pot to the “Sauté” function on normal heat. When hot, add the 1 tbsp Olive Oil and swirl to coat. Place the chicken breast-side down in the pot and sear undisturbed for 4-5 minutes until the skin turns deep golden brown.
Carefully flip the chicken and sear the other side for another 3-4 minutes. This step builds a flavor foundation that pressure cooking can’t achieve alone. The skin should release easily when it’s properly browned—don’t force it.
Step 3: Pressure Cook with Broth for Juicy Results
Remove the chicken and set it aside. Pour the 1 cup Chicken Broth into the Instant Pot, using a wooden spoon to scrape up all the browned bits from the bottom—this prevents the “burn” error. Return the chicken to the pot, breast-side up, placing it on the trivet if your model includes one.
Secure the lid, set the valve to “Sealing,” and cook on high pressure for 25 minutes. The natural release is crucial here—let the pressure drop on its own for a full 15 minutes before quick-releasing any remaining pressure. This gradual release keeps the meat tender.
Step 4: Finish with Butter for Silky Texture
Carefully remove the chicken to a cutting board and tent loosely with foil. Return the Instant Pot to “Sauté” mode and let the liquid reduce by half—this concentrates the flavors. Stir in the 2 tbsp Butter until melted, creating a rich, glossy sauce.
Pour this sauce over the chicken before serving. The butter adds a luxurious finish that ties all the herb and citrus notes together. Let the chicken rest for 10 minutes before carving to allow the juices to redistribute—this is what makes every bite succulent.
Pro Tips For Making Instapot Whole Chicken
- Dry the Skin: Pat the chicken completely dry with paper towels before seasoning—I learned this the hard way after ending up with steamed skin instead of crispy.
- Season Inside Out: Don’t just rub the spices on the skin; get some kosher salt and garlic powder inside the cavity too. It makes a real difference in flavor.
- Use the Rack: Always place the chicken on the trivet that comes with your Instant Pot, not directly in the liquid. Skip this and you’ll boil the bird instead of pressure-cooking it.
- Let It Rest: After cooking, give it a solid 10 minutes under foil before carving. I was skeptical until I tried it, but the juices stay put instead of running all over the cutting board.
Dietary Considerations for This Dish
Keto-Friendly Option
This dish fits perfectly into a keto diet with 0g carbs per serving. The chicken provides high-quality protein while the herbs and butter add healthy fats. I often serve mine with roasted Brussels sprouts or a simple keto coleslaw to complete the meal. 💪
Gluten-Free by Nature
All ingredients in this recipe are naturally gluten-free, making it safe for those with celiac disease or gluten sensitivity. Just double-check your chicken broth label—I use Pacific Foods brand for guaranteed gluten-free certification.
Dairy-Free Modification
To make this dairy-free, simply omit the 2 tbsp butter at the end. Instead, drizzle an extra 1 tbsp olive oil over the chicken before serving. The herb-infused cooking liquid will still provide plenty of flavor.
Low-Sodium Adjustments
For those watching sodium, reduce the kosher salt to 1 tsp and use no-salt-added chicken broth. I like Imagine Foods brand for this. The lemon and herbs will still provide excellent flavor.
Paleo Adaptation
This recipe is already paleo-compliant as written. The chicken, herbs, and natural fats align perfectly with paleo principles. For extra authenticity, use ghee instead of butter and ensure your chicken is pasture-raised. 🌿
Allergy Considerations
The only potential allergen is dairy from the butter. For nut allergies, check that your chicken wasn’t processed in a facility with nuts. The recipe contains no soy, eggs, or grains, making it suitable for most common food allergies.
Nutrition Facts
Frequently Asked Questions
Do I need to thaw a frozen chicken first?
Yes, always thaw completely before cooking. A 4 lb bird takes about 24 hours in the fridge. Never cook from frozen—it can lead to uneven cooking and potential food safety issues.
Can I use chicken broth instead of water?
Using 1 cup chicken broth adds significant flavor to both the meat and the cooking liquid. It’s the preferred method for this recipe.
Why does my chicken skin not crisp up?
The pressure cooker won’t crisp skin like an oven would. For crispier results, transfer to a 400°F oven for 5-10 minutes after pressure cooking to finish.
How do I know when it’s done?
The 25 minutes cook time plus 15-minute natural release ensures doneness. Always verify with a meat thermometer—165°F in the thickest part of the thigh.

- Jollof Rice Sauce Recipe: West African Tomato and Spice Infusion - September 25, 2026
- Japanese Rice Soup Recipe: Umami-Rich Comfort in a Bowl - September 25, 2026
- Homemade Cream Of Rice Recipe: Silk-Smooth Breakfast in Minutes - September 25, 2026